Common Repairs
AC Not Cold? This 5-Minute Fix Works Like Magic!
As your AC struggles to cool, discover this quick fix that could transform your comfort—don’t miss out on the magic!
If your AC isn't blowing cold air, a quick five-minute fix might just do the trick. First, check your thermostat settings to verify it's in "cool" mode and set lower than the room temperature. Then, inspect the circuit breaker to confirm it's in the "on" position; a simple reset can work wonders. Don't forget to clear any obstructions around your vents, as clogged filters can greatly reduce cooling efficiency. By addressing these quick fixes, you'll likely restore your AC's performance. There's more to explore if you're aiming for long-term cooling solutions.
Key Takeaways
- Check and adjust the thermostat settings to ensure it's set to "cool" and lower than the current room temperature.
- Inspect and replace clogged air filters to enhance airflow and improve cooling efficiency.
- Verify that the circuit breaker for the AC unit is in the "on" position and reset if tripped.
- Ensure all vents and registers are clear of obstructions to allow proper airflow throughout the space.
- Examine the disconnect switch for any visible damage and confirm it is in the "on" position.
Understanding AC Functionality
Understanding how your air conditioning system works is crucial for maintaining a comfortable indoor environment. When your AC isn't cooling, it's important to recognize that the system operates by extracting heat from indoor air and transferring it outside. This is done using a refrigerant, which absorbs and expels heat energy by changing from liquid to vapor.
The cooling process starts when warm air enters through the return vent. As it gets filtered, it's blown over the evaporator coil, where the refrigerant absorbs heat, cooling the air. The compressor then raises the refrigerant's temperature, allowing it to release heat outdoors via the condenser.
This cycle continues, recirculating cooled air back into your living space. Proper functionality hinges on efficient heat transfer. Issues like clogged filters, dirty coils, or low refrigerant levels can disrupt this process and lead to your AC not cooling effectively.
To maintain a comfortable environment, keep these components clean and well-maintained. By understanding the functionality of your AC system, you can better troubleshoot and address potential problems, keeping your home cool and comfortable all summer long.
Common Cooling Issues
When your AC isn't cooling properly, it's often due to common issues that can easily be overlooked. Identifying these problems can save you time and money. Here's a quick breakdown:
Problem | Description |
---|---|
Clogged Filters | They restrict airflow, reducing cooling efficiency and forcing your unit to work harder. |
Dirty Evaporator Coil | A filthy coil prevents effective heat absorption, leading to insufficient cooling. |
Low Refrigerant | Often due to leaks, this results in warm air from vents and ice buildup on coils. |
Additionally, a malfunctioning compressor can hinder refrigerant heat transfer, contributing to inadequate cooling. Regular maintenance is essential; cleaning or replacing filters and inspecting the evaporator coil can greatly enhance airflow and cooling efficiency. Neglecting these common cooling problems can lead to system shutdowns and costly repairs.
Taking the time to address these issues will improve your AC's performance and extend its lifespan, ensuring you stay cool when it matters most. Don't wait for a breakdown—make these checks part of your routine!
Quick Fix: Check Thermostat
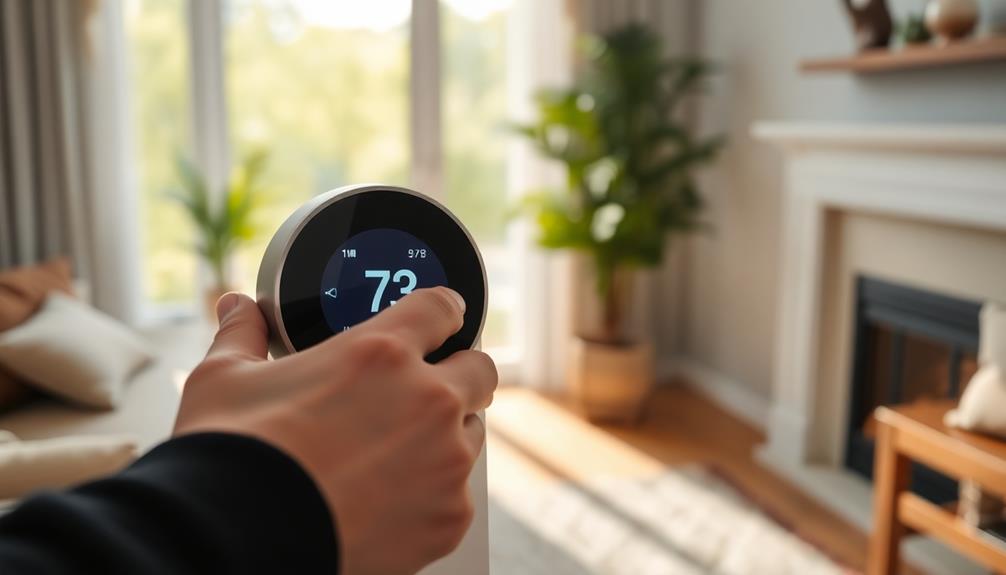
Checking your thermostat is a quick and effective way to troubleshoot why your AC isn't cooling. First, make certain your thermostat is set to "cool" mode and that the temperature is set lower than the current room temperature. If the display isn't lit, there may be a malfunction—check the batteries or power supply.
Next, clear any dust or debris from inside the thermostat. A clean thermostat guarantees it accurately reads the room temperature, which is vital for effective cooling.
If you're still having issues, inspect the wiring and connections at the thermostat. Make certain everything is secure and free from corrosion, as faulty wiring can prevent your AC from operating properly.
Regularly testing your thermostat's functionality can help you catch any calibration issues early. If it's not reading temperatures accurately, it may lead to inefficient cooling.
Inspect Circuit Breaker
If your thermostat checks out but your AC still isn't cooling, it's time to inspect the circuit breaker. This step is vital because the circuit breaker protects your AC unit from electrical overload. A tripped breaker can interrupt the power supply, preventing effective cooling.
Here's a quick checklist to guide you:
Step | Action | Notes |
---|---|---|
1. Check Breaker | Verify the breaker is in the "on" position. | A simple reset can restore functionality. |
2. Reset Breaker | If tripped, flip the switch off, then back on. | This may resolve cooling issues. |
3. Monitor AC Unit | Observe the AC unit's performance post-reset. | Confirm it's running smoothly. |
4. Inspect Wiring | Look for loose wires or faulty components. | Frequent tripping indicates underlying electrical issues. |
Regularly inspecting the circuit breaker and its wiring can prevent unexpected breakdowns and maintain consistent cooling performance. By taking these simple steps, you can effectively monitor the AC unit, guaranteeing it works efficiently and keeps you cool when you need it most.
Clear Airflow Obstructions
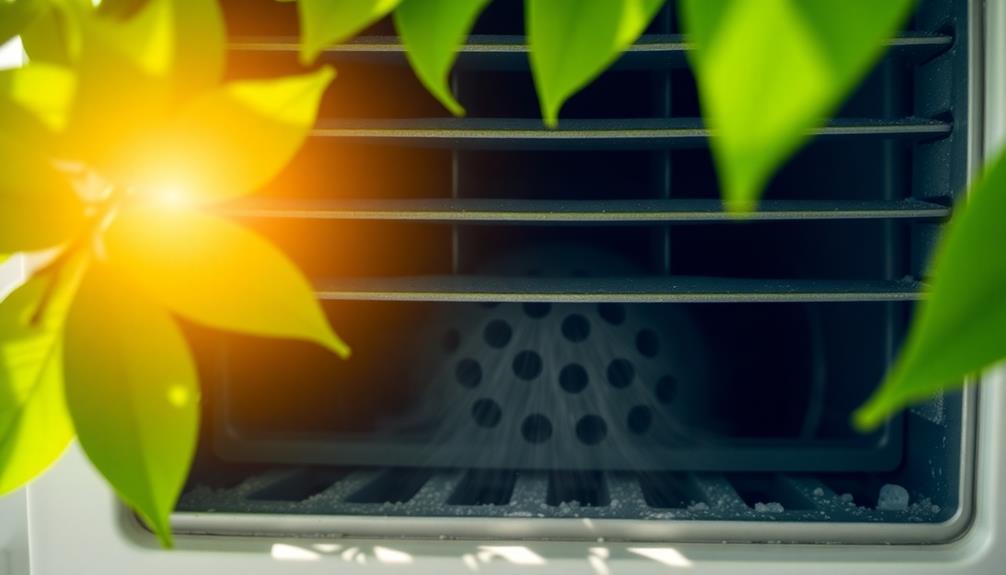
To keep your AC running efficiently, it's vital to clear any airflow obstructions that might be hindering performance. When air flow is restricted, the system struggles, leading to reduced cooling efficiency.
Here are three key areas to focus on:
- Dirty Air Filters: Regularly check and change your air filters every 1-3 months. Dirty filters restrict airflow, making it harder for your AC to operate effectively.
- Obstructed Vents: Verify all vents and registers are open and free from furniture or debris. Proper airflow is essential for ideal air circulation throughout your home.
- Ductwork Inspection: Inspect your ductwork for leaks or blockages. Sealing any gaps can greatly improve AC performance and enhance ventilation.
Additionally, keep the area around your indoor AC unit clear to allow effective air intake and prevent overheating.
Don't forget to clean your outdoor condenser unit by removing leaves and dirt to maintain proper airflow and heat exchange efficiency.
Verify Power Supply
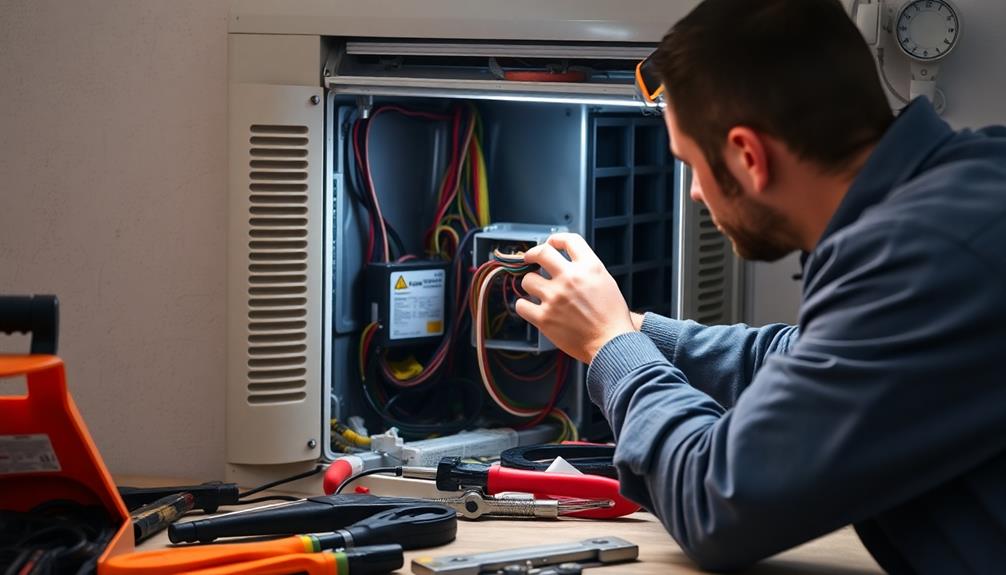
Before assuming there's a major issue with your AC, check the power supply.
Start by inspecting the circuit breaker status, the condition of the power cord, and the operation of the disconnect switch.
These simple checks can often reveal the source of your cooling problems.
Check Circuit Breaker Status
Have you checked the circuit breaker status lately? Your AC units rely on a steady power supply, and any disruption can lead to poor cooling performance.
Start by ensuring that both the indoor and outdoor unit circuit breakers are in the "on" position. If the breaker has tripped, a quick resetting can usually restore power. However, frequent trips might indicate deeper electrical issues that require a professional's attention.
Here's what to check:
- Circuit Breaker Position: Confirm that the circuit breaker hasn't tripped due to overload or short circuits.
- Inspect the Disconnect Box: Look for loose or damaged wires near the outdoor condenser unit, as these can impede power supply.
- Overall Electrical System: Verify that all switches are turned on and check for any blown fuses or damaged connections.
Inspect Power Cord Condition
A thorough inspection of the power cord can prevent frustrating AC issues. Start by checking for any visible damages like frays or cuts on the power cord, as these can disrupt the electricity flow to your AC unit. Next, verify that the power cord is securely plugged into the outlet; a loose connection can stop your unit from receiving power entirely.
To verify the outlet's functionality, plug in a different device and see if it works. If that device doesn't power on, you may have a problem with the power supply. Also, check your circuit breakers for any that might have tripped. If you find one, resetting it could restore power to your AC unit.
Here's a quick checklist to guide you:
Action | Status |
---|---|
Inspect power cord for visible damages | [ ] Damaged [ ] Fine |
Verify cord's securely plugged | [ ] Loose [ ] Secure |
Test outlet with another device | [ ] Not Working [ ] Working |
Check circuit breakers | [ ] Tripped [ ] Reset |
Consult a qualified electrician | [ ] Needed [ ] Not Needed |
If you notice any issues, don't hesitate to consult a qualified electrician for safe repairs.
Verify Disconnect Switch Operation
After confirming the power cord is in good condition, the next step is to verify the operation of the disconnect switch. This switch, typically located near the outdoor condenser unit, is essential for cutting off power to the AC system during maintenance. If your AC isn't cooling, check that the disconnect switch is set to "on" and that the power supply is active.
Follow these steps to verify functionality:
- Inspect for Damage: Look for any visible signs of wear or loose wires in the disconnect box. Damaged components can impede the electrical flow necessary for your AC unit to operate efficiently.
- Check the Switch Position: Confirm the disconnect switch is in the "on" position. If it's tripped, reset it by turning it off and back on.
- Conduct Regular Maintenance: Make confirming the disconnect switch a part of your routine maintenance to prevent unexpected cooling failures.
Maintenance Tips for Efficiency
To keep your AC running efficiently, regularly replace or clean the air filters every 1-3 months.
Don't forget to schedule annual inspections to catch any potential issues early.
Also, make sure to clear any debris from the outdoor condenser unit to improve heat release and cooling performance.
Regular Filter Replacement
Keeping your air conditioning system running efficiently hinges on regular filter replacement. Dirty filters can block airflow, markedly reducing cooling efficiency and forcing your AC unit to work harder. This not only leads to higher energy bills but can also cause damage to internal components over time.
Additionally, understanding the impact of energy consumption on your overall utility costs can help motivate timely maintenance actions, as energy efficiency ratings provide benchmarks for comparison.
To maintain peak performance, follow these essential tips:
- Change or clean filters every 1-3 months: Regular filter replacement is vital, especially during peak usage seasons like summer.
- Monitor filter cleanliness with smart thermostats: These devices can remind you when it's time for a replacement, helping to guarantee consistent airflow.
- Inspect filters monthly: During high-demand periods, checking your filters monthly can prevent a buildup of dust and debris, allowing your AC unit to operate efficiently.
Annual System Inspections
Scheduling annual system inspections is essential for maintaining your air conditioning unit's efficiency and longevity. These inspections help you identify and resolve potential issues before they escalate, ensuring your AC operates smoothly throughout the cooling season.
Regular maintenance is particularly important as it can greatly enhance air quality and comfort in your space, aligning with goals of sustainability through energy-efficient technology like energy-efficient heat pumps. During these visits, HVAC professionals clean vital components like evaporator coils and condenser coils, which can enhance cooling performance by up to 30%.
Regular HVAC maintenance checks also include verifying refrigerant levels. Keeping proper refrigerant levels is vital; low levels can severely hinder cooling efficiency and may lead to costly compressor damage.
Additionally, inspections involve checking and replacing air filters. You should replace these every 1-3 months, as dirty filters can restrict airflow, reducing system efficiency by 15% or more.
Clear Condenser Unit Debris
A clean outdoor condenser unit plays an important role in your air conditioning system's efficiency. When you clear condenser unit debris, you guarantee maximum airflow, which is vital for maintaining cooling efficiency.
This is especially important as regular maintenance can prevent efficiency losses due to wear and tear and help avoid costly repairs down the line. Here are three steps you can take to boost your unit's performance:
- Maintain Clearance: Keep at least 2 feet of space around your condenser unit. This prevents obstructions that can limit airflow.
- Regular Cleaning: Aim for cleaning the condenser coils at least once a year. Use a garden hose to gently rinse and remove debris, but make sure you turn off the power first.
- Seek Professional Help: If you notice severe blockages, consider professional cleaning. Excess dirt can impair performance and lead to costly system failures.
For peak performance, understanding the refrigeration cycle is key to effective maintenance.
Troubleshooting Clogged Filters
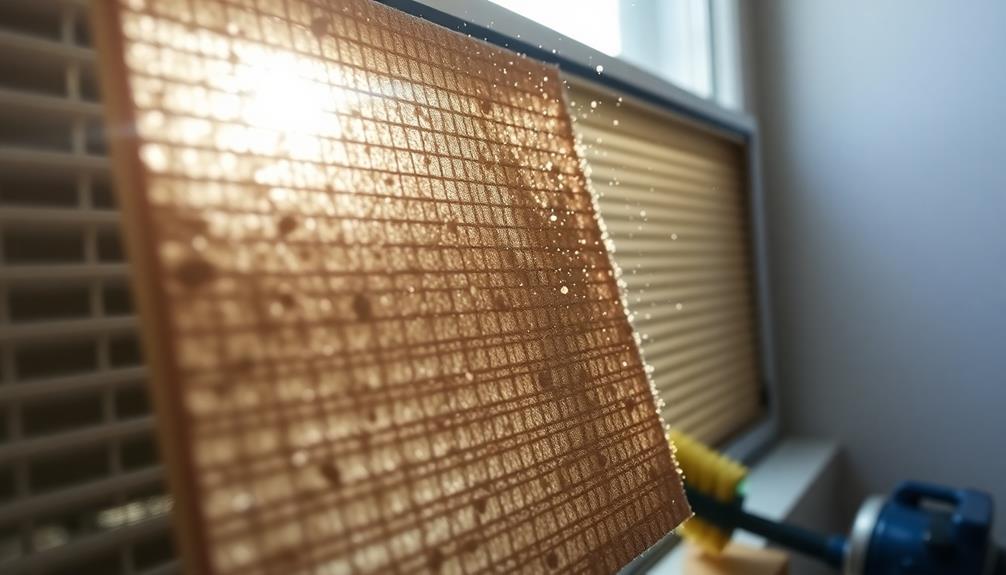
Regularly checking your air filters is essential for maintaining your AC's efficiency and cooling performance. Clogged air filters can severely restrict airflow, which leads to inadequate cooling and forces your AC system to work harder. This not only increases your energy bills but can also cause mechanical failures down the line.
Here's a quick guide to help you troubleshoot clogged filters:
Issue | Symptoms | Action |
---|---|---|
Clogged Air Filters | Reduced airflow and cooling | Replace or clean |
Dirty Filters | Increased energy bills | Check every 1-3 months |
Frozen Evaporator Coils | Ice buildup on coils | Inspect filters |
Smart Thermostat Alert | Filter cleanliness notifications | Follow alerts |
Inefficient AC System | Constantly running, poor cooling | Clean or replace |
Preventing Ice Build-Up
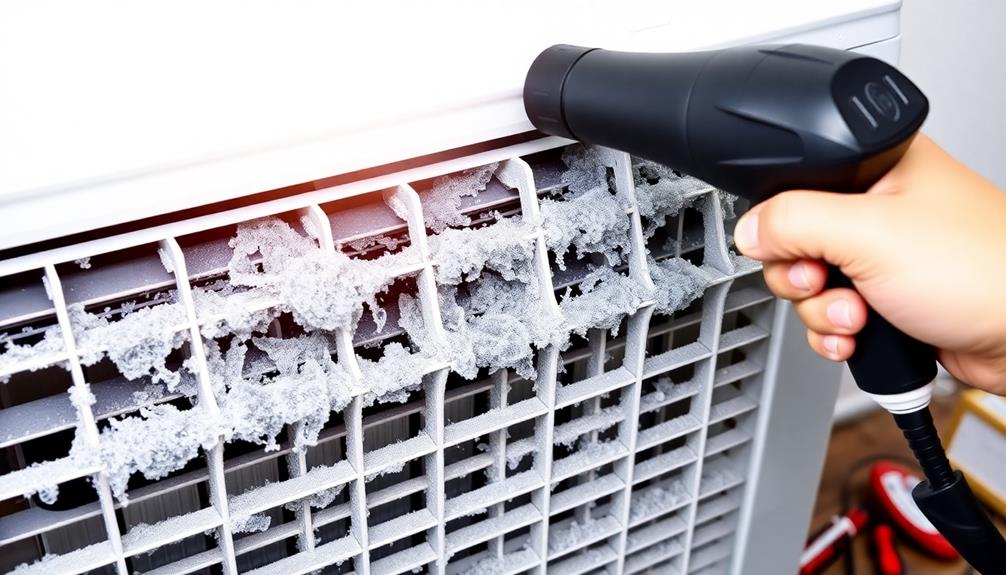
Preventing ice build-up in your AC system is vital for maintaining ideal cooling performance. Ice can hinder airflow, reduce cooling efficiency, and lead to costly repairs. Here are three key steps you can take to avoid this problem:
- Check Air Filters: Regularly change or clean your air filters. Clogged filters restrict airflow, causing the evaporator coils to freeze due to inadequate heat absorption.
- Clear the Condensate Drain Line: Make sure your condensate drain line is clear and functioning properly. Blockages can lead to water backing up, which may freeze around the evaporator coil.
- Monitor Refrigerant Levels: Keep an eye on your refrigerant levels. Low refrigerant can result from leaks, leading to poor heat absorption and potential ice build-up.
Additionally, confirm that all vents are unobstructed for consistent airflow.
Scheduling regular professional maintenance is vital, as technicians can inspect and clean your HVAC system's evaporator and condenser coils.
When to Call a Professional

If you're still facing cooling issues after trying basic fixes, it might be time to call in a professional.
Persistent problems like warm air from the vents, tripped breakers, or strange sounds can indicate electrical issues or major component failures.
Don't hesitate to reach out for expert help when you suspect something more serious is going on.
Persistent Cooling Problems
Persistent cooling problems can be frustrating, especially when your AC unit fails to deliver the relief you expect. If you've tried basic fixes but your AC isn't cooling, it's time to contemplate professional intervention.
Here are three key indicators that suggest you should call an expert:
- Refrigerant Leak or Compressor Malfunction: If your unit blows warm air consistently, these issues could be the culprit.
- Ductwork or HVAC Sizing Problems: Uneven temperatures throughout your home may point to insufficient HVAC sizing or ductwork issues that require expert assessment.
- Mechanical Failures: Unusual noises, like grinding or buzzing, or failure to start often signal mechanical failures that need immediate attention.
If you face recurring issues after changing filters or cleaning coils, don't hesitate to reach out to a professional.
Additionally, if your AC unit is over 10-15 years old and shows inefficiency, it might be time to contemplate replacing your air system altogether. A qualified technician can evaluate whether repairs or a replacement is the best course of action. Regular maintenance, such as changing your air filter, can help extend the lifespan of your unit and improve efficiency. It’s recommended to replace your air filter now, as a clogged filter can force your system to work harder, increasing energy consumption. Ultimately, if inefficiency persists despite these efforts, a new system may offer greater long-term savings and comfort.
Electrical Issues Detected
Electrical issues can be a major roadblock to your AC's performance, leaving you sweltering in the heat. If your AC unit frequently trips the circuit breaker, it's a sign that something's amiss. This could indicate faulty wiring or other underlying problems that need a professional evaluation.
Don't ignore flickering lights or persistent breaker trips, as these symptoms often suggest more serious electrical issues.
Start by inspecting the disconnect switch; a malfunction here can hinder power to the outdoor unit. If you find loose connections, try tightening them, but be cautious.
If the problems persist after basic troubleshooting, like resetting the circuit breaker, it's time to call in a licensed electrician. They can perform a thorough inspection and identify any hidden complications.
Major Component Failures
When your AC starts showing signs of major component failures, such as a malfunctioning compressor or a faulty capacitor, it's vital to act quickly. Delaying could lead to further damage and higher repair costs.
Here are three key signs that you need to call an HVAC professional:
- Unusual Noises: If you hear grinding, squealing, or banging sounds, it could indicate a failing AC compressor.
- Oil Leaks: Any visible oil around the unit could suggest internal issues, and you shouldn't ignore it.
- System Not Running: If your AC is unresponsive or you hear humming without it starting, you may have a broken capacitor.
Addressing these issues promptly can prevent more extensive repairs down the line. Neglecting a damaged motor or a frozen evaporator coil can worsen the situation.
Regular professional maintenance is also important, as it can help identify potential major component failures before they escalate.
Don't hesitate to reach out to an HVAC professional if you notice these signs; it's better to be safe than sorry when it comes to your comfort and the efficiency of your system.
Frequently Asked Questions
Why Does My AC Work but Not Cold Enough?
If your AC works but isn't cool enough, check the air filter, evaporator coil, and refrigerant levels. Verify the outdoor condenser is clean and that your thermostat settings are accurate to optimize cooling efficiency.
Why Is My AC Having a Hard Time Cooling?
Did you know that 75% of AC issues stem from dirty filters and coils? If your AC's struggling to cool, check the filter, clean the coils, and verify refrigerant levels are adequate for peak performance.
Why Does My AC Stop Cooling After 5 Minutes?
Your AC might stop cooling after five minutes due to a frozen evaporator coil, low refrigerant levels, a malfunctioning compressor, or electrical issues. Regular maintenance can prevent these problems and guarantee consistent cooling.
How Do I Reset My Central AC Not Blowing Cold Air?
To reset your central AC, turn off the thermostat, wait five minutes, then turn it back on. Also, check the circuit breaker and verify the thermostat's set to "cool" below the current temperature.
Conclusion
Just like a ship needs wind to sail smoothly, your AC relies on proper care to keep your home cool. By checking the thermostat, inspecting the circuit breaker, and clearing any obstructions, you can steer clear of common cooling issues. Regular maintenance acts as the compass guiding you towards efficiency. If you encounter turbulent waters, don't hesitate to call a professional. With these tips, you'll navigate the heat with ease and keep your comfort vessel afloat.
Common Repairs
Replace Your Headlights With This Weird Military Technology
Discover how advanced military headlights can transform your driving experience, leaving you wondering what other secrets they hold for enhanced safety.
You can greatly enhance your vehicle's visibility and safety by replacing your headlights with advanced military technology like the Model 8700. These headlights feature Dual Burn® technology, merging high and low beams for superior nighttime visibility. ComfortLite® high beams reduce glare, making driving more comfortable. Plus, SmartHeat® technology prevents snow and ice from accumulating on lenses, ensuring you get peak performance in extreme weather. They're designed to fit a variety of vehicles and are easy to install. Curious about how the technology works and where to buy them? There's a lot more to explore about these innovative headlights.
Key Takeaways
- Military-grade technology in headlights, like die-cast aluminum housings, enhances durability for extreme conditions and ensures reliability.
- Model 8700 features Dual Burn® technology for superior nighttime visibility by merging high and low beams.
- SmartHeat® technology prevents snow and ice accumulation, ensuring optimal performance during harsh weather.
- These headlights are compatible with trucks, motorcycles, and specialty vehicles, making them versatile for various applications.
- Easy plug-and-play installation allows for quick replacement without the need for professional services.
Overview of Military Technology
Military technology encompasses a wide array of advanced innovations designed to enhance performance and safety in challenging environments. One key focus is on using advanced materials and designs that withstand tough conditions. For example, durable die-cast aluminum housings are critical in products like the 8700 Evo 2 Dual Burn headlights, guaranteeing they're tough enough for demanding situations.
You'll find that innovations derived from military lighting advancements, such as Dual Burn® technology, improve visibility considerably. By merging high and low beam outputs, you get a more effective lighting solution for various environments.
Additionally, SmartHeat® technology exemplifies how military-grade solutions tackle extreme weather, preventing snow and ice from accumulating on lenses.
Moreover, military technologies often meet strict regulatory standards, similar to how the 8700 Evo headlights comply with DOT, ECE, and FMVSS 108 regulations for safety and performance. This commitment to quality guarantees reliability in critical situations.
The adaptability of military technology is evident in products like LED headlights, designed for multiple applications, including agriculture, automotive, and off-road use, showcasing versatility reminiscent of military equipment.
Innovative Features of Model 8700
Drawing from the advancements seen in military technology, the Model 8700 Evo 2 Dual Burn headlights incorporate several innovative features designed to enhance your driving experience.
One standout feature is the Dual Burn® technology, which combines high and low beams for an impressive light output. This means you get extra illumination when using your high beams, making nighttime driving safer and more efficient.
Additionally, the SmartHeat® technology helps prevent snow and ice from building up on the lens, ensuring you maintain visibility even in harsh weather conditions. You'll appreciate the ComfortLite® high beams, which are engineered to reduce glare and improve overall driving comfort, further enhancing your safety on the road.
Built to last, the Model 8700 features durable die-cast aluminum housing that can withstand various applications, whether you're driving a truck, motorcycle, or off-road vehicle.
Plus, the plug-and-play installation makes it incredibly user-friendly, allowing you to easily replace standard 7 round (PAR56) headlights without hassle.
With the Model 8700, you're not just upgrading your headlights; you're investing in a technology that prioritizes safety and performance.
Applications and Use Cases
When you think about enhanced nighttime visibility, the Model 8700 Evo 2 Dual Burn headlights stand out for their ability to adapt to various vehicle applications.
Their advanced technology mirrors the adaptability seen in home security systems that cater to different environments.
Whether you're driving on a highway, traversing a construction site, or tackling off-road trails, these headlights provide the illumination you need.
Their robust design and advanced technologies make them a reliable choice for any demanding environment.
Enhanced Nighttime Visibility
Enhanced nighttime visibility is essential for safe driving, especially in challenging conditions. The Model 8700 Evo 2 Dual Burn headlights utilize advanced Dual Burn® technology, combining high and low beams to greatly improve your visibility at night. This makes them perfect for various vehicles, including trucks and motorcycles.
Additionally, ensuring clean air in your vehicle can complement your driving experience by reducing allergens and odors effective reduction of allergens that can distract you while on the road.
These headlights come equipped with ComfortLite® high beams, which help reduce glare and provide clearer sightlines, enhancing your nighttime driving comfort. Plus, with SmartHeat® technology, you won't have to worry about snow or ice buildup on the lens, ensuring peak light output even in extreme weather conditions.
Why should you consider these headlights? Here are some key benefits:
- Enhanced safety: Better visibility reduces the risk of accidents in low-light situations.
- Regulatory compliance: They meet DOT, ECE, and Transport Canada regulations, ensuring safety standards are upheld.
- Versatile use: Ideal for automotive, construction, and off-road applications, these headlights adapt to various driving environments.
Versatile Vehicle Applications
In today's diverse driving landscape, the Model 8700 Evo 2 Dual Burn headlights stand out for their adaptability across a wide range of vehicles.
Whether you drive a truck, motorcycle, classic car, or even agricultural or specialty equipment, these headlights enhance visibility in various environments. When considering vehicle upgrades, it's crucial to also reflect on past experiences and relationships, as overcoming past mistakes can lead to better choices.
Designed for both on-road and off-road applications, they greatly improve safety in challenging conditions, making them ideal for construction, industrial, and mining operations.
The innovative Dual Burn® technology combines high and low beams, providing superior light output that guarantees better visibility for nighttime driving in any vehicle type.
Moreover, compliance with DOT, ECE, and Transport Canada regulations guarantees that you're using safe and legal lighting, regardless of your vehicle category.
If you often find yourself maneuvering through extreme weather, you'll appreciate the availability of heated versions. These prevent snow and ice buildup, guaranteeing consistent performance when you need it most.
In essence, the Model 8700 Evo 2 Dual Burn headlights aren't just a lighting upgrade; they're a versatile solution tailored to meet the demands of various driving environments and vehicle types.
Pricing and Availability
When you're considering the Model 8700 Evo 2 Dual Burn headlights, you'll find them priced at $464.81 each, which is competitive for high-quality options.
These headlights are readily available across various markets, making it easy for you to find them.
Plus, you can use the dealer locator on J.W. Speaker's website to check local availability and get support for any questions you might have.
Competitive Pricing Options
Finding the right headlights doesn't have to break the bank. The Model 8700 Evo 2 Dual Burn headlights, which are compliant with DOT regulations, come in two stylish options: a black bezel or a chrome bezel, both priced at $464.81.
This competitive pricing reflects the U.S. market, ensuring you get high-quality LED headlights without overspending.
Here are some reasons why these headlights are a smart investment:
- Plug and Play Installation: You won't need to pay for professional installation; simply install them yourself, saving you time and money.
- Innovative Technology: J.W. Speaker Corporation offers advanced lighting solutions, giving you access to cutting-edge features that enhance your driving experience.
- Heated Versions Available: If you live in extreme weather areas, the heated options increase practicality, ensuring you can drive safely in any condition.
Availability Across Markets
If you're looking for high-quality headlights that won't break the bank, the Model 8700 Evo 2 Dual Burn headlights are readily available across various markets. Priced at $464.81 each, you can choose between sleek black or chrome bezels, reflecting competitive pricing in the U.S. market.
Plus, these headlights are DOT compliant, ensuring they meet the necessary regulatory standards for road use, which adds an extra layer of confidence to your purchase.
You'll also find options for heated versions, perfect for tackling extreme weather conditions. This feature expands their usability, making them ideal for a variety of applications, including trucks, motorcycles, and specialty vehicles.
Whether you're upgrading your ride or outfitting a fleet, these headlights cater to your needs.
To simplify your purchasing process, J.W. Speaker Corporation offers a dealer locator tool, helping you find authorized sellers near you. This accessibility means you won't have to search endlessly to get your hands on these advanced headlights.
With their versatility and availability, the Model 8700 Evo 2 Dual Burn headlights are an excellent choice for anyone looking to enhance their vehicle's lighting performance.
Support and Resources
For anyone looking to enhance their driving experience with advanced headlights, J.W. Speaker offers a wealth of support and resources to guarantee you make the most of your investment. Their extensive FAQ section is a go-to for troubleshooting and installation guidance, helping you get your new headlights up and running smoothly.
You can find J.W. Speaker products easily with their dealer locator tool, which connects you to high-quality lighting solutions online. Plus, informative brochures and catalogs provide insights into various LED headlight options and their applications, so you can choose the right fit for your vehicle.
To further enhance your understanding, check out the video resources that explain the features of the SmartHeat Series®. These visuals make it easy to grasp the benefits of this innovative technology.
- Access support for warranty policies and terms
- Utilize the dealer locator for easy product access
- Explore brochures and videos for in-depth product knowledge
With these resources at your fingertips, you'll feel confident in your choice of headlights and enjoy the superior performance they deliver.
J.W. Speaker is committed to quality and customer satisfaction, guaranteeing you have everything you need for a seamless experience.
Company Innovations and Products
As J.W. Speaker Corporation, you're committed to pushing the boundaries of automotive lighting technology. Your 2024 lineup showcases innovative products like the LED Work Light Model 4417 and the LED Headlight Model 8633 Evolution. These advancements emphasize safety and visibility, ensuring compliance with DOT, ECE, and Transport Canada regulations for various driving conditions.
You've also introduced the LED Compact Work Light Model 795, which offers versatility for automotive and industrial applications. This adaptability means you can use it in multiple settings, enhancing your operational efficiency.
Additionally, your LED Stop, Tail, Turn & Backup Lights Model 260 and LED Work & Backup Lights Model 905 are designed to improve vehicle safety and functionality across a wide range of vehicles.
To help you better understand these innovative technologies, you provide informative resources, including brochures and videos. These materials explore features like Dual Burn® and SmartHeat®, ensuring you have all the information needed to make informed decisions about your lighting solutions.
With each product, you're not just enhancing visibility; you're prioritizing safety and reliability on the road. Our solutions are designed to improve both function and form, ensuring that your vehicle stands out while keeping you secure. Whether you’re upgrading lights, mirrors, or other essential components, you can trust in their durability for the long haul. If you’re looking for creative ideas for repair slogans, we can help you craft messages that resonate with quality, trust, and innovation for your brand.
Installation and Compatibility Guide
When it comes to installing your new Model 8700 Evo 2 Dual Burn headlights, you'll find the process straightforward and hassle-free.
These headlights are designed as a drop-in replacement for standard 7 round (PAR56) headlights, making them compatible with a wide range of vehicles, including trucks and motorcycles.
Thanks to the plug and play installation, you won't need extensive modifications or technical expertise to get them up and running.
Consider these key points for a smooth installation experience:
- Regulatory Compliance: The headlights comply with DOT, ECE, and Transport Canada regulations, ensuring they meet safety standards for road use.
- Weather Resistance: If you live in a colder climate, opt for the heated versions, designed specifically for extreme weather conditions.
- Dealer Locator Tool: Use the dealer locator tool to find compatible J.W. Speaker products for your specific vehicle model, ensuring you get the right fit.
With these headlights, you can enhance your visibility and safety on the road while enjoying a seamless installation process.
Don't hesitate to upgrade your vehicle with this cutting-edge technology!
Frequently Asked Questions
Why Were the Adaptive Headlight Illegal in the US?
Adaptive headlights were illegal in the US primarily due to concerns about glare for oncoming drivers. Strict NHTSA regulations and varying state laws hindered compliance, making manufacturers hesitant to introduce this technology despite its potential benefits.
Are LED Headlights Going to Be Illegal?
Are LED headlights headed for the legal chopping block? Not yet! As long as you guarantee they meet federal standards, you're in the clear. Stay tuned, though; regulations may change as technology evolves.
Are LED Headlight Conversion Kits Legal?
Yes, LED headlight conversion kits can be legal, but you've gotta verify they meet specific regulations like DOT and ECE standards. Always check for compliance markings and local laws to avoid fines or safety issues.
Are LED Headlight Conversions Illegal?
If you install LED headlights but they aren't DOT approved, you might face fines. In many areas, non-compliance with local regulations makes LED conversions illegal, so always check your state's specific vehicle lighting laws before upgrading.
Conclusion
Incorporating military technology like the Model 8700 into your vehicle's headlights isn't just about illumination; it's about stepping into the future, like a sci-fi hero zipping through the night. With its innovative features and robust performance, you'll not only enhance your visibility but also stand out on the road. So why wait? Upgrade your ride today and experience the difference firsthand. Embrace this cutting-edge technology and make nighttime driving a breeze!
Common Repairs
Brake Pads Made From THIS Material Last 500% Longer!
Get ready to discover how ceramic brake pads can revolutionize your driving experience and significantly reduce maintenance costs—find out more!
If you're looking for brake pads that last considerably longer, consider ceramic brake pads. Made from a blend of dense ceramics and copper fibers, these pads can endure up to 75,000 miles—that's about 500% longer than traditional organic pads, which only last around 40,000 miles. Their superior heat dissipation reduces brake fade, ensuring reliable performance. Plus, they operate quietly and produce less dust, keeping your wheels cleaner. With fewer replacements needed, you'll also save on maintenance costs. There's a lot more to understand about their benefits and how they work, so keep exploring!
Key Takeaways
- Ceramic brake pads can last up to 75,000 miles, significantly longer than traditional organic pads, which average 40,000 miles.
- Their dense ceramic and copper fiber composition enhances durability, contributing to the extended lifespan.
- Superior heat dissipation properties in ceramic pads reduce brake fade, allowing for consistent performance over time.
- Quieter operation and less dust generation improve overall driving experience and reduce maintenance frequency.
- Investing in ceramic pads may have a higher upfront cost, but long-term savings from fewer replacements make them economical.
The Science Behind Ceramic Brake Pads
Understanding the science behind ceramic brake pads reveals why they're a popular choice for many drivers. Their unique material composition, featuring dense ceramics and embedded copper fibers, considerably enhances durability and performance.
Unlike organic or semi-metallic options, ceramic brake pads can last up to 75,000 miles, making them a smart investment under normal driving conditions.
The efficient heat dissipation of ceramic pads helps minimize brake fade, preventing the warping that can occur during high-temperature braking situations. This guarantees you maintain ideal stopping power when you need it most.
Additionally, their finer material composition results in less dust generation, keeping your wheels cleaner and reducing environmental impact.
One of the standout features of ceramic brake pads is their quiet operation. The unique construction dampens noise, contributing to a smoother and more comfortable driving experience.
This combination of low dust, effective heat management, and noise reduction makes ceramic brake pads an excellent choice for those who value performance and comfort in their braking experience.
Benefits of Long-Lasting Brake Pads
Longevity in brake pads brings significant advantages that can enhance your driving experience and maintenance routine. By opting for long-lasting brake pads, you're investing in several key benefits that can make your time on the road safer and more enjoyable.
- Improved safety: Higher durability means you'll enjoy consistent braking performance, reducing the risk of brake failure.
- Reduced maintenance costs: With fewer replacements needed, you'll save both time and money over your vehicle's lifespan.
- Cleaner wheels: Extended lifespan minimizes brake dust accumulation, leading to cleaner rims and less cleaning effort.
Long-lasting brake pads are designed to withstand higher temperatures, providing excellent performance during aggressive driving conditions. This capability not only enhances your vehicle's efficiency but also guarantees that your braking performance remains reliable over time.
You'll feel confident knowing that your brakes can handle whatever the road throws at them. By choosing durable materials, you're making a smart decision that benefits your vehicle and your wallet in the long run.
Comparison: Ceramic vs. Traditional Pads
Choosing the right brake pads can greatly impact your driving experience and vehicle performance. When comparing ceramic and traditional brake pads, the differences are striking.
Ceramic pads typically last up to 75,000 miles, markedly outlasting traditional organic pads that average around 40,000 miles. This extended lifespan means less frequent replacements, saving you time and hassle. Additionally, the heat dissipation properties of ceramic pads can be likened to the efficiency seen in heat pumps, which rely on effective heat management for ideal performance, highlighting the importance of material choice in durability and performance efficiency is measured by the Coefficient of Performance (COP).
In terms of noise and dust, ceramic pads excel with quieter operation and finer dust production, keeping your wheels cleaner. Traditional pads, especially semi-metallic ones, are known for generating more noise and dust, which can be an annoyance during your daily commute.
Heat dissipation is another vital factor. Ceramic pads are composed of dense ceramic materials and copper fibers, allowing for superior heat dissipation and minimizing brake fade. This reliability across various temperatures enhances overall braking performance, especially in extreme conditions, unlike traditional pads, which may struggle.
While ceramic pads tend to be pricier upfront, their longevity and reduced maintenance needs make them more cost-effective in the long run. Investing in ceramic pads can boost your driving experience and provide peace of mind on the road.
Factors Affecting Brake Pad Lifespan
When it comes to brake pad lifespan, several factors come into play that can considerably affect how long your pads last. Understanding these elements can help you maximize your brake pad longevity and guarantee safer driving.
- The material composition of your pads greatly influences their durability.
- Your driving habits, like how hard you brake, can either extend or shorten their lifespan.
- The driving environment you navigate, whether it's busy city streets or open highways, plays a significant role.
Heavy vehicles put additional stress on braking components, leading to faster wear. Likewise, driving in stop-and-go traffic accelerates excessive wear compared to steady cruising.
Regular maintenance is essential; checking your brake fluid and replacing it every 25,000 miles can prevent contamination and enhance brake pad lifespan.
Choosing the Right Brake Pads
Understanding the factors that affect brake pad lifespan naturally leads to the importance of selecting the right brake pads for your vehicle.
Start by considering your driving style. If you frequently drive in demanding conditions or own a high-performance vehicle, semi-metallic pads might be your best bet. For everyday driving, organic brake pads can offer a quieter, more comfortable ride. Ceramic pads are a great middle ground, providing excellent heat resistance and low dust generation.
Next, evaluate your vehicle manufacturer's recommendations. They design brake pads for peak performance based on your vehicle's specifications.
Factors like noise level and dust generation also play a critical role in your choice. If you prefer a quieter braking system, you might lean towards ceramic or organic pads over semi-metallic options.
Signs You Need New Brake Pads
Knowing the signs that indicate you need new brake pads can save you from dangerous driving situations. Ignoring these warning signals can compromise your vehicle's braking performance and put you at risk on the road.
Here are key indicators to watch for:
- Squeaking or grinding noises when you apply the brakes.
- Vibration or pulsation in the brake pedal during braking.
- Brake warning light illuminated on your dashboard.
If you hear squeaking noises, it often means your brake pads are worn and need replacement. Grinding noises signal that the pads are severely depleted, threatening your safety.
You should also be alert for reduced responsiveness or longer stopping distances; these can indicate your brake pads are nearing the end of their lifespan. A physical inspection can reveal uneven wear patterns or thinning pads.
If you notice any of these signs, don't wait. Addressing the issue promptly guarantees ideal braking performance and keeps you safe on the road. Ignoring these early signs can lead to more severe and costly repairs down the road, so it’s best not to take any chances. However, don’t throw away your OBD scanner just yet—it can still be a useful tool for other diagnostic checks. Regular maintenance and immediate action are key to preventing accidents and ensuring your vehicle stays in top condition.
Maintenance Tips for Longevity
To guarantee your brake pads last as long as possible, regular maintenance is essential. Start by inspecting your brake pads for signs of wear, like thinning material or uneven surfaces. Catching these issues early can prevent premature failure and maintain your braking system's efficiency.
You can also extend the lifespan of your brake pads by practicing gradual stops instead of abrupt braking, which can reduce wear by up to 30%. Keep your brake fluid clean and replace it every 25,000 miles to avoid corrosion that could impact pad performance.
Managing your vehicle weight is another effective strategy; reducing cargo can decrease strain on the brake pads, potentially increasing their longevity by 20% or more.
Expert Recommendations for Brake Service
While regular maintenance is vital for your brake system, seeking expert recommendations can further enhance safety and performance. To guarantee your brakes function at their best, consider these key points:
– Prioritize professional evaluations: Regular brake inspections help catch issues early, especially if you hear squeaking or feel reduced responsiveness.
Additionally, just as with managing camper toilets, understanding the mechanics of your brake system can prevent costly repairs.
– Choose the right brake pads: Opt for pads made from ceramic materials, as they can last up to 75,000 miles, greatly boosting longevity compared to other options.
This is similar to selecting the right materials for turning vehicles into campers, assuring maximum efficiency and comfort.
– Avoid mismatched components: Selecting brake pads compatible with your vehicle is vital for peak performance and vehicle safety.
Don't underestimate the importance of maintaining proper brake fluid levels and cleanliness either. Experts recommend flushing and replacing brake fluid every 25,000 miles to extend the life of your brake components.
Professional brake services, like those from MINI of Warwick, offer invaluable guidance on brake pad selection and timely replacements.
Frequently Asked Questions
What Brake Pad Material Lasts the Longest?
If you're looking for longevity, ceramic brake pads are your best bet. They typically last up to 75,000 miles, outperforming semi-metallic and organic options. Your driving habits can also affect how long they last.
Which Type of Brake Pads Last Longer?
You'd think brake pads are like fine wine, improving with age, right? Well, ceramic pads last the longest, typically up to 75,000 miles. They'll keep you cruising longer than those semi-metallic or organic options ever could!
What Material Are the Best Brake Pads Made Of?
The best brake pads are often made from ceramic materials. You'll find they offer durability and longevity, lasting up to 75,000 miles. Their heat dissipation and noise reduction features make them a smart choice for your vehicle.
What Are the Best Brake Pads for Longevity?
Did you know ceramic brake pads can last up to 75,000 miles? For longevity, you'll want to choose these over organic or semi-metallic options, as they provide the best durability and performance for your vehicle.
Conclusion
In choosing ceramic brake pads, you're not just opting for longevity; you're investing in safety and performance. Imagine driving with confidence, knowing your brakes will last 500% longer than traditional options. This decision doesn't just save you money; it elevates your driving experience. So, when it's time to replace your brake pads, remember: the right choice today can keep you on the road longer and safer tomorrow. Your vehicle deserves the best—don't settle for less!
-
Definitions and Roles2 weeks ago
What is a Automotive Repair – Expert Guide
-
DIY Repairs2 weeks ago
Reset Your Chevy Equinox Oil Light Quickly
-
DIY Repairs2 weeks ago
Reset Your Nissan Titan Oil Light Quickly & Easily
-
Mechanical Issues2 weeks ago
Leaking Oil? This Quick Fix Could Save You Thousands!
-
Structural Issues4 days ago
Rust Proof Your Car For $10 With This Little-Known Trick
-
Legal and Regulatory2 weeks ago
What Does the California Bureau of Automotive Repair Do
-
Miscellaneous2 weeks ago
Will Ferris Automotive Repairs
-
Mechanical Issues2 weeks ago
Mechanics Furious About This DIY Trick That Prevents Engine Damage