
A control arm connects your wheel hub to the vehicle frame, playing a key role in steering, handling, and overall ride comfort. When it shows signs like uneven tire wear, handling issues, or strange noises, it’s time for a replacement. The process involves removing the old arm, inspecting and replacing worn bushings or ball joints, and ensuring precise alignment afterward. To maintain safety and peak performance, understanding the complete replacement steps is essential as you explore more details.
Key Takeaways
- Signs of control arm issues include handling problems, uneven tire wear, and unusual noises over bumps.
- The control arm connects the wheel hub to the vehicle frame, ensuring suspension stability and proper wheel alignment.
- Inspect ball joints and bushings for wear or damage during replacement to prevent future suspension issues.
- Replacement involves removing the old control arm, inspecting and replacing worn components, and ensuring accurate mounting and alignment.
- Proper installation and suspension alignment are crucial for optimal handling, safety, and vehicle stability post-replacement.

If your vehicle is handling poorly, or you notice uneven tire wear and unusual noises when driving over bumps, it might be time to replace the control arm. The control arm plays a pivotal role in your suspension system, connecting the wheel hub to the vehicle’s frame and allowing for smooth steering and stability. When it becomes worn or damaged, your ride quality suffers, and safety can be compromised. One of the first signs to watch for is a misalignment in your suspension. A poorly aligned suspension often results from a bent or broken control arm, which can throw off your vehicle’s steering and cause uneven tire wear. That’s why a thorough suspension alignment is essential after replacing a control arm, guaranteeing your wheels are properly aligned and your handling is restored.
Before replacing the control arm, it’s imperative to perform a ball joint inspection. The ball joint is a critical component attached to the control arm that allows for pivoting movement, facilitating steering and suspension articulation. Over time, ball joints can wear out, develop looseness or play, and become a safety hazard. During your inspection, look for signs like excessive play, grease leakage, or a clicking noise when turning. If the ball joint shows signs of wear, it’s wise to replace both the control arm and the ball joint simultaneously. This approach saves you time and money in the long run, preventing the need for future repairs.
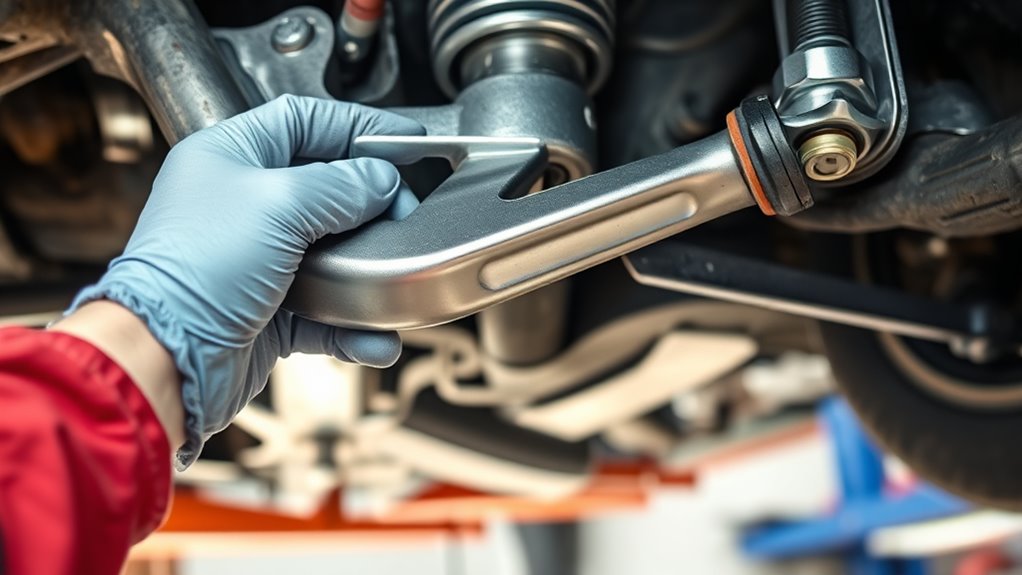
When replacing the control arm, you’ll need to lift your vehicle securely and remove any components blocking access, such as the wheel, brake caliper, or sway bar links. Once the old control arm is detached, you should inspect the bushings and ball joints attached to it. If these parts are cracked, torn, or heavily worn, they should be replaced along with the control arm to guarantee maximum suspension performance. Installing a new control arm involves aligning the mounting points accurately and tightening all bolts to manufacturer specifications. After installation, it’s essential to perform a suspension alignment to make sure everything is set correctly and your vehicle handles as it should.
In addition, understanding the importance of the contrast ratio can help in recognizing how visual quality impacts your vehicle’s display systems, especially if your vehicle is equipped with advanced digital displays or infotainment systems that depend on high contrast for clarity.

12-PC SET Suspension Kit for 2009-2013 for Toyota Corolla Front Lower Control Arm Lower Ball Joint Inner Outer Tie Rod End w/Boot Sway Bar End Link
- Complete Suspension Kit: Full set with 1-year replacement warranty
- Durable Construction: Forged from solid steel with electrophoretic coating
- Direct OE Replacement: Designed to match OEM part numbers
As an affiliate, we earn on qualifying purchases.
As an affiliate, we earn on qualifying purchases.
Frequently Asked Questions
How Long Does a Control Arm Replacement Typically Take?
A control arm replacement generally takes about 1 to 2 hours, depending on your vehicle and the installation time. You’ll find that the repair duration can vary based on factors like access to the part and whether additional components need attention. During this time, your mechanic will remove the old control arm, install the new one, and make certain everything is aligned properly, so you get back on the road safely and quickly.
Can I Drive My Vehicle After Replacing the Control Arm?
Driving safety after replacing your control arm is like walking a tightrope—it’s vital to proceed carefully. You can usually drive your vehicle right after the repair, but it’s best to wait until the mechanic confirms everything’s properly aligned and tightened. Repair timing matters; rushing back too soon might compromise safety. Always follow your mechanic’s advice for test-driving and make sure your vehicle’s suspension is functioning correctly before hitting the road again.
What Are the Signs of a Failing Control Arm?
You’ll notice suspension issues like a rough ride or uneven tire wear, and steering problems such as wandering or a loose feeling in the wheel. These signs indicate your control arm might be failing. If you ignore them, it can lead to more serious suspension damage or loss of control. It’s best to have a mechanic inspect your vehicle promptly to prevent further issues and make certain of safe driving.
Is It Necessary to Replace Both Control Arms at the Same Time?
You don’t always need to replace both control arms at the same time. During a control arm inspection, if only one shows signs of wear or damage, you can replace just that one. However, if both arms have similar wear or if it’s been a long time since the last replacement, it’s best to take into account replacement timing for both to guarantee balanced handling and safety. Always consult with a mechanic for ideal results.
How Much Does Control Arm Replacement Usually Cost?
Control arm replacement typically costs between $300 and $700 per arm, depending on your vehicle and labor rates. The replacement cost factors include the control arm’s lifespan, which varies based on driving habits and road conditions, and whether you need additional parts or suspension work. You might save money by replacing both arms at once, especially if they near the end of their lifespan, to avoid future labor costs.
Conclusion
Replacing your control arms is a smart move to guarantee smooth handling and safety on the road. Did you know that over 60% of suspension issues stem from worn-out control arms? By staying proactive and maintaining these parts, you can extend your vehicle’s lifespan and avoid costly repairs later. So, keep an eye on your suspension, and don’t hesitate to replace your control arms when needed—your car will thank you for it.