To replace your radiator, first guarantee the engine is cool and disconnect the negative battery terminal. Drain the coolant and carefully remove the old radiator, including hoses and mounting brackets. Flush the cooling system if needed, then install the new radiator and reconnect all parts securely. Fill with the correct coolant and bleed the system to remove air pockets. Watch for leaks and proper operation—continue to explore for detailed guidance on each step.
Key Takeaways
- Ensure the engine is cool, disconnect the battery, and drain the coolant before removing the old radiator.
- Disconnect hoses, caps, and mounting brackets carefully, then lift out the radiator.
- Flush the cooling system if necessary and prepare the new radiator for installation.
- Reconnect hoses, sensors, and brackets; fill with coolant and bleed the system to remove air.
- Check for leaks, secure all connections, and monitor the system during initial startup.

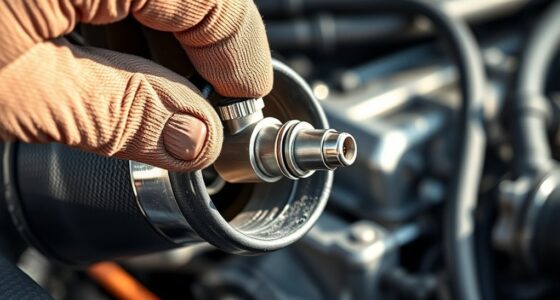
Replacing a radiator might seem intimidating, but with the right steps, you can do it yourself and save money. The process begins with gathering the necessary tools and parts, including a new radiator, coolant, a drain pan, and basic hand tools. Before removing the old radiator, make sure your engine is completely cool to avoid burns or injuries. Start by disconnecting the negative battery terminal to prevent electrical issues. Next, drain the coolant from the system by opening the radiator drain valve or removing the lower radiator hose. As you do this, have a drain pan ready to catch the coolant, which you should dispose of responsibly or recycle. Once the coolant is drained, you’ll need to disconnect the radiator hoses, radiator cap, and any attached mounting brackets or sensors.
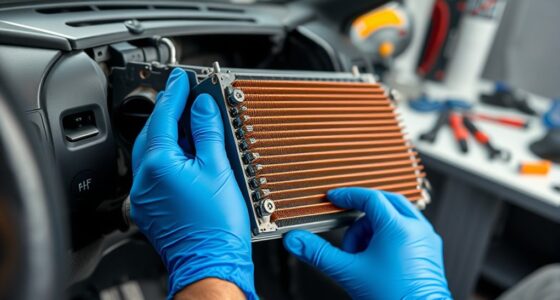
With the old radiator free, carefully lift it out of the engine bay, taking care not to damage surrounding components. Before installing the new radiator, it’s a good idea to perform a radiator flushing on the cooling system if the old radiator was showing signs of corrosion or buildup. Flushing the radiator helps remove debris, rust, and old coolant residues that can clog the system or impair cooling efficiency. Digital literacy programs encourage playful communication among seniors, making them more comfortable with new technology. After flushing, fill the new radiator with fresh coolant, ensuring you use the correct type specified by your vehicle manufacturer. When refilling the coolant, it’s crucial to bleed the system properly to eliminate air pockets, which can cause overheating or radiator damage. This typically involves running the engine with the radiator cap off and the heater set to maximum until the thermostat opens and coolant circulates.
Once the coolant is refilled and the system is bled, double-check all connections for leaks and ensure the radiator is securely mounted. Start your engine and let it run for a few minutes while monitoring the temperature gauge. Keep an eye out for leaks around the hoses, radiator cap, and fittings. During this process, you might need to top off the coolant level again, as air bubbles escape. After the engine reaches operating temperature, turn it off and let it cool, then recheck the coolant level, topping it off as necessary. This ensures your cooling system is properly filled and free of air pockets, helping your vehicle run efficiently. By following these steps, you can confidently replace your radiator, perform a coolant refill, and ensure your cooling system functions smoothly.
Frequently Asked Questions
How Long Does Radiator Replacement Typically Take?
Radiator replacement usually takes about 2 to 4 hours, depending on your vehicle and experience level. You’ll need to drain the cooling system and remove the old radiator, which can be time-consuming. Once you install the new radiator, refill the cooling system with fresh radiator fluid and bleed out any air pockets. If you’re familiar with the process, you might finish faster, but expect a few hours for proper installation.
What Tools Are Required for Radiator Replacement?
To replace your radiator, you’ll need basic tools like a wrench set, screwdrivers, and pliers. Start by draining the coolant, then disconnect the radiator hoses, which often requires a hose clamp tool or pliers. You’ll also need a drain pan to catch the coolant. Make sure to have new hoses and clamps ready for reinstallation. These tools guarantee a smooth process, preventing leaks and making your radiator replacement more efficient.
Can I Replace My Radiator Myself?
You can replace your radiator yourself if you’re comfortable with DIY repairs, but it’s not always recommended. While it’s possible to save money and learn new skills, mistakes can be costly and dangerous. For complex systems or if you’re unsure, seeking professional assistance guarantees safety and proper installation. Assess your experience, tools, and confidence before deciding—sometimes, a professional ensures the job’s done right the first time.
How Much Does Radiator Replacement Usually Cost?
The cost estimate for radiator replacement typically ranges from $300 to $900, depending on your vehicle’s make and model. You might find repair options that are more affordable or more expensive, so it’s wise to compare prices. Keep in mind, doing it yourself can save labor costs, but if you’re unsure, professional replacement guarantees proper installation and avoids further damage. Always get multiple quotes for the best deal.
Are There Signs Indicating Radiator Failure Before Replacement?
Think of your radiator as your engine’s heartbeat. If you notice coolant leaks, it’s like blood seeping from a wound, signaling trouble. Engine overheating acts as a fever, warning you of deeper issues. These signs indicate radiator failure, and ignoring them can lead to severe engine damage. Stay vigilant with coolant levels and temperature gauges, and address problems early to keep your engine healthy and running smoothly.
Conclusion
Now that you’ve followed these steps, your radiator replacement is well underway. Remember, patience and attention to detail make all the difference. Don’t rush through the process, or you might find yourself in hot water later. Keep a cool head, and you’ll have your vehicle running smoothly again. When it comes to car repairs, slow and steady often wins the race. Trust your work, and you’ll be back on the road in no time.