
To replace your cabin air filter yourself, locate it usually behind the glove box or under the dashboard—check your owner’s manual for specifics. Remove any panels or covers carefully, then slide out the old filter, noting its orientation. Insert the new filter, making sure airflow arrows match, and reassemble everything securely. This quick fix helps improve air quality and HVAC efficiency. Keep going to discover more detailed steps to make the process even easier.
Key Takeaways
- Locate the cabin air filter behind the glove box, under the dashboard, or near the windshield by consulting your vehicle’s manual.
- Remove the filter cover or panel using a screwdriver or by hand, being careful not to damage clips or tabs.
- Take out the old filter, noting its orientation, and inspect it for heavy dirt or clogging; clean the compartment thoroughly.
- Insert the new filter, ensuring the airflow arrows match the correct direction, then reattach the cover securely.
- Start the vehicle, activate the climate control, and verify improved airflow and cabin freshness; replace every 12,000–15,000 miles.

Replacing your cabin air filter yourself is a simple and cost-effective way to improve your vehicle’s air quality and guarantee a comfortable ride. When you take on filter maintenance, you ensure that the air circulating inside your car remains clean and fresh. Over time, dust, pollen, pollution, and other airborne particles can clog the filter, reducing airflow and negatively impacting the quality of air you breathe while driving. By replacing the filter regularly, you prevent these contaminants from building up, which not only enhances air quality but also helps your vehicle’s HVAC system run more efficiently.
Replacing your cabin air filter keeps your car’s air fresh and your HVAC system running efficiently.
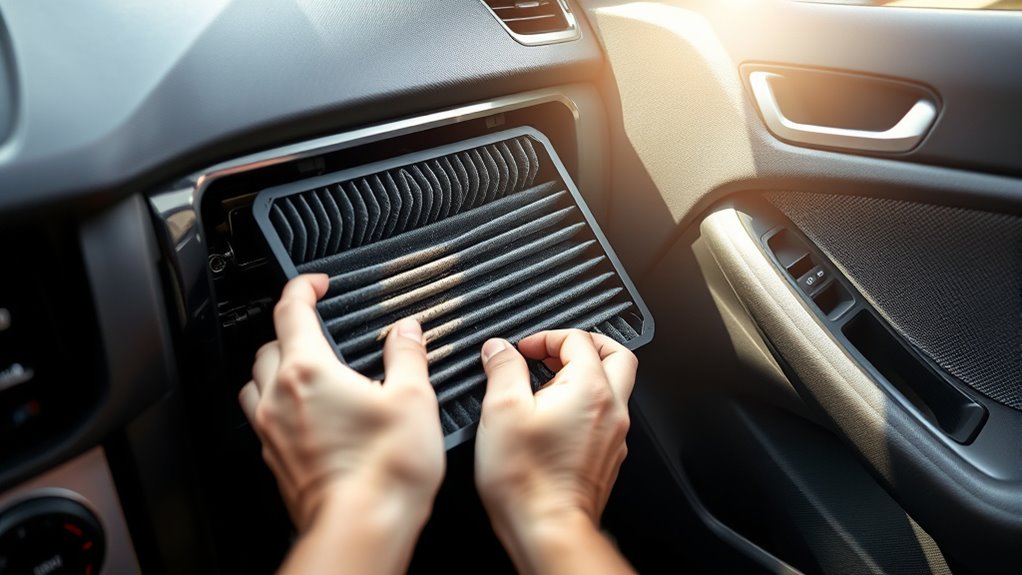
The process begins with locating the cabin air filter compartment. Depending on your vehicle make and model, this could be behind the glove box, under the dashboard, or beneath the hood near the windshield. Consult your owner’s manual if you’re unsure about the exact location. Once you find it, you’ll typically need to remove a panel or cover to access the filter. Most covers are held in place with clips, screws, or tabs, so have a screwdriver or your hands ready to gently release them. Be careful not to force anything, as you don’t want to damage the surrounding trim or clips.
When removing the old filter, take note of its orientation. Many filters are designed to fit in one specific direction, so install the new one accordingly. Check the condition of the old filter—if it’s heavily soiled or clogged, it’s a clear sign that filter maintenance is overdue. Before inserting the new filter, give the compartment a quick vacuum or wipe-down to remove any accumulated dust or debris. This step ensures the new filter works at its best and prolongs its lifespan. Additionally, being aware of digital literacy programs can help seniors learn how to better manage and maintain their vehicle systems.
Installing the new filter is straightforward. Slide it into place, aligning it with the airflow direction marked on the filter or compartment. Replace the cover or panel securely, making sure everything clicks or screws back into position. Once reassembled, start your vehicle and turn on the climate control system. You should notice improved airflow and, more importantly, a fresher, cleaner smell inside your cabin. Regular filter replacements, ideally every 12,000 to 15,000 miles or as recommended by your vehicle manufacturer, keep your air quality high and your filter maintenance routine simple.
Frequently Asked Questions
How Do I Know When My Cabin Air Filter Needs Replacing?
You’ll know your cabin air filter needs replacing when you notice a decrease in air quality inside your vehicle, such as musty smells or reduced airflow. Typically, filters should be replaced every 12,000 to 15,000 miles, but this depends on driving conditions. Keep an eye on the filter’s lifespan, and if it looks dirty or clogged, it’s time for a change to maintain fresh, clean air.
Can I Replace the Cabin Air Filter Without Tools?
You can often do a toolless replacement if your cabin air filter is easily accessible behind the glove box or under the dashboard. Many DIY kits include simple tools, but some filters are designed for quick swaps without any tools at all. Picture yourself opening the compartment, gripping the filter, and pulling it out effortlessly—this is possible with a straightforward, toolless DIY kit, making the process simple and hassle-free.
What Are the Signs of a Clogged Cabin Air Filter?
You’ll notice reduced airflow from your vents, causing your AC or heater to struggle. Air quality drops, often accompanied by musty odors or increased dust inside your vehicle. If the filter’s lifespan has been exceeded, these signs become more evident. A clogged cabin air filter hampers ventilation and impacts air quality, so replacing it promptly restores airflow and keeps the air inside fresh and healthy.
Are There Any Safety Precautions During Replacement?
Yes, you should wear protective gear like gloves and a mask to avoid dust and debris. Make sure you work in a well-ventilated area to prevent inhaling any particles. Before starting, turn off your vehicle and disconnect the battery if necessary. Handle the filter carefully to prevent damage, and dispose of the used filter properly. These precautions help guarantee your safety during the replacement process.
How Often Should I Replace My Cabin Air Filter?
You should replace your cabin air filter every 15,000 to 30,000 miles or once a year, whichever comes first. Regular replacement helps maintain good air quality inside your vehicle and guarantees your filter lifespan isn’t shortened by dirt and debris buildup. If you notice reduced airflow, bad odors, or increased allergies, it’s time to change the filter sooner. Keeping up with replacements keeps your cabin air fresh and clean.
Conclusion
Replacing your cabin air filter isn’t just easy—it’s surprisingly satisfying, especially when you realize how a simple task can improve your driving experience. Sometimes, it’s funny how aligning that tiny filter feels like restoring clarity to your everyday journey, almost as if the universe nudges you to take control. So, next time you notice that stale air, remember, a little effort can unexpectedly turn your commute into a new, invigorating escape—just like fate intended.