Replacing your PCV valve yourself is simple and cost-effective. First, gather the necessary tools like screwdrivers and pliers, making sure the engine is cool. Locate the valve, usually attached to the valve cover, then carefully disconnect the hose and remove the old valve. Compare the new one for compatibility, install it securely, and check all connections. Starting the engine will help you verify everything works smoothly. Keep going for detailed steps to ensure a successful replacement.
Key Takeaways
- Locate the PCV valve under the hood, usually attached to the valve cover, using your vehicle’s manual as a guide.
- Carefully disconnect the hose from the old valve, avoiding damage, and remove the valve using appropriate tools.
- Compare the new PCV valve with the old one to ensure compatibility before installation.
- Install the new valve into the original mount and securely reattach the hose, ensuring proper fit.
- Start the engine and listen for irregular sounds; inspect the hose for cracks or blockages to confirm proper installation.

Replacing your PCV valve yourself is a straightforward way to improve your engine’s performance and prevent future issues. The PCV system plays a vital role in managing engine gases and maintaining proper combustion. When it functions correctly, it helps reduce emissions and keeps your engine running smoothly. Regular PCV system maintenance ensures your vehicle stays reliable and efficient. The first step is understanding the common troubleshooting symptoms that indicate a failing PCV valve. You might notice rough idling, increased oil consumption, or a buildup of sludge in the valve cover. You could also experience poor acceleration or a strong fuel smell coming from the engine bay. Recognizing these symptoms early helps you address issues before they cause more serious damage.
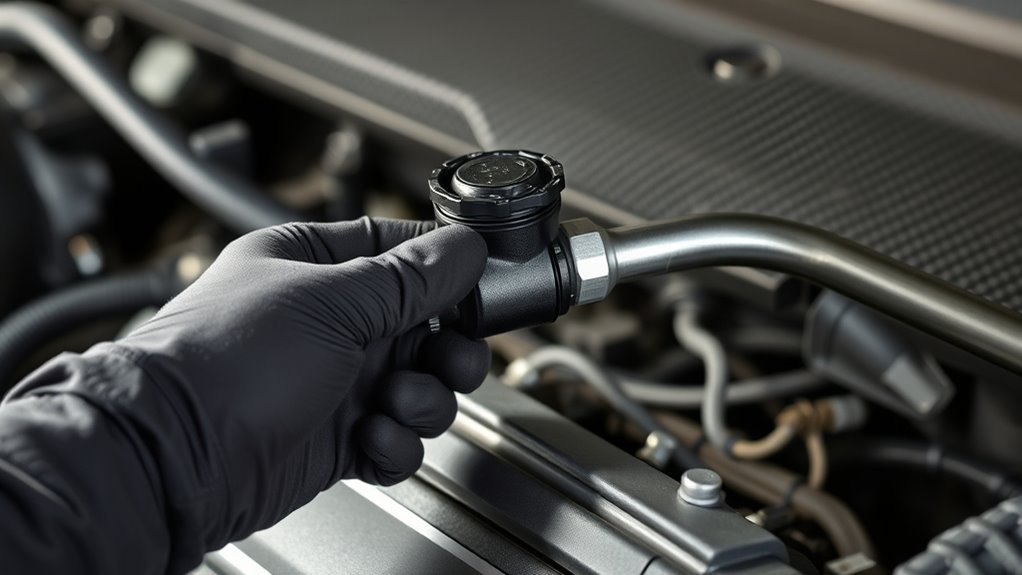
Once you’ve identified that the PCV valve needs replacement, gather the necessary tools. Usually, you’ll need a socket set, screwdrivers, and possibly pliers. Make sure your engine is cool before starting the work to avoid burns or injuries. Open the hood and locate the PCV valve, which is typically attached to the valve cover and connected to a hose leading to the intake manifold. Depending on your vehicle, the exact location may vary, so consulting your owner’s manual can be helpful. To remove the old valve, disconnect the hose carefully, then unscrew or unclip the valve from its mount. Be gentle to avoid damaging surrounding components.
With the old valve removed, compare it to the new one to confirm it matches precisely. Installing the new PCV valve is straightforward: insert or screw it into the same place, then reattach the hose securely. Double-check all connections to prevent leaks. After completing the installation, start your engine and listen for any abnormal sounds. It’s also a good idea to inspect the hose for cracks or blockages. Proper PCV system maintenance isn’t just about replacing the valve; it’s about confirming the entire system functions effectively. Regular inspections and timely troubleshooting symptoms can extend the life of your engine and improve fuel economy. Understanding dream symbolism and meanings related to vehicle components can also help in diagnosing issues.
Performing this DIY replacement saves you money and gives you peace of mind, knowing your vehicle is in good hands. Keep an eye on engine performance in the weeks following the replacement. If symptoms like rough idling or excessive oil consumption persist, further troubleshooting might be necessary. However, in most cases, a new PCV valve restores proper function, smooths engine operation, and reduces emissions. With just a bit of effort and attention to detail, you can maintain your vehicle’s health and avoid costly repairs down the road.
As an affiliate, we earn on qualifying purchases.
Frequently Asked Questions
How Do I Identify a Faulty PCV Valve Visually?
You can identify a faulty PCV valve through a visual inspection by looking for signs of corrosion or build-up on the valve itself. Check for cracks, excessive dirt, or oil leaks around the valve stem and housing. If the valve appears dirty, corroded, or damaged, it’s likely not functioning properly. A healthy valve should look clean and intact, with no signs of corrosion or debris obstructing its operation.
Can I Replace the PCV Valve Without Removing the Intake Manifold?
Yes, you can replace the PCV valve without removing the intake manifold if it’s accessible through the engine bay. However, you’ll likely need specialized tools to reach and remove it properly. In most cases, removing the intake manifold makes the job easier and safer, especially if the valve is deep or hard to access. Always check your vehicle’s service manual for specific instructions and recommended procedures.
What Are the Signs of PCV Valve Failure Besides Rough Idling?
When your engine whispers trouble, it’s telling you something’s off beyond rough idling. You might notice increased oil consumption, as the engine’s breathing gets sloppy, or see a cloud of increased emissions billowing out. A failing PCV valve causes these symptoms — oil leaks, sludge buildup, or a burnt smell. Keep an eye on these signs, and don’t ignore the engine’s quiet scream for help before it’s too late.
How Often Should the PCV Valve Be Inspected?
You should inspect your PCV valve during regular engine maintenance, roughly every 20,000 to 30,000 miles. Proper PCV system maintenance guarantees effective engine ventilation and prevents harmful buildup. Check it more frequently if you notice symptoms like excessive oil consumption or rough idling. Regular inspections help catch issues early, keeping your engine running smoothly and efficiently. Always follow your vehicle manufacturer’s recommendations for ideal engine health.
Are There Any Special Tools Required for PCV Valve Replacement?
You don’t need many special tools for PCV valve replacement. A basic tools overview includes a socket wrench, screwdrivers, and pliers. These help you remove clamps and hoses easily. Follow the replacement steps carefully: locate the valve, disconnect hoses, unscrew or pop out the old valve, then install the new one and reconnect everything securely. With these simple tools, you can complete the process efficiently and safely.
Conclusion
Replacing your PCV valve yourself might seem like a small task, but it’s a crucial step in keeping your engine breathing easy. Think of it as giving your car a breath of fresh air—revitalizing its performance and longevity. With a few simple tools and a little patience, you’ve opened a new level of DIY confidence. So go ahead, take control and guarantee your engine’s health—because sometimes, the smallest change makes the biggest difference.