DIY Repairs
Reset Your Chevy Equinox Oil Light Quickly
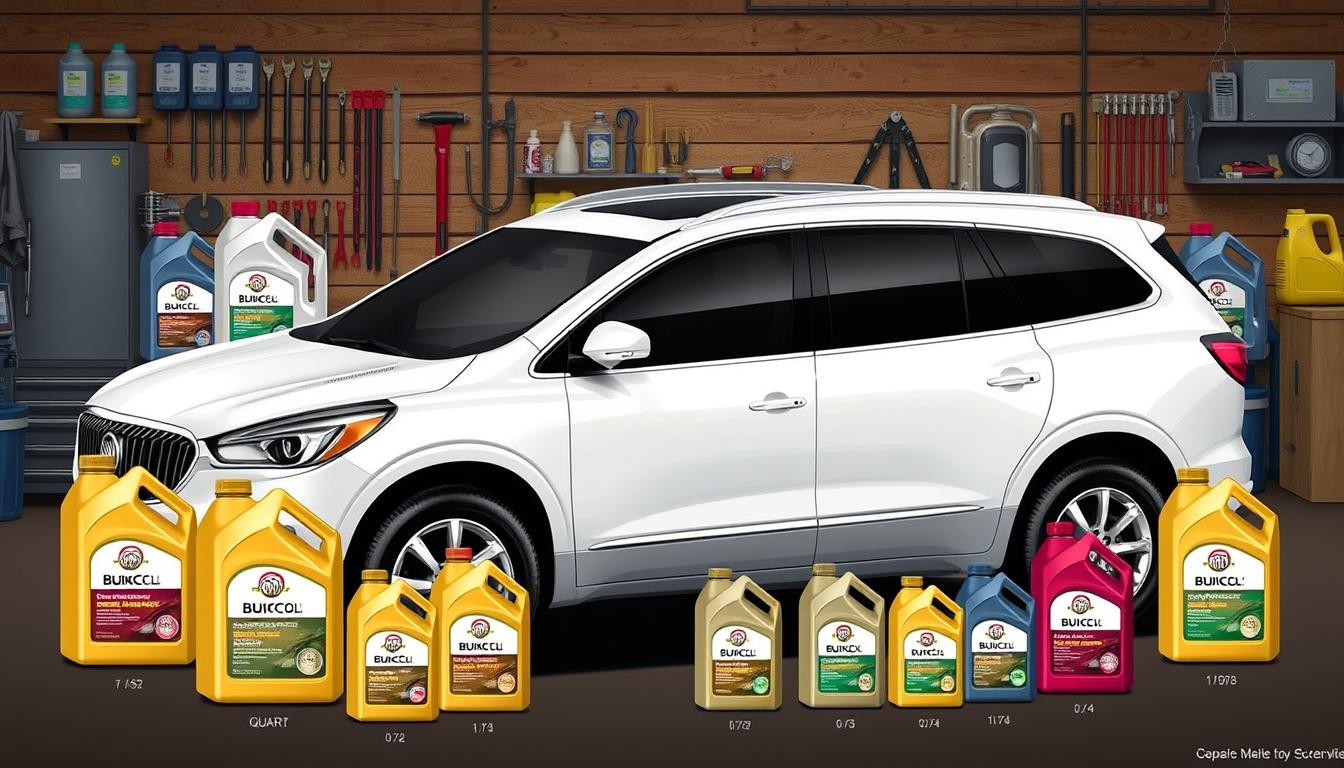
Stepping into your Chevy Equinox, you feel a blend of trust and excitement. But, the oil light soon reminds you to maintain your car. Its flickering isn’t just a warning. It tells you to keep your car in top shape. By learning to reset the oil light, you boost your confidence. You also make sure your car stays healthy. Having this skill means small steps can make a big difference for your car and your comfort.
Key Takeaways
- Understanding the oil light is crucial for vehicle maintenance.
- Resetting the oil light is a simple yet important task.
- Regular maintenance can prevent bigger issues down the road.
- Knowing the signs for an oil change can save you time and money.
- Utilizing your oil light reset guide enhances your vehicle care knowledge.
Understanding the Chevy Equinox Oil Light
The Chevy Equinox oil light alerts you to potential oil system issues. Recognizing what the Chevy Equinox oil light means enhances your driving and car care. It usually signals low oil, dirty oil, or a needed oil change. Being aware allows you to keep your engine running well.
What the Oil Light Indicates
The oil warning light tells you about your engine oil’s condition. It turns on for:
- Low oil levels
- Oil quality degradation
- Oil pressure problems
Reacting quickly to these warnings helps prevent engine damage. Checking your oil level regularly is key to avoiding future issues.
Importance of Resetting the Oil Light
Knowing why to reset the oil light after changing oil is crucial. Resetting this light allows you to monitor oil life accurately. It helps you know when it’s time for another oil change. Not resetting can cause confusion, leading to delayed oil changes or using bad oil. This neglect can damage your engine, causing expensive repairs or reduced performance.
How to Reset the Chevy Equinox Oil Light
Resetting your Chevy Equinox’s oil light is crucial for keeping your car running smoothly. Here are easy steps to reset the oil light quickly. This helps ensure your vehicle stays in excellent condition.
Step-by-Step Instructions
- Turn the ignition to the “Run” position without starting the engine.
- Press the MENU button until the vehicle information menu appears, then scroll to “Remaining Oil Life.”
- Press SET/CLR to select.
- Use the up or down arrow to choose “YES” to reset.
- Confirm your selection by pressing the SET/CLR button.
- Your reset is now complete.
Common Variations in the Process
There may be slight variations in resetting the oil light, depending on your Chevy Equinox model year. For some models, you might need to press the gas pedal three times quickly. Others may have a dashboard button labeled with an “i” or a road symbol. Always check the Owner’s Manual for your specific model’s instructions.
Tools You Might Need
Knowing the right tools can simplify resetting your Chevy Equinox’s oil light. You often only need basic tools for this. But, understanding your car’s controls and having a manual helps a lot.
Basic Tools for Resetting the Oil Light
There are a few key tools you should have ready:
- Owner’s Manual – It has important info just for your car.
- Diagnostic Scanner Tool – It helps find other possible car problems.
- General Hand Tools – Like screwdrivers and pliers, for easy fixes.
Optional Tools for Better Maintenance
To take even better care of your Chevy Equinox, consider these tools:
- Oil Filter Wrench – It makes changing the oil filter simpler.
- Oil Change Kit – It has everything you need for an oil change.
- Vehicle Diagnostic Equipment – It helps keep an eye on engine health for more security with upkeep.
When to Reset Your Oil Light
Knowing when to reset your oil light is key for your Chevy Equinox’s care. It links to when you change your oil. Keeping up with oil changes helps your engine run well and last longer.
Recommended Maintenance Schedule
Experts often suggest changing oil every 3,000 to 7,500 miles. Your driving habits and oil type can change this. Sticking to this schedule helps your engine stay healthy. After changing oil, always reset the oil light to keep track of your oil’s condition.
Signs That Indicate an Oil Change is Due
It’s important to know when your engine needs a new oil change. Here are some common signs:
- Illuminated oil light on the dashboard
- Unusual engine noises, like knocking or rattling
- A noticeable drop in how well your engine works
Spot these signs? It’s time to change your oil and reset the oil light. This keeps your Chevy in good shape.

Tips for Maintaining Your Chevy Equinox
To keep your Chevy Equinox in top shape, focus on essential upkeep. Make sure to change the oil regularly and keep track of all maintenance. Doing so will greatly extend your vehicle’s life.
Regular Oil Change Practices
Changing the oil in your Chevy Equinox is key. Use the oil type and change it as the manufacturer suggests. This keeps your engine running smoothly. Regular oil changes also boost your car’s performance and gas mileage. Here are some tips:
- Change the oil every 5,000 to 7,500 miles, or as recommended by your owner’s manual.
- Choose high-quality motor oil that meets industry standards.
- Replace the oil filter with every oil change to ensure optimal filtration.
Keeping Track of Maintenance Records
Keeping good records of your vehicle’s maintenance is smart. It helps you stay on top of your Chevy Equinox’s service needs. You can also use it as a reference for routine upkeep or repairs. Make sure to note:
Date | Service Type | Mileage | Service Provider |
---|---|---|---|
01/15/2023 | Oil Change | 25,000 | Chevy Dealer |
07/20/2023 | Tire Rotation | 30,000 | Local Mechanic |
12/10/2023 | Brake Inspection | 35,000 | Chevy Dealer |
By sticking to these maintenance tips, you ensure your Chevy Equinox stays reliable. It will reward you with many years of service.

Conclusion
Learning how to reset the oil light on your Chevy Equinox is key. It’s a big part of keeping up with your car’s health. Doing this helps keep the dashboard indicators right. It also makes your car run better.
Following simple car care tips can improve how your car drives. Things like checking the oil and changing it on time matter. They help your Chevy Equinox face any problem, from gear issues to electrical problems.
Adding the oil light reset to your car care routine is smart. It’s a step towards taking great care of your Chevy Equinox. This helps your car last longer and keeps you safe on the road.
FAQ
How often should I reset the Chevy Equinox oil light?
What happens if I don’t reset the oil light?
Can I reset the oil light without starting the engine?
Are there any special tools required to reset the oil light?
What are some signs that my Chevy Equinox needs an oil change?
Can I consult the Owner’s Manual for resetting the oil light?
What tools can I use for better maintenance of my Chevy Equinox?
Why is it important to keep track of maintenance records?
DIY Repairs
The Shocking $1 Tool That Replaces An Entire Toolbox For Repairs
On a budget? Discover the $1 tool that could revolutionize your repairs—find out how it can replace your entire toolbox!
The shocking $1 magnetic socket extension is a revolutionary tool that can replace your entire toolbox for repairs. With a powerful magnet at the tip, it securely holds bolts, saving you the hassle of retrieving dropped fasteners in tight spaces. Available in various drive sizes, it perfectly adapts to your needs, while the pivot feature gives you access to hard-to-reach areas. Unlike traditional toolkits, this compact solution enhances your efficiency and prevents wasted time during repairs. You'll find it's cost-effective and highly versatile, so stick around to discover how this small tool can transform your DIY experience.
Key Takeaways
- The magnetic socket extension costs only $1, offering a cost-effective solution for various repair tasks.
- It features a powerful magnet that secures bolts, preventing them from dropping into hard-to-reach areas.
- Available in multiple drive sizes and lengths, it effectively replaces multiple standard sockets.
- The pivot mechanism allows access to tight or awkward spaces, enhancing versatility during repairs.
- This tool simplifies the repair process, saving time and frustration compared to traditional toolkits.
Overview of the Magnetic Tool
Have you ever struggled to retrieve a dropped bolt in a cramped space? If so, you need to check out the magnetic socket extension tool. This handy gadget features a powerful magnet at the tip that securely holds bolts, preventing them from slipping into hard-to-reach areas during your repairs.
With various drive sizes available—1/4", 3/8", and 1/2"—you can easily tackle different tasks without the fear of losing your bolts.
The versatility of this tool is impressive. It comes in multiple lengths, including short and stubby options, making it perfect for accessing tight spaces where standard tools just won't fit.
Plus, the pivot feature allows for angled access to hard-to-reach bolts, while a reliable locking mechanism guarantees stability when using it straight.
At around $30, the magnetic socket extension tool is a cost-effective solution that can replace multiple tools in your toolbox, streamlining your repair process.
You'll find that it enhances your efficiency and organization, making it an essential addition for anyone who frequently works on engines or transmissions.
Don't let dropped bolts frustrate you any longer—this tool has got you covered!
Common Repair Challenges
What hurdles do you face when tackling repairs in cramped spaces? If you've ever tried retrieving bolts in tight areas, especially around engines or transmissions, you know how frustrating it can be.
You might find yourself losing time searching for the right size, whether it's metric or European. Standard sockets often drop bolts into hard-to-reach crevices, making you scramble to find them, which can also pose safety hazards if debris gets near hot engine parts.
To enhance your creative problem-solving skills during such tasks, consider applying design thinking principles that emphasize user-centric solutions.
To avoid these issues, make sure you have the right tools at hand. I've tried various solutions, but they often fall short. It's crucial to have a tool that can securely hold bolts and prevent dropping, especially when you're working in a tight spot.
The DIY community highlights the need for tools that are readily accessible for roadside repairs, and sharing knowledge is key.
If you're tired of these common repair challenges, please click to discover a smarter solution that can help you tackle those tricky jobs with ease.
With the right approach, you can simplify your repairs and save time, ensuring a smoother experience.
Benefits of Magnetic Extensions
Magnetic extensions offer you enhanced bolt retention, ensuring that you won't lose any bolts in tricky spots during repairs.
With their versatile access solutions, you can tackle a wide range of tasks, even in tight or awkward spaces.
Plus, their compact design makes them easy to handle and store, making them a must-have for any toolkit.
Enhanced Bolt Retention
When tackling repairs, the frustration of losing bolts can be a major setback. You want to get the job done efficiently, but the first thing you notice is that pesky bolt slipping out of your grasp and disappearing into hard-to-reach areas. That's where magnetic socket extensions come in.
These handy tools feature a powerful magnet at the tip that securely holds bolts, preventing them from dropping and saving you from the hassle of searching. Additionally, understanding the mechanics of proper tool usage can enhance your overall repair experience, much like how toilet maintenance and repairs can prevent unnecessary frustrations with plumbing.
Available in various drive sizes like 1/4", 3/8", and 1/2", these extensions allow for deep insertion without the risk of losing bolts in tight spaces. Plus, some magnetic extensions come with a locking mechanism, giving you the flexibility to access difficult bolts at different angles, whether you're under the car or in a cramped corner.
With options for short and stubby lengths, you can tailor your approach to different repair scenarios. This means you spend less time searching for lost bolts and more time getting your work done.
Versatile Access Solutions
Effortless access to hard-to-reach bolts can make all the difference during a repair job, and that's exactly what magnetic socket extensions offer.
These handy tools feature a powerful magnet at the tip that securely holds bolts, preventing them from dropping into tight spaces while you work. Available in multiple sizes—1/4", 3/8", and 1/2" drive—you can easily tackle various tasks without worrying about losing your fasteners.
One of the standout benefits is the pivot feature on some magnetic extensions, allowing you to access angled or difficult-to-reach bolts with ease. This versatility enhances your ability to perform complex repairs more efficiently.
Plus, with a locking mechanism for straight position use, you gain added control and stability, making your work smoother and more precise.
At around $30, magnetic socket extensions are a cost-effective solution that can replace the need for multiple tools in a traditional toolbox.
By investing in these extensions, you simplify your repair process, giving you confidence in tackling any project that comes your way.
Say goodbye to fumbling with tools and embrace the convenience of magnetic socket extensions!
Compact Design Advantage
In today's fast-paced repair environment, having tools that are both effective and easy to store is essential. Magnetic socket extensions stand out for their compact design, making them a must-have in your toolkit.
These tools not only save space but also deliver impressive functionality.
Here are three key benefits of magnetic extensions:
- Versatility in Tight Spaces: With various sizes (1/4", 3/8", and 1/2" drive), you can easily access bolts in cramped areas without worrying about dropping them.
- Enhanced Bolt Retention: The powerful magnet securely holds bolts, reducing the frustration of losing them during repairs. This means less time searching and more time fixing.
- Angled Access Made Easy: Many magnetic extensions come with pivot capabilities, allowing you to reach those awkward bolts without sacrificing control or security.
The compact design of these extensions means you can easily transport and store them in your toolbox, eliminating the need for larger sets of tools.
Embrace the convenience and efficiency of magnetic socket extensions and transform your repair experience!
Tool Features and Variations
Magnetic socket extensions offer a range of features and variations that make them essential for any repair toolkit. You'll find these extensions available in multiple drive sizes, including 1/4", 3/8", and 1/2", so you can tackle various repair tasks with ease.
Their versatility extends to different lengths, with short and stubby options that help you access tight spaces where traditional tools can't reach.
One standout feature is the powerful magnet at the tip of the extension, which securely holds bolts, minimizing the risk of dropping them into hard-to-reach areas. This can save you time and frustration during repairs.
Many magnetic extensions also include a pivot mechanism, allowing for angled access, enhancing usability in confined locations. This feature is particularly handy when you're working in tricky spots.
Additionally, a locking mechanism is often integrated into these extensions, enabling you to switch between straight and angled positions effortlessly. This guarantees you maintain control and precision while working, making your repairs more efficient.
With these features and variations, magnetic socket extensions truly simplify your repair projects, providing everything you need in one compact tool.
How to Use the Tool
Using a magnetic socket extension is straightforward, and it can greatly streamline your repair tasks. This incredible tool securely holds bolts and fasteners in place, so you won't have to worry about losing them in hard-to-reach areas.
Here's how to make the most of it:
- Choose the right size: The extension is compatible with 1/4", 3/8", and 1/2" drive sizes. Select the appropriate socket based on your repair needs to guarantee a snug fit.
- Utilize the pivot mechanism: When working in tight or awkward spaces, adjust the extension to access those tricky angles. This feature makes it easier to retrieve bolts without straining yourself.
- Switch configurations: Take advantage of the locking feature to toggle between straight and angled setups. This versatility lets you adapt to various repair situations efficiently.
With this $1 tool, you can save time and frustration when retrieving dropped fasteners, allowing you to focus on the job at hand.
Embrace this handy gadget, and watch your repair efficiency soar!
Comparison With Traditional Tools
Comparing the magnetic socket extension to traditional tools reveals significant advantages that can transform your repair experience. Priced around $30, this tool offers superior bolt retention, preventing those pesky bolts from getting lost in tight engine spaces.
Unlike standard socket extensions, the magnetic tip securely holds bolts, allowing for deep insertion without the risk of dropping them into hard-to-reach areas. Traditional toolkits often lack the convenience of a magnetic extension, which can save you significant time and frustration during repairs.
You won't have to waste time searching for dropped bolts anymore. Many DIYers find that a single magnetic extension tool can effectively replace multiple standard sockets, streamlining their toolbox and enhancing repair efficiency.
Additionally, some magnetic extensions come with an added pivot feature, allowing for angled access to bolts. This versatility is something traditional tools typically don't offer.
Whether you're working in tight spaces or need to reach awkward angles, the magnetic socket extension stands out as a must-have tool. With its ability to simplify your toolbox and improve your repair process, it's clear that this tool is a game-changer compared to conventional options.
Community Insights and Support
When you're facing a repair challenge, sharing your experiences with others can make all the difference. The DIY community thrives on exchanging tool recommendations and practical tips, helping you find the right solutions for your projects.
Additionally, just as parents can benefit from resources like foster parent pay to support their journey, DIY enthusiasts can also leverage community insights for effective repairs.
Shared Repair Experiences
Many car enthusiasts find that sharing repair experiences not only enhances their skills but also builds a supportive community.
When you connect with fellow DIYers, you tap into a wealth of knowledge and camaraderie that transforms the repair process into a shared adventure.
Here are a few ways engaging with the community can elevate your experience:
- Hands-On Learning: Regular tech days provide you with real-life opportunities to learn and practice new techniques, making complex repairs more manageable.
- Resource Sharing: By participating in online platforms and forums, you gain access to invaluable tips and innovative tools, like the magnetic socket extension, that simplify common challenges.
- Emotional Support: When you face frustrating repairs, having a network of fellow enthusiasts who understand your struggles can be incredibly reassuring, reminding you you're not alone.
Tool Recommendations Exchange
As you dive deeper into the DIY repair community, you'll quickly discover the wealth of tool recommendations that can elevate your projects. Engaging with fellow enthusiasts not only enriches your knowledge but also helps you gather insights on versatile tools ideal for roadside repairs. These tools can save you time and frustration when unexpected issues arise.
Among the popular recommendations, magnetic socket extensions stand out for their retention and accessibility. They make a significant difference in hard-to-reach spaces, enhancing your repair efficiency.
By participating in tech days and online forums, you can share experiences and learn about the latest tools that improve your repair skills. Encouraging suggestions for tool reviews keeps the community active and engaged, ensuring everyone stays informed.
Viewer support fosters a thriving environment where DIY enthusiasts can connect, learn, and share their experiences freely.
Cost-Effectiveness and Value
Investing in a high-quality tool kit, like the KingTool 325 Piece Home Repair Tool Kit, pays off in both time and money. This kit packs a punch with its extensive array of tools and fasteners, meaning you won't have to make multiple trips to hardware stores. Priced around $30, it's an ideal investment for homeowners and DIY enthusiasts who want high-quality tools without breaking the bank.
Here are three reasons why this tool kit is a smart choice:
- Time Savings: The magnetic socket extension tool prevents dropped bolts, which can save you hours of frustration during repairs.
- Organized Efficiency: With a durable toolbox featuring organized compartments, you'll easily access your tools and maximize your efficiency.
- Customer Satisfaction: Rated 4.5 out of 5 stars from nearly 1,843 reviews, users rave about its effectiveness and reliability for various repair tasks.
When you consider the value and convenience the KingTool kit brings, it's clear that this is a cost-effective solution that meets all your repair needs.
You'll be equipped and ready for anything!
Future Tools to Consider
With the KingTool 325 Piece Home Repair Tool Kit serving as a solid foundation, it's time to explore additional tools that can elevate your repair game even further. One standout option is the magnetic socket extension tool, priced around $30. This tool securely holds bolts, making it perfect for tight spaces where dropping a bolt can be a real hassle.
Available in sizes like 1/4", 3/8", and 1/2" drive, these extensions allow for deep insertion without the worry of losing bolts in hard-to-reach areas. Some models even feature a pivot mechanism for angled access, enhancing your versatility during repairs. A nine-piece set from Steelman offers various sizes, ensuring you're prepared for any task.
Here's a quick comparison of some must-have tools:
Tool Type | Price | Features |
---|---|---|
Magnetic Socket Extension | $30 | Securely holds bolts, multiple sizes |
Steelman Nine-Piece Set | $50 | Diverse sizes for various applications |
Pivot Mechanism Extensions | $35 | Angled access for hard-to-reach bolts |
Standard Socket Sets | $40 | Essential for general repairs |
Ratchet Wrench Kit | $45 | Quick adjustments in tight spaces |
Consider adding these tools to your collection!
Frequently Asked Questions
What Is the Most Useful Tool in a Toolbox?
The most useful tool in your toolbox often depends on your tasks. A versatile multi-tool stands out, combining functions like cutting, screwing, and prying, making it invaluable for various repairs and DIY projects you tackle.
What Tools Are in a Mechanics Tool Box?
You've got wrenches, sockets, and precision screwdrivers, but don't forget the pliers and hammers! Your toolbox is a treasure chest of fasteners and bits, all ready for your next grand automotive adventure.
What's in an Electricians Tool Box?
In an electrician's toolbox, you'll find wire strippers, pliers, screwdrivers, and a multimeter. Don't forget insulated tools for safety, along with electrical tape, cable ties, and connectors to tackle various repair and installation tasks.
What Is Electronic Tool Box?
An electronic toolbox is a digital application that consolidates tools for managing projects and repairs. You'll find features like inventory tracking, scheduling, and collaboration, streamlining your workflow and enhancing organization across devices.
Conclusion
To sum up, the magnetic tool is like a Swiss Army knife for your repairs—compact, versatile, and incredibly handy. It simplifies your toolbox, making it easier to tackle those common repair challenges without breaking the bank. With its unique features and strong community support, you'll wonder how you ever managed without it. Embrace this cost-effective solution and watch your DIY projects transform with ease and efficiency. Get ready to streamline your repairs and enjoy the process!
DIY Repairs
Mechanics Are Losing Money Because Of This DIY Leak Fix
You won’t believe how DIY leak fixes are impacting local mechanics’ livelihoods and what it means for your future repairs.
If you've tried a DIY leak fix, you might be unknowingly hurting local mechanics. These repairs often lead to bigger issues and costly comebacks that you didn't anticipate. When you return to professionals, they face the challenge of diagnosing your poorly executed fix, which can drive up labor costs. As more people turn to DIY solutions, mechanics see fewer requests and struggle financially, especially during peak times. This competition forces them to adjust their prices and services, impacting their income. Stick around to uncover how mechanics are adapting to these challenges and ensuring quality service for all.
Key Takeaways
- DIY leak fixes often fail, leading customers to return to mechanics for more expensive repairs, ultimately increasing labor costs.
- Trust issues arise when DIY repairs result in recurring problems, damaging relationships between mechanics and their clients.
- Technicians face financial strain as increased DIY fixes reduce service requests, especially during peak seasons.
- Competition from DIY repairs forces mechanics to adjust their pricing strategies, impacting their earnings negatively.
- Ethical concerns may arise as financial pressures lead some technicians to overcharge or misdiagnose issues stemming from DIY attempts.
Impact of DIY Repairs
DIY repairs might seem like a quick fix, but they often lead to bigger headaches down the road. You might think tackling an oil leak yourself will save you money, but improper repairs can exacerbate existing issues, ultimately costing you more.
When you decide to fix your car without professional help, you risk creating problems that mechanics, especially those at independent shops, must address later on.
Many consumers jump into DIY repairs to save cash, but when those efforts fail, they end up facing increased labor costs when they return to professionals for assistance. Mechanics often struggle to diagnose issues caused by amateur fixes, which can extend repair times and decrease their profitability.
This cycle can leave you frustrated and out of pocket, as your initial savings vanish.
High competition in the automotive repair industry means that independent shops are frequently left to rectify problems stemming from DIY attempts. Instead of saving money, you might find yourself spending more as you seek help to fix what you tried to repair yourself.
Next time you consider a DIY fix, remember that a professional might be your best bet for a reliable solution.
Trust Issues With Mechanics
Many car owners find themselves grappling with trust issues when dealing with mechanics, especially after experiencing the fallout from DIY repairs. When you take your vehicle in for something as routine as an oil change, unexpected price increases can leave you feeling frustrated and deceived.
If the initial repair estimate doesn't match the final bill, it's no wonder that skepticism creeps in. Lack of transparency regarding the repairs performed can further erode trust. Without clear documentation of repairs, you might question the mechanic's honesty and capability.
It's crucial to have open communication about costs and any additional work needed; misunderstandings can lead to disputes and dissatisfaction. Additionally, encountering recurring issues after repairs can greatly damage your relationship with a mechanic.
If a problem persists, you might worry about their skill level and reliability, adding to your trust issues. Unprofessional behavior, such as unsolicited personal comments, can amplify these concerns, reinforcing the need for professionalism in customer interactions.
Building a solid relationship with your mechanic hinges on transparency, clear communication, and mutual respect.
Financial Consequences for Technicians
Facing increased competition from DIY leak fixes, technicians in the automotive repair industry are feeling the financial pinch. As customers choose to patch their own oil leaks, particularly issues like a faulty valve cover gasket, your repair jobs dwindle. This trend limits your income, especially during peak seasons when you should be busy.
With fewer service requests, you might find your earnings fluctuating or, worse, declining. Many mechanics rely on flat-rate pay systems, meaning less work directly translates to lower paychecks. The financial consequences are severe; you may feel pressured to charge for unnecessary repairs just to maintain your income, which can erode customer trust over time.
Additionally, the DIY trend forces you to rethink your pricing strategies and service offerings. You may need to lower prices or offer promotions to attract customers, but this could further squeeze your profit margins.
The competition from DIY repairs creates a challenging environment, pushing you to adapt quickly to survive. If you don't find ways to stand out and prove your value, the financial consequences could become unsustainable for your career in the long run.
Ethical Concerns in the Industry
The financial pressure on technicians can lead to a troubling ethical landscape within the automotive repair industry. Low warranty compensation often forces mechanics to resort to unethical practices, like overcharging for unnecessary repairs, just to keep their heads above water.
You might notice that high competition among mechanics can further exacerbate this issue, encouraging some to cut corners or misdiagnose problems to maximize profits.
Burnout and dissatisfaction are common in this line of work, as many technicians feel undervalued and overworked. This environment can erode service quality and ethical conduct, making it harder for honest mechanics to flourish.
When earnings are tied to flat-rate pay systems, the pressure to generate income can lead to disparities and dishonest practices among those working to make ends meet.
Additionally, widespread theft and unethical dealings create moral dilemmas for sincere technicians, ultimately damaging the overall reputation of the profession.
As a result, consumer trust takes a significant hit, leaving many customers wary of seeking professional help. It's crucial to recognize that these ethical concerns affect not only the industry but also the relationships between mechanics and their clients.
Strategies for Mechanics to Adapt
Adapting to the changing landscape of the automotive repair industry requires mechanics to embrace innovative strategies that resonate with their customers. One effective approach is to offer educational workshops on DIY repairs. These sessions empower customers and showcase your expertise, reinforcing the value of your professional services.
Additionally, understanding the importance of monitoring credit card statements can help mechanics emphasize financial literacy when discussing service costs with customers.
Consider implementing tiered service packages that include consultations for DIY fixes. This way, you can capture business from those who might otherwise attempt repairs on their own. Leveraging social media and online platforms to share tips for minor repairs positions you as a trusted resource, driving traffic to your shop for more complex issues.
Another strategy is to establish a referral program for customers who successfully fix minor leaks. This not only encourages repeat business but also fosters a community of trust between you and car owners.
Ultimately, offering competitive pricing and maintaining transparent communication about potential DIY leaks will help you retain customers who might consider self-repair options. By combining these strategies, you can adapt effectively, reduce the financial impact of lost business, and strengthen your customer relationships.
Frequently Asked Questions
How Expensive Is It to Fix an Oil Leak?
Fixing an oil leak can cost you between $150 and $2,000, depending on the leak's severity and your vehicle. Regular maintenance and prompt repairs help you avoid escalating expenses and further damage.
What to Do if You Think Your Mechanic Is Scamming You?
If you feel like a fish out of water with your mechanic, start documenting everything. Gather evidence, consult a lawyer if needed, and don't hesitate to report any unprofessional behavior to protect yourself and others.
What Happens if You Can't Pay Your Mechanic?
If you can't pay your mechanic, they might file a lien on your vehicle, complicating ownership. You could lose transportation until the bill's settled, and they may pursue legal action for the owed amount.
What to Do When Your Car Needs More Work Than It's Worth?
When your car needs more work than it's worth, evaluate repair costs against market value. Consider selling it "as-is" or trading it in, and always get multiple estimates to guide your decision.
Conclusion
In today's world, nearly 60% of car owners attempt DIY repairs, leaving mechanics struggling to stay afloat. This trend not only erodes trust between you and your local technician but also threatens their livelihoods. Mechanics are passionate about their craft, yet many face the harsh reality of dwindling income due to these quick fixes. By supporting skilled professionals, you're not just fixing your car; you're investing in a community that values expertise and ethics in the industry.
DIY Repairs
Fix Your Car’s Squeaky Brakes With This Simple Household Item!
Banish those annoying squeaks from your brakes with a surprising household item—discover how it can transform your driving experience today!
You can quiet your car's squeaky brakes easily with a household item like baking soda. Just mix one tablespoon with a cup of water to create a paste. Apply it to your brake pads and rotors, let it sit for 15-20 minutes, then rinse it off thoroughly. This method can reduce friction and grime, helping your brakes operate quietly. Don't forget to conduct routine maintenance to keep everything running smoothly. If the squeaking persists, you might want to explore other solutions that can help guarantee your safety on the road.
Key Takeaways
- Use a mixture of baking soda and water as a gentle abrasive cleaner for brake pads and rotors to reduce squeaking.
- Apply dish soap to the back of brake pads to act as a lubricant and minimize friction noise.
- Clean brake components with white vinegar to dissolve grease and grime that may cause squeaking.
- Rubbing alcohol mixed with water can effectively wipe down brake parts, reducing dust and noise.
- Regularly inspect and clean all brake components to ensure smooth operation and prevent squeaky brakes.
Causes of Squeaky Brakes
Squeaky brakes can be a frustrating experience, and understanding the causes is the first step toward resolving the issue. One common reason for those annoying squeaking sounds is worn brake components, like brake pads and hardware. These worn parts can lead to increased vibration and misalignment during braking.
Moisture accumulation on rotors can also play a role. When moisture causes rust, it wears off during initial braking, creating temporary squeaking noises as the rust clears away.
Additionally, dust and debris trapped between your brake pads and rotors can cause friction, contributing to unwanted noise during braking.
Another major culprit is improper lubrication of caliper slide pins. If these pins seize or drag, you'll hear those irritating squeaks.
Sticking caliper slides can lead to brake pads dragging on rotors, which produces additional noise and often signals the need for maintenance or replacement.
Household Solutions for Noise
You can tackle squeaky brakes using common household items that you probably already have on hand.
By applying simple techniques with these materials, you can effectively clean and maintain your brake components.
Just remember to take proper safety precautions while you work to keep yourself and your vehicle safe.
Common Household Items
When dealing with annoying brake noises, common household items can provide effective solutions. You'll find that a simple cleaning solution made with dish soap can help remove brake dust and contaminants from your brake components. This step can greatly reduce those squeaky brakes.
Additionally, ensuring your brakes are properly calibrated can enhance their performance, leading to a quieter ride, similar to achieving ideal color accuracy in home cinema projectors. Baking soda, when mixed with water, acts as a gentle abrasive cleaner that helps eliminate debris causing noise.
White vinegar is another handy item in your kitchen; it's an effective degreaser that breaks down grease and grime on brake pads, leading to quieter braking performance. For a residue-free clean, consider using a mixture of water and rubbing alcohol to wipe down brake parts, which can help reduce friction and noise when you apply the brakes.
If you're facing squeaks due to humidity, cornstarch can be a temporary fix. Sprinkle it on your brake pads to absorb moisture and minimize the squeaking caused by humidity buildup.
Application Techniques
Using household items can be a practical approach to silence annoying brake noises, and knowing the right application techniques will maximize their effectiveness. For squeaky brakes, start by applying a thin layer of dish soap to the back of the brake pads. This acts as a lubricant, reducing friction and minimizing noise without harming the braking system.
Regular maintenance is key, similar to how filter replacement frequency varies by model for air purifiers, as it helps guarantee that all components function properly.
Next, consider using a mixture of vinegar and water as a cleaning solution. Spray this on brake components to dissolve dust and debris, which often contribute to noise. You can also rub a fabric softener sheet along the brake pads; it may dampen noise by creating a soft barrier. Test this method cautiously to verify it doesn't affect braking performance.
Regular maintenance is key, so use a household degreaser to clean brake components and remove any buildup that leads to squeaking.
Safety Precautions
Safety is paramount when addressing squeaky brakes with household solutions. Before you start, make certain your vehicle is parked on a flat surface and the parking brake is engaged to prevent any accidental movement. This simple step can save you from potential accidents.
When working with cleaning products or lubricants, always wear protective gloves and safety glasses. This minimizes skin exposure and protects your eyes from harmful chemicals.
Additionally, ascertain any household items you choose are compatible with brake components; avoid products containing wax or silicone that could leave residues harmful to brake performance.
Here are some key safety tips:
- Always work in a well-ventilated area or outdoors to avoid inhaling toxic fumes.
- Be cautious with flammable substances; keep them away from heat sources.
- After applying any solution, test your brakes at low speeds in a safe area before returning to normal driving.
Application Process for Baking Soda
To fix those squeaky brakes, you'll want to prepare a baking soda paste.
Mix one tablespoon of baking soda with a cup of water until it reaches a paste-like consistency.
Once you're set, you can apply it directly to the brake pads and rotors for effective noise reduction.
Baking Soda Preparation Steps
Preparing baking soda for application involves mixing one part baking soda with two parts water to form a thick paste that adheres well to brake components.
Before diving in, make certain your brake area is clean and free of dust and debris. Wipe it down with a dry cloth or use brake cleaner for best results.
Here's how to prepare and apply the baking soda paste:
- Mix one part baking soda and two parts water.
- Apply a thin layer of the paste generously to the brake pads and rotors.
- Allow it to sit for about 15-20 minutes for ideal effect.
After the paste has set, rinse the brake components thoroughly with water to remove any residue. This step is essential, as you want to guarantee no baking soda remains that could interfere with brake performance.
Finally, test the brakes to see if the squeaking has been reduced. If the noise persists, don't hesitate to repeat the process.
With these simple steps, you can effectively tackle that annoying squeak and enjoy smoother rides!
Application and Effectiveness Tips
Applying baking soda effectively can greatly enhance your brake cleaning routine. To get started, mix baking soda with water to create a thick paste. This paste acts as a gentle abrasive, perfect for cleaning brake components.
Take a cloth or brush and gently scrub the brake pads and rotors, focusing on areas where dust and debris have accumulated. This will help reduce noise and maintain cleaner brake components.
Once you've scrubbed the surfaces, it's essential to rinse thoroughly with water. If any baking soda residue remains, it can create a slippery surface, which is unsafe.
After rinsing, make sure to allow your brakes to dry completely before reassembling. This step is important to optimize performance and guarantee your vehicle operates safely.
For best results, incorporate this method into your maintenance tips regularly. Not only will this practice help keep your brakes clean, but it can also extend the lifespan of the pads, reducing annoying squeaking noises.
Maintenance Tips for Brakes
Maintaining your brakes is vital for guaranteeing both performance and safety on the road. To keep your braking system in prime condition, follow these maintenance tips:
Regularly inspect brake pads for wear, as this is critical for effective stopping power. For best results, consider techniques used in paint sprayer maintenance to verify all components are functioning smoothly. Replace brake pads when the thickness falls below 1/8 inch.
Clean brake components, focusing on sliding surfaces, to eliminate dust and debris. Monitor brake fluid levels and flush the fluid every two years.
By inspecting your brake pads, you can confirm peak performance and extend their lifespan. Don't forget to clean brake components, as this helps reduce noise and prevents uneven pad wear.
Lubricate caliper slide pins with high-temp brake grease to avoid seizing and enhance the overall functionality of your brakes.
Also, be sure to replace worn hardware, like pad clips, when you swap out brake pads. This step helps align the pads correctly and minimizes squeaking sounds.
Following these tips not only increases safety but also improves your vehicle's performance. By staying proactive with brake maintenance, you'll enjoy a smoother, quieter ride and feel confident on the road.
When to Seek Professional Help
Despite your best efforts with DIY maintenance and cleaning, there are times when squeaky brakes signal that professional help is needed. If you've tried everything, but the noise persists, it may indicate deeper issues that require a professional diagnosis.
Regular maintenance checks can prevent serious brake problems, so don't overlook them.
If you hear metal scraping or grinding, consult a mechanic immediately. This often means your brake pads are severely worn and need urgent replacement.
Additionally, if you notice a decrease in braking performance or an increase in brake pedal travel, it's a sign of underlying issues that demand attention.
Brake noise that's accompanied by unusual vibrations or pulling to one side while braking is another red flag. These symptoms can point to potential caliper problems or rotor issues that need expert intervention.
Getting vehicle-specific repair from a professional guarantees that your braking system is safe and effective.
Remember, addressing these concerns promptly can save you from more costly repairs down the line and keep you safe on the road.
Don't hesitate to seek help when you need it!
Cost Considerations for Brake Repairs
When it comes to brake repairs, understanding the costs involved can help you budget effectively and avoid unexpected expenses. Typically, replacing brake pads costs between $100 and $300, depending on your vehicle and the quality of parts.
If you need rotor replacement due to wear or damage, expect an additional $150 to $300.
The average total cost for a complete brake job—including pads and rotors—ranges from $250 to $600 or more. This variation is influenced by labor rates and whether you choose OEM or aftermarket parts.
To keep your auto repairs in check, consider these cost elements:
- Regular maintenance, like brake fluid flushing every two years, is essential to prevent brake failure.
- Timely attention to squeaky brakes can save you from more extensive damage and higher repair costs later on.
- Comparing prices from different shops can help you find a better deal on your brake job.
User Experiences and Feedback
Many car owners have turned to DIY methods for addressing squeaky brakes, often sharing their experiences and outcomes in online forums.
You might find that many users report significant noise reduction after applying simple cleaning techniques, enjoying up to 400-500 miles of silence. This positive feedback highlights the effectiveness of using household items like foam brake dust cleaners, which offer a cost-effective alternative to pricey dealership services for brake maintenance.
Regular cleaning of brake components with recommended products seems to lead to improved brake performance and a noticeable reduction in squeaking.
However, some users caution against using products with wax or silicone, as these can be incompatible with brake systems and may result in increased dust buildup.
Frequently Asked Questions
What Is the Easiest Way to Fix Squeaky Brakes?
To fix squeaky brakes, you can start by cleaning brake pads and applying high-temp grease to contact points. Regularly inspect components and guarantee proper lubrication to minimize noise and maintain smooth operation.
Can I Put Something on My Brakes to Stop Squeaking?
Sure, you could slather on peanut butter, but why not try high-temperature brake grease instead? It'll reduce friction and silence those squeaks. Just remember, don't put anything on the brake pads themselves—safety first!
What Can I Spray on My Brakes to Make Them Stop Squeaking?
To stop your brakes from squeaking, spray a non-chlorinated brake cleaner on them. This removes dust and debris. After cleaning, apply high-temp brake grease to contact points to minimize friction and noise.
Can I Spray WD-40 on My Brakes to Stop Squeaking?
Think about it: would you trust a slippery surface to stop your car? You shouldn't spray WD-40 on your brakes. It'll compromise safety. Use proper brake cleaners instead to silence those squeaks effectively.
Conclusion
In summary, tackling squeaky brakes doesn't have to break the bank. By using simple household items like baking soda, you can silence those pesky noises and keep your car running smoothly. Just remember, while DIY fixes can work wonders, it's essential to know when to call in the pros. After all, a stitch in time saves nine—maintaining your brakes not only enhances your driving experience but also keeps you safe on the road.
-
DIY Repairs1 month ago
Reset Your Nissan Titan Oil Light Quickly & Easily
-
Legal and Regulatory2 months ago
How to File a Complaint With the Bureau of Automotive Repair
-
Legal and Regulatory2 months ago
What Does the California Bureau of Automotive Repair Do
-
Legal and Regulatory1 month ago
How to Get a Bureau of Automotive Repair License
-
Legal and Regulatory2 months ago
What Does the Bureau of Automotive Repair Do
-
Definitions and Roles1 month ago
What is a Automotive Repair – Expert Guide
-
DIY Repairs1 month ago
Fix Your Car’s Squeaky Brakes With This Simple Household Item!
-
Mechanical Issues1 month ago
Leaking Oil? This Quick Fix Could Save You Thousands!