Maintenance
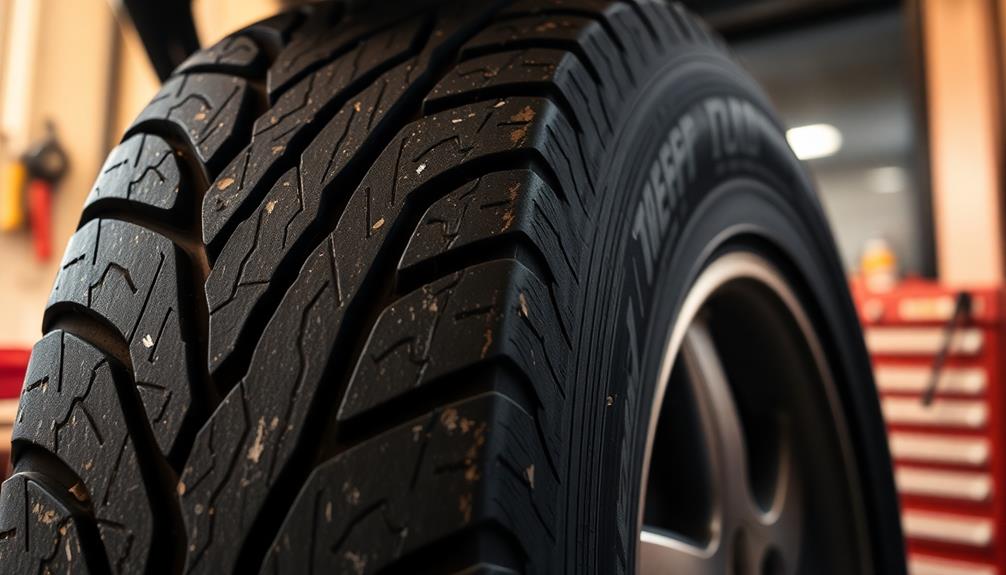
The Tire Rotation Secret That Makes Them Last Twice As Long
Discover the tire rotation secret that doubles their lifespan—are you ready to unlock the key to safer, more efficient driving?
To make your tires last twice as long, rotate them regularly—ideally every 5,000 to 7,000 miles or during oil changes. This simple step guarantees even tread wear, enhancing vehicle safety and performance. Different vehicles require specific rotation patterns; for instance, front-wheel drive tires move straight back, while rear tires cross to the front. Neglecting this routine can lead to uneven wear, reducing tire lifespan greatly. By keeping up with rotations, you not only extend tire life but also improve fuel efficiency and grip. There's plenty more you can discover about tire maintenance to optimize your driving experience.
Key Takeaways
- Regular tire rotation every 5,000 to 7,000 miles ensures even tread wear, extending tire lifespan and enhancing vehicle performance.
- Utilize appropriate rotation patterns based on your vehicle's drivetrain type for optimal tire performance and safety.
- Timely rotations reduce the risk of uneven wear, helping to avoid premature tire replacements and improving fuel efficiency.
- Combining tire rotations with oil changes streamlines maintenance, saving time and ensuring proactive vehicle care.
- Build relationships with local tire shops for personalized service and expert advice, maximizing tire longevity and overall vehicle safety.
Importance of Tire Rotation
When it comes to maintaining your vehicle, understanding the importance of tire rotation is vital for your safety on the road. Regularly rotating your tires helps guarantee even tread wear, greatly reducing the risk of losing control while driving.
Since front tires and rear tires wear unevenly based on their position, neglecting this process can lead to premature tire replacement and unsafe driving conditions.
By making it a habit to rotate tires every 7,000 miles or during oil changes, you're not just extending their lifespan by several thousand miles; you're also enhancing your vehicle's handling and grip. This consistent practice promotes uniform tread wear across all tires, ensuring they perform well regardless of their position.
Moreover, adhering to proper rotation patterns tailored to your vehicle's drivetrain—whether it's front-wheel drive, rear-wheel drive, or all-wheel drive—is essential. This attention to detail guarantees that each tire gets its fair share of wear, helping you maintain peak tire performance.
Ultimately, investing in regular tire rotation is a straightforward way to enhance your driving safety and enjoy a smoother ride.
Recommended Rotation Patterns
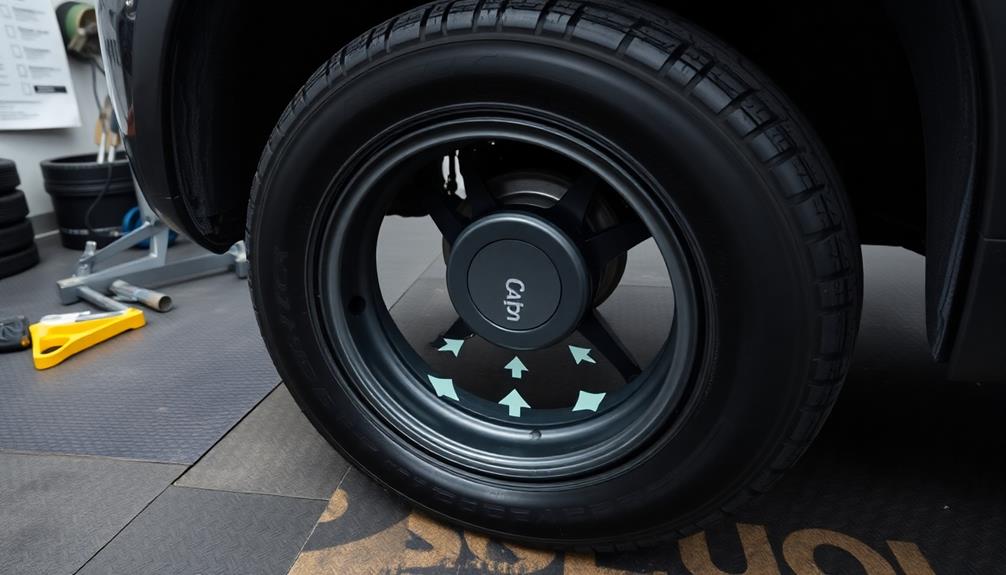
When it comes to tire rotation, knowing the right pattern for your vehicle is essential.
For front-wheel drive cars, you'll move the front tires straight back and let the rear tires cross to the front.
If you drive an all-wheel drive vehicle, you should use the "double x" pattern for best performance and wear.
Front-Wheel Drive Rotation
Every 7,000 miles or during your routine oil changes, it's vital to rotate the tires on your front-wheel drive vehicle to guarantee even wear and extend their lifespan.
For front-wheel drive systems, the recommended rotation pattern involves moving the front tires straight back to the rear axle while crossing the rear tires to the front axle. This method helps counteract the faster wear that front tires experience due to weight distribution and steering forces.
When you rotate your tires using this pattern, you promote uniform wear across all tires, leading to improved handling, better traction, and increased fuel efficiency.
To optimize performance and safety, it's important to consult your owner's manual for any specific recommendations regarding tire rotation for your vehicle model.
All-Wheel Drive Guidelines
To guarantee even tire wear and ideal performance in your all-wheel drive vehicle, you should follow the recommended "double x" rotation pattern. This method involves moving your front tires to the opposite rear positions and shifting the rear tires to the opposite front positions.
By using this rotation pattern, you'll account for the different wear rates due to the unique power distribution and handling characteristics of all-wheel drive systems.
It's advisable to perform tire rotations every 5,000 to 7,000 miles, or with your oil changes, to maintain peak tire performance and longevity. Regularly adhering to these guidelines can greatly extend the lifespan of all four tires, enhancing traction and safety while driving.
Always consult your vehicle's owner's manual for specific manufacturer recommendations regarding rotation patterns tailored for your all-wheel drive system.
By committing to this double x rotation and staying on top of your maintenance schedule, you can guarantee that your tires last longer, providing you with a smoother and safer ride.
Challenges of Tire Rotation
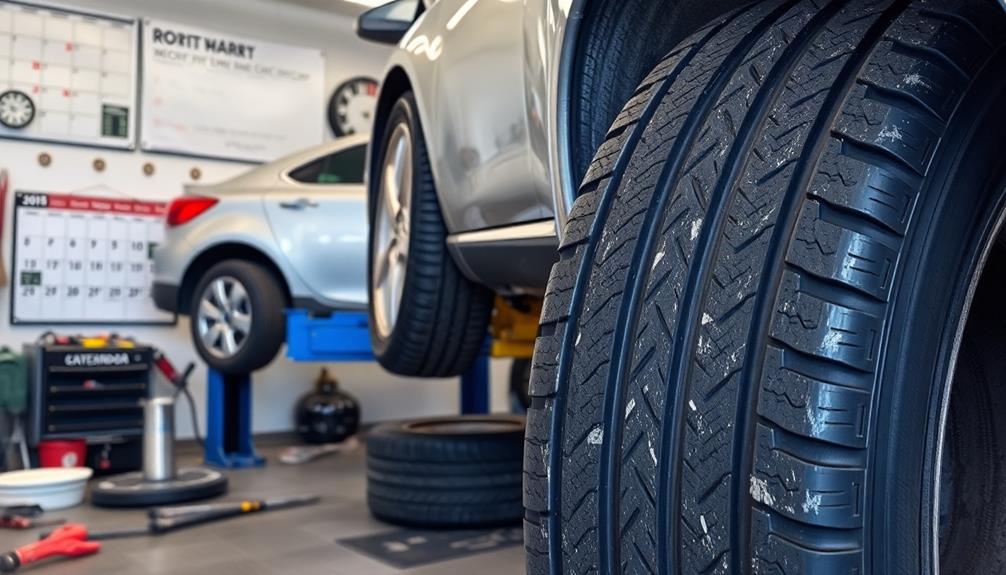
Regularly rotating your tires can be a challenge for many vehicle owners. First, you need to safely lift your vehicle off the ground, which requires a quality jack and jack stands to guarantee stability. If you don't have the right tools or experience, this can be intimidating.
The process can also be time-consuming and labor-intensive, making it easy to put off. Many people juggle busy schedules, and tire rotation often falls by the wayside.
While you might consider doing it yourself, you'll need to understand the appropriate tire rotation patterns, particularly for directional tires. This added complexity can make the DIY approach less appealing.
Fortunately, local tire shops offer quick rotation services, providing a convenient alternative for those who lack the tools or time. If you're diligent about maintenance, scheduling your tire rotations alongside oil changes can help streamline the process and guarantee it doesn't get overlooked.
Ultimately, whether you decide to tackle tire rotation yourself or take advantage of professional services, being aware of these challenges can help you make informed decisions about your vehicle's upkeep.
Maintenance Scheduling

To keep your tires in top shape, schedule rotations every 7,000 miles or alongside your oil changes.
Building a relationship with a local tire shop can make this process easier and more efficient.
Optimal Rotation Intervals
Maintaining ideal rotation intervals for your tires is vital for guaranteeing their longevity and performance. It's recommended to rotate your tires every 7,000 miles or with every oil change. This practice helps promote even tread wear, extending the lifespan of your tires considerably.
By scheduling tire rotations during your regular maintenance visits, you can prevent uneven wear and avoid costly replacements down the line.
Keeping track of your mileage is important for determining these best rotation intervals. Regularly checking your odometer not only helps maintain the health of your tires but also improves your vehicle's fuel efficiency. When your tires wear evenly, it can lead to better gas mileage and a safer driving experience.
To make this process even easier, consider establishing a routine with local tire shops for regular rotations. This can provide convenience and guarantee you don't miss out on timely maintenance.
Scheduling With Maintenance Tasks
Scheduling tire rotations alongside your regular maintenance tasks is a smart move that can save you time and money. Aim to rotate your tires every 7,000 miles or during oil changes to guarantee even wear and extend their lifespan. When you combine these tasks, you prevent uneven tire wear, which could lead to costly replacements down the road.
Additionally, understanding the importance of financial considerations during vehicle maintenance can help you budget for these necessary services efficiently.
Establishing a consistent maintenance schedule with your local tire shop adds convenience and guarantees timely rotations. You won't have to worry about forgetting when to rotate your tires if you keep track of your mileage and maintenance tasks. This proactive approach helps you avoid missed intervals that could result in premature wear and tear.
Moreover, combining tire rotations with other maintenance services not only saves time but also promotes better overall vehicle performance and safety. By integrating these tasks, you can maintain a well-functioning vehicle while maximizing the lifespan of your tires.
Local Shop Relationships
Building a strong relationship with your local tire shop can greatly enhance your vehicle's maintenance experience. When you establish a connection, you'll benefit from personalized service and tailored maintenance schedules that suit your driving habits.
Here's how you can make the most of your local shop:
- Regular Check-Ups: Early identification of uneven tire wear can lead to timely rotations and adjustments, preventing costly replacements.
- Streamlined Scheduling: Combine tire rotations with oil changes or other maintenance tasks to simplify your visits and guarantee consistent tire care.
- Loyalty Programs: Take advantage of discounts and loyalty programs offered by local shops, making your maintenance more cost-effective over time.
- Expert Advice: Building rapport gives you access to expert insights on tire care, helping you maximize the lifespan of your tires.
- Tailored Recommendations: A strong relationship allows the shop to provide recommendations based on your vehicle's specific needs.
Benefits of Regular Tire Rotation
Why should you bother with regular tire rotation? It's simple: it promotes even tire wear, greatly extending your tires' lifespan by thousands of miles.
When you rotate your tires consistently, you guarantee uniform tread wear, which enhances grip and traction. This not only contributes to safer driving conditions but also improves your vehicle's handling.
You'll also find that regular tire rotations can prevent costly premature replacements, saving you money in the long run. Maintaining proper alignment through these rotations helps improve fuel efficiency, as uneven wear can lead to increased rolling resistance.
Plus, by reducing the risk of tire blowouts and other failures, you enhance your overall vehicle safety and reliability.
In short, regular tire rotation isn't just a maintenance task; it's an investment in your vehicle's performance and safety.
By committing to this simple practice, you're making certain your tires last longer, work better, and keep you safe on the road.
Cost-Effective Tire Services
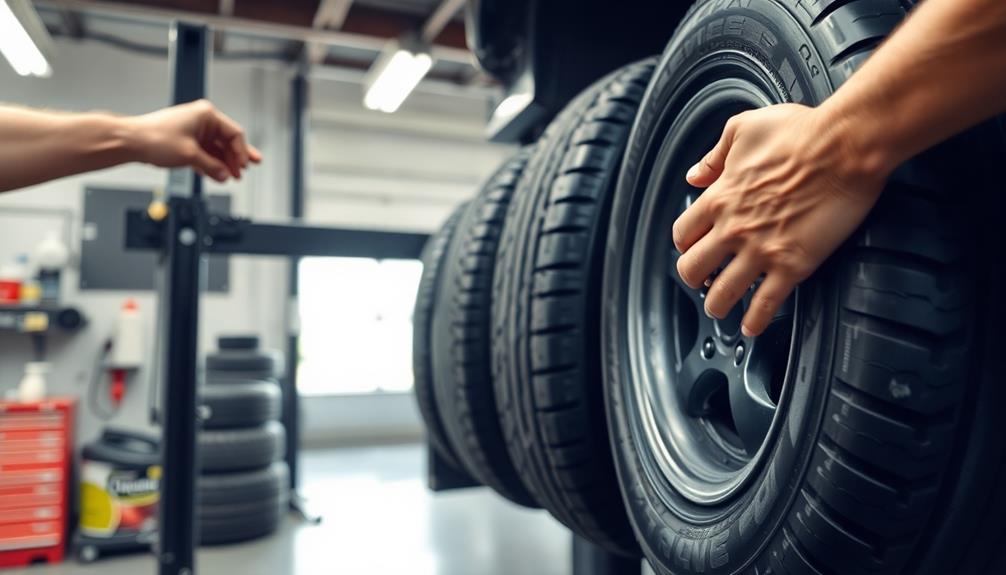
When you consider the affordability of tire maintenance, it's clear that cost-effective tire services are a smart choice for any vehicle owner.
Regular tire rotations not only extend the life of your tires, but they also save you money in the long run. The average cost for tire rotation and balancing is around $20, making it an accessible service.
Plus, many garages offer free rotations when you buy new tires, providing even more savings.
Choosing professional tire services can save you time and guarantee the job's done correctly, avoiding costly mistakes that might arise from DIY attempts.
Here are some key benefits of opting for cost-effective tire services:
- Affordable maintenance keeps your budget intact.
- Free services are often available with new tire purchases.
- Expertise guarantees proper rotation and balancing.
- Time-saving by combining services like oil changes.
- Long-term savings by preventing premature tire replacements.
DIY Tire Rotation Tips
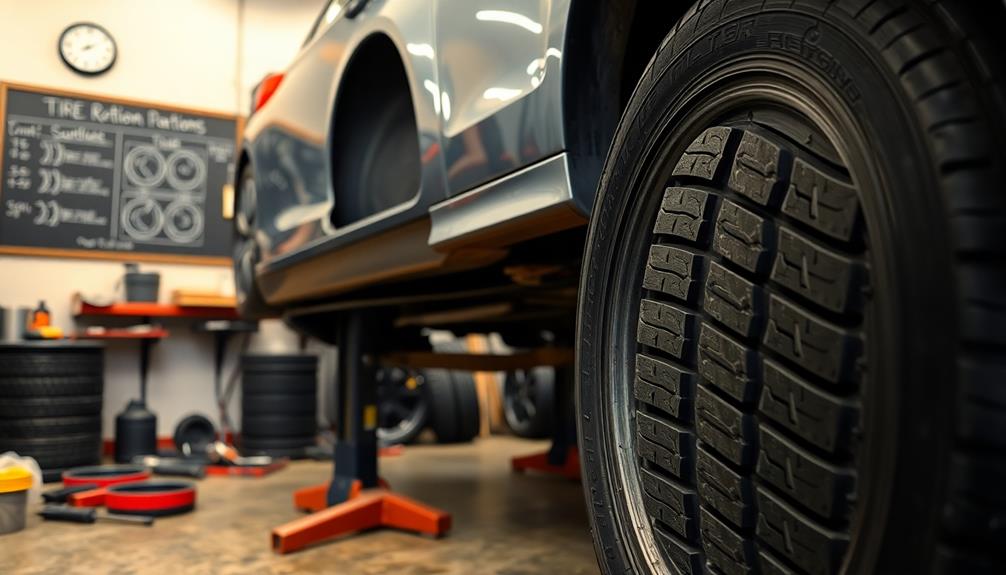
Regularly rotating your tires is an important part of vehicle maintenance that can greatly enhance their lifespan and performance. Not only does this practice help maintain ideal handling, but it can also improve fuel efficiency, making it a vital part of car care.
First, familiarize yourself with the appropriate tire rotation pattern for your vehicle type—front-wheel drive, rear-wheel drive, or all-wheel drive. This knowledge guarantees even wear across all tires and aligns with popular truck models in the US that benefit from proper maintenance.
Invest in quality tools like a jack and jack stands to safely lift your vehicle; proper equipment is essential for a successful DIY tire rotation. Always perform tire rotations every 6,000 to 8,000 miles, or during oil changes, to maximize tire lifespan and improve overall vehicle performance.
Additionally, regularly check the tire tread using the molded horizontal bars in the grooves. This helps you determine when it's time for a rotation and catch any uneven wear early.
Don't forget to take necessary safety precautions! Wear gloves and make sure your vehicle is on a stable surface to avoid injuries while rotating your tires.
Frequently Asked Questions
Do Rotating Tires Actually Make Them Last Longer?
Yes, rotating your tires does make them last longer. By promoting even wear, you reduce the risk of premature replacement, enhance handling, and improve safety. Regular rotation helps you get the most out of your tires.
How to Make Tires Last as Long as Possible?
You'd think tires last forever, right? But to maximize their lifespan, you need to regularly rotate them, check pressure, align wheels, and track mileage. It's all about maintenance—don't skip it if you want longevity!
What Is the Best Tire Rotation Pattern?
The best tire rotation pattern depends on your vehicle type. For front-wheel drive, move front tires straight back and cross rear ones. For rear-wheel drive, cross front tires back and move rear tires straight forward.
How Long Does a Tire Rotation Last?
"An ounce of prevention's worth a pound of cure." A tire rotation lasts until your next service, typically every 7,000 miles. Regular rotations even out wear, ensuring better performance and extending tire life considerably.
Conclusion
In the grand scheme of your vehicle's performance, tire rotation is like the unsung hero in a classic tale—essential yet often overlooked. By prioritizing regular rotations, you're not just extending the life of your tires; you're enhancing your safety and saving money in the long run. So, embrace this simple maintenance routine and watch your tires go the distance, just like the legendary characters who rise to greatness through perseverance. Your ride will thank you!
Maintenance
Clean Your Engine Like A Pro With This Household Item
Transform your engine cleaning routine with a simple household item that promises professional results—find out how to achieve a spotless finish!
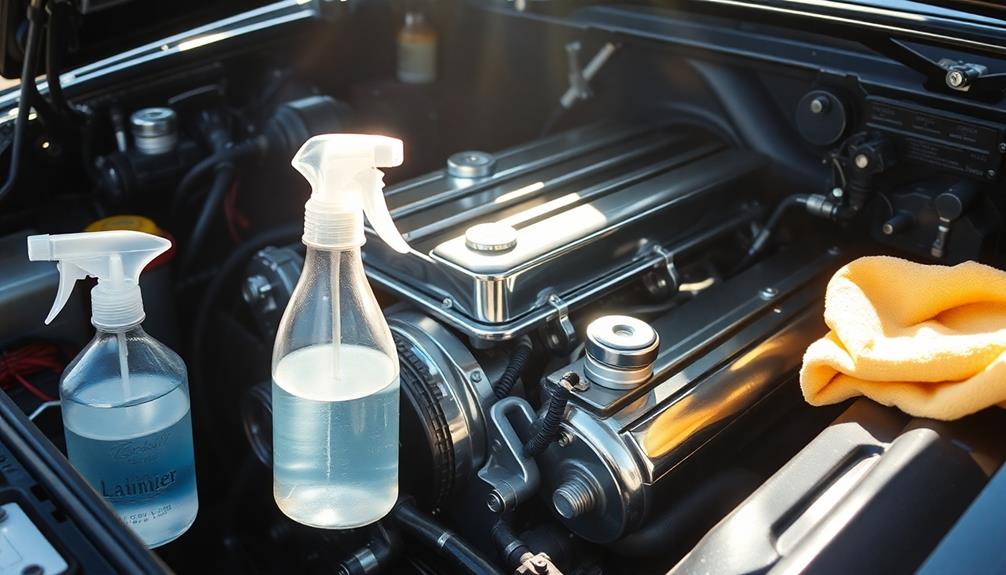
If you want to clean your engine like a pro, grab some dish soap and hot water. This simple mixture acts as a non-corrosive degreaser, breaking down tough grime without damaging sensitive parts. Start by covering electrical components with plastic to keep them safe. After applying the soap mixture, scrub with a non-metallic brush, then rinse carefully. Don't forget to dry everything with a microfiber cloth for a polished finish! Regular cleaning with this household solution helps prevent rust and boosts performance. Stick around to discover more tips for keeping your engine in top shape!
Key Takeaways
- Use a mixture of dish soap and hot water as a safe and effective household degreaser for cleaning your engine.
- Protect sensitive electrical components by covering them with plastic bags before starting the cleaning process.
- Apply a non-corrosive degreaser like Simple Green for tough grime, ensuring to scrub with soft brushes.
- Rinse the engine bay thoroughly with a hose, being cautious around electrical parts to avoid damage.
- Regularly clean your engine 1-2 times a year to maintain performance and extend the lifespan of components.
Benefits of Engine Cleaning
When you regularly clean your engine, you not only boost its performance but also extend the life of its components. A clean engine prevents dirt, grime, and oily residues from accumulating, which can impede cooling and increase wear on essential parts.
Wood-burning stoves offer considerable savings on heating expenses due to their efficiency, showcasing the benefits of maintaining all your machinery clean and efficient. By keeping your engine bay clean, you simplify maintenance tasks, making it easier to spot leaks and other issues early. This proactive approach can save you from costly repairs down the road.
Moreover, maintaining a clean engine greatly improves your vehicle's resale value. Potential buyers are more likely to be drawn to a well-maintained car, and a spotless engine bay sends a strong message about how well you've cared for the vehicle. Neglecting engine cleaning can lead to rust and damage from debris buildup, ultimately shortening the lifespan of various components.
Cleaning your engine once or twice a year not only promotes longevity and reliability but also contributes to overall vehicle performance. By making engine cleaning a regular part of your maintenance routine, you're investing in your vehicle's future, ensuring it runs smoothly and retains its value for years to come.
Essential Pre-Cleaning Steps
Maintaining a clean engine is an essential step in guaranteeing your vehicle runs efficiently, but before you get started, a few pre-cleaning measures can make a big difference.
First, guarantee your engine is completely cool to avoid burns or damage to components.
Next, focus on protecting sensitive electrical parts. Cover the battery and connectors with plastic bags and tape to shield them from water and cleaning solutions. If possible, disconnect the battery terminals or remove the battery entirely to prevent any electrical issues during the cleaning process.
Then, clear away any loose debris from under the windshield wipers and around the engine area. This step stops dirt from spreading while you clean.
Cleaning Supplies Needed
To get your engine bay sparkling clean, you'll need the right supplies.
Start with a non-corrosive degreaser and some soft cloths, as they'll help you tackle tough grime without damaging any surfaces.
Don't forget your protective gear to keep yourself and your engine safe during the process.
Essential Cleaning Products
Cleaning your engine effectively requires the right set of supplies. First and foremost, you'll need a reliable degreaser like Simple Green. This powerful cleaning solution breaks down oil and grime, making your engine detailing tasks much easier.
To apply it, grab some soft cloths and brushes. These tools are fundamental for getting into tight spaces and cleaning intricate components without causing any damage.
Don't forget your protective gear! Rubber gloves and eye protection are vital as you work with chemical cleaners. Your safety should always come first.
Additionally, before you start applying any cleaning solutions, use a vacuum or air compressor to remove loose debris. This guarantees you achieve a more thorough clean.
For an environmentally friendly alternative, consider using a bucket filled with hot water and dish soap as a cleaning solution. This mixture can help lift dirt and grime without harsh chemicals.
With these essential cleaning products in hand, you're well-equipped to tackle your engine cleaning project like a pro. Just remember to take your time and focus on each area for the best results!
Safe Cleaning Alternatives
If you're looking for safe cleaning alternatives that won't harm your engine or the environment, there are plenty of household items that can do the job. One of the best options is dish soap mixed with hot water. This combination acts as a safe and effective cleaning product, cutting through oily residues without harsh chemicals.
For instance, essential oils like eucalyptus oil can also provide natural antiseptic properties, making it a great addition to your cleaning routine.
You can also create a powerful solution using baking soda and vinegar, which tackles tough stains and odors in your engine bay. For sensitive areas, isopropyl alcohol works wonders as an adhesive remover and helps dissolve stubborn substances like tree sap.
Don't forget about toothpaste! It can restore your headlights and remove minor scuffs, proving that common household items can enhance your vehicle's aesthetics.
Additionally, consider using Simple Green, a non-corrosive cleaner that effectively breaks down automotive fluids. Just remember to rinse thoroughly after application to prevent any potential causticity that could harm engine components.
These safe cleaning alternatives not only help maintain your engine but also guarantee you're being environmentally conscious while you do it!
Tools for Effective Cleaning
Equipping yourself with the right tools makes engine bay cleaning more efficient and effective. Start with a non-corrosive degreaser like Simple Green; it's safe for various metals and great at breaking down tough automotive fluids. This will be your first step in tackling grease and grime.
Next, grab a stiff synthetic bristle brush to scrub away stubborn muck. For delicate areas, a soft detailing brush works wonders, ensuring you don't damage sensitive components.
After scrubbing, use microfiber cloths to dry and polish surfaces, leaving everything streak-free and shining.
Don't forget your protective gear! Wearing rubber gloves will protect your skin, and consider using plastic bags to cover sensitive electrical parts, keeping them dry during the cleaning process.
When it's time to rinse, a garden hose or pressure washer is essential for eliminating contaminants. Just be cautious with the pressure, especially near electrical components, to avoid damage.
With these tools in hand, you'll be well on your way to a clean and well-maintained engine bay that looks as good as new!
Step-by-Step Cleaning Process
Before you start cleaning, make certain your engine is cool and cover sensitive electrical parts with plastic bags to protect them.
Next, you'll apply a degreaser and scrub away the grime using a non-metallic brush.
Pre-Cleaning Preparations Overview
Preparing your engine for cleaning requires careful attention to detail to guarantee safety and effectiveness. Start by confirming the engine is cool; this helps prevent burns and protects delicate components.
Next, you should disconnect the battery. If possible, remove it entirely to safeguard the electrical system during your cleaning process.
Now, focus on protecting sensitive electrical components. Use plastic bags and tape to cover these areas, shielding them from water and cleaning solutions. This step is essential since moisture can cause electrical malfunctions.
Before you engage in cleaning, clear any debris from under the windshield wipers and around the engine area. This will make your cleaning more thorough and efficient.
While you're at it, inspect beneath the vehicle for any oil leaks. Spotting these issues before cleaning can save you time and guarantee you address any underlying problems.
Manual Cleaning Steps
To get started with cleaning your engine, apply a generous amount of non-corrosive cleaner, like Simple Green, evenly across the engine bay. Allow it to penetrate for about 3-5 minutes.
After that, use a soft brush to agitate the cleaner and scrub away grease and grime from tight spaces and intricate components. Remember to rinse your brush frequently to maintain its effectiveness.
Next, carefully remove any plastic coverings to avoid water entering sensitive electrical components. Once you've scrubbed the entire area, it's time to rinse. Use a hose to thoroughly rinse the engine bay, ensuring all loosened dirt and debris are washed away. This step is essential; leftover cleaner could damage engine components.
Finally, dry the engine bay with microfiber cloths to prevent water spots. For an extra touch, consider applying a protectant to enhance the appearance and repel dirt.
- Make sure to cover sensitive areas before cleaning.
- Scrub using a soft brush to avoid scratches.
- Always double-check that no cleaner remains post-rinsing.
Following these steps will help you achieve a clean engine bay that looks and performs better!
Safe Cleaning Techniques
Cleaning your engine safely is important to avoid damage and guarantee your safety. Always start by confirming the engine is cool. This prevents burns and thermal shock to components.
Before you begin, cover sensitive electrical parts with plastic bags and tape to shield them from water and cleaners.
When it comes to choosing products, opt for non-corrosive, engine-safe cleaning products like Simple Green. These will effectively break down tough automotive fluids without harming your engine.
If you're using a pressure washer, keep a distance of 3-5 feet. This distance helps avoid damage to delicate electrical parts while still removing grime and debris effectively.
Don't forget to wear protective gear. Rubber gloves and eye protection are essential when handling strong degreasers to prevent skin irritation and chemical burns.
Following these safe cleaning techniques won't only protect your engine but also guarantee your personal safety as you clean. With the right approach and products, you can achieve a clean engine without the risk of damaging critical components or harming yourself.
Applying Protectants Effectively
When it comes to applying protectants effectively, choosing the right product is key.
You'll want to use techniques that guarantee even coverage while avoiding overspray, especially in tight spots.
Let's explore the best options and methods to keep your engine bay looking great and protected.
Choosing the Right Protectant
How can you effectively protect your engine components? Start by choosing the right protectant, like 303 Aerospace, which repels dirt and moisture, essential for maintaining the integrity of your engine's plastic and rubber parts. Using a protectant regularly can prevent brittleness and prolong the lifespan of these components.
When selecting your protectant, consider these factors:
- Compatibility: Confirm it's suitable for both plastic and rubber surfaces in your engine bay.
- Coverage: Look for products that offer even coverage without oversaturation, so you avoid excess buildup in sensitive areas.
- Application ease: Choose a protectant that can be applied easily with a soft cloth or toothbrush, especially in intricate areas.
Once you've applied the protectant, allow it to dry completely for that showroom finish. This not only enhances the appearance of your engine bay but also maximizes the protectant's effectiveness.
Regular use will help maintain your engine's components, keeping them looking and performing their best. So, invest in a quality protectant and make it a part of your routine maintenance!
Application Techniques and Tips
Applying protectants effectively can make a significant difference in the longevity and appearance of your engine components. Start by using a soft cloth or a toothbrush to apply your chosen protectant, ensuring even coverage on plastic parts while avoiding overspray on electrical components.
Misting the protectant onto surfaces can help prevent drips and splatters, giving you a more uniform finish. For detailed areas like crevices and tight spots, use a soft-bristled brush to make sure all surfaces are treated adequately.
After applying, let the protectant sit for a few minutes; this allows for thorough absorption and enhances the overall shine. When it's time to buff, grab a clean, dry microfiber cloth to achieve that showroom finish.
Always keep in mind to follow the manufacturer's instructions regarding drying times and reapplication frequency for best results. By adhering to these application techniques, you'll not only protect your engine components but also improve their appearance, ensuring they look great and last longer.
With these tips, you can clean your engine like a pro!
Final Touches for Shine
After you've meticulously cleaned the engine bay, it's essential to give your vehicle's exterior a quick wash. This not only prevents paint damage but also enhances the overall appearance of your ride.
Regular cleaning helps maintain the value of your vehicle, which is especially important given the competitive market for top US truck manufacturers. Once the exterior is clean, it's time to apply a protectant to really make your vehicle shine.
Here are some steps to achieve that showroom finish:
- Apply a protectant: Products like 303 Aerospace create a barrier against dirt and help prevent plastic brittleness.
- Buff the surfaces: Use a soft cloth to buff the cleaned areas and avoid streaks or residue.
- Focus on cleaning chrome: A polished chrome adds a classy touch, making your engine bay stand out even more.
Regular maintenance, including the application of a protectant, contributes to the longevity of your engine bay's components, ensuring everything looks new for longer.
A clean engine bay not only looks appealing but also makes it easier to spot leaks and perform routine maintenance. With these final touches, you'll feel like a pro, and your vehicle will exude that fresh-off-the-lot appeal!
Maintenance Tips for Longevity
To keep your vehicle running smoothly for years to come, establishing a regular maintenance routine is vital. Cleaning your engine bay 1-2 times a year can help spot leaks and issues early, extending your vehicle's lifespan. A clean engine bay enhances efficient cooling, promoting better performance and reducing wear on components. This proactive approach can save you from costly repairs down the line.
When cleaning, use household items like dish soap as a degreaser to effectively remove greasy residue without relying on harsh chemicals. This not only contributes to better engine functionality but also helps maintain the integrity of automotive fluids, preventing contamination. Make sure to thoroughly coat the surfaces while being mindful of sensitive components.
Regularly checking for accumulated grime and debris is essential to prevent rust and damage. Maintaining a clean engine not only protects rubber components from deterioration but also minimizes corrosion risks.
Common Mistakes to Avoid
While maintaining a clean engine bay is important, it's equally vital to recognize common mistakes that can lead to damage or inefficiency. By being aware of these pitfalls, you can guarantee a safer, more effective cleaning process.
- Avoid using vinegar as a cleaner; its acetic acid can rust and damage the metal components in your engine bay.
- Don't forget to cover sensitive electrical components with plastic bags and tape. Water exposure can easily cause electrical failures, leaving you with costly repairs.
- Refrain from applying degreasers directly on hot engine parts. Thermal shock can crack critical components, such as the intake manifold.
Additionally, be cautious with high-pressure washing; maintain a distance of 3-5 feet to protect delicate engine components from damage.
Recommended Products for Success
When it comes to cleaning your engine, using the right products can make a significant difference in both effectiveness and safety. One of the best choices is Simple Green All-Purpose Cleaner. Its non-corrosive formula effectively breaks down tough automotive fluids without damaging any metal, plastic, or rubber components.
For protecting plastic parts in the engine bay, consider using 303 Aerospace Protectant. This product repels dirt and prevents brittleness, giving your engine a showroom finish.
If you're looking for a thorough clean, foaming engine degreasers are designed to be safe for electrical components while lifting grime and grease effectively.
However, if you opt for petroleum-based degreasers, remember they can be powerful for heavy-duty cleaning but require careful handling to avoid damaging rubber and leaving residue.
For those who prefer a more eco-friendly approach, natural engine degreasers are a great option. They're non-toxic and effective for light cleaning tasks, making them an affordable choice for regular maintenance.
Frequently Asked Questions
What Is the Best Homemade Engine Cleaner?
The best homemade engine cleaner combines equal parts vinegar and water. This solution effectively removes corrosion and rust while being safe for metal surfaces. Always rinse thoroughly afterward to avoid damage and guarantee peak performance.
How Can I Clean My Engine at Home?
To clean your engine at home, make sure it's cool, cover sensitive parts, and apply a Simple Green and water mixture. Scrub, rinse carefully, and dry with microfiber cloths for best results. Regular cleaning boosts performance too!
Can I Clean My Engine Bay With Dawn Dish Soap?
Absolutely, you can use Dawn dish soap to clean your engine bay. It's tough on grime but gentle on surfaces. Just remember to rinse thoroughly to avoid leaving any residue that could harm components.
What Is the Best Thing to Clean the Inside of Your Engine?
To clean the inside of your engine, use a mixture of liquid dish soap and hot water. It cuts through grease effectively. Just remember to cover sensitive components to prevent water damage while cleaning.
Conclusion
By giving your engine a little TLC with that trusty household item, you're not just sprucing it up; you're breathing new life into it. A clean engine runs smoother and performs better, and it's a satisfying way to show your ride some love. So, roll up your sleeves, follow the steps, and enjoy the fruits of your labor. Your engine will thank you, and you'll feel great knowing you took the time to care for it!
Maintenance
Change Your Wipers With This $2 Item And Never Look Back!
Learn how a simple $2 silicone cleaner can transform your wipers and ensure clear visibility, especially during harsh weather conditions!
You can transform your wiper blades' effectiveness with a simple $2 silicone cleaner! This affordable item not only removes dirt and grime but also restores the rubber's flexibility, improving contact with your windshield. With regular use, it enhances the performance of your wipers and makes sure your visibility stays clear, especially during harsh weather. Plus, incorporating this into your maintenance routine can save you money in the long run by extending the lifespan of your blades. Keep your driving safe and hassle-free, and find out more tips on how to maintain your wipers effectively!
Key Takeaways
- A $2 silicone wiper blade cleaner effectively removes dirt and grime, enhancing wiper performance and extending lifespan.
- Regular use of this cleaner restores rubber flexibility, ensuring better contact with the windshield.
- Incorporating the cleaner into your maintenance routine saves money on wiper replacements over time.
- Clean wiper blades improve visibility, reducing the risk of accidents during adverse weather conditions.
- Using this affordable item helps maintain wipers, allowing for clear driving without frequent replacements.
Why Wiper Blades Matter
When it comes to driving safety, don't overlook the importance of wiper blades. These essential components play a vital role in maintaining clear visibility during adverse weather conditions.
If your wiper blades are neglected, you may notice streaks or smudges on your windshield, which can greatly impair your visibility and increase the risk of accidents. That's something you really need to watch!
According to your owner's manual, it's a good idea to replace your wiper blades approximately every six months. Doing so guarantees peak performance and safety while driving, especially during sudden weather changes.
Properly functioning wiper blades help you see clearly, allowing you to react quickly to any obstacles or hazards on the road.
Plus, regular inspections and maintenance of your wiper blades can save you from costly repairs down the line, as worn or ineffective blades can cause damage to your windshield.
Don't wait until the next storm to realize your wipers aren't up to the task. Take a few moments to check them now and make sure your driving experience remains safe and enjoyable.
How to Inspect Wiper Blades
Inspecting your wiper blades regularly is essential for ensuring they function effectively. Start by utilizing the service position feature on your vehicle, which makes it easier to access the blades. As you inspect, make sure to check for smooth operation; they should move quietly and cover the entire windshield area.
Look for signs of wear, such as grooves, tears, or missing pieces on the rubber blade. These issues can greatly impair performance. Also, check for areas of the windshield that remain uncleaned after use, as this can indicate ineffective contact with the glass surface.
If the blades are dirty, clean them with glass cleaner. However, if you notice any damage, replacement is necessary to maintain visibility.
Here's a quick reference to help you with your inspection:
Inspection Aspect | What to Look For | Action Needed |
---|---|---|
Blade Condition | Grooves, tears, or missing pieces | Replace if damaged |
Operation | Smooth movement without noise | Adjust or replace if needed |
Cleaning Effectiveness | Areas left uncleaned | Clean or replace as necessary |
Make sure to keep your wipers in top shape for safety!
Selecting the Right Wipers
Choosing the right wiper blades is vital for maintaining clear visibility during inclement weather. First, make sure the wipers are compatible with your vehicle's make and model. This guarantees a proper fit and ideal performance.
Next, consider the curvature of your windshield. Some blades are specifically designed to contour to unique shapes, enhancing contact and cleaning efficiency.
If you can't find dealership-specific blades, look for universal fit options. Just be sure they meet the required specifications for your vehicle to avoid any issues.
Additionally, pay attention to the installation method; different wiper blades have various attachment styles. Ensuring a secure fit to your wiper arm is important for effective operation.
Before purchasing, always inspect the rubber blade for grooves or damage. Worn or missing pieces can drastically affect visibility and safety while driving.
Simple Maintenance Techniques
To keep your wipers in top shape, you should regularly inspect them for wear and tear every three months.
Engaging in regular maintenance not only enhances the life of your wipers but also contributes to a more organized vehicle environment, which can reduce stress levels during your drives.
Cleaning the blades with glass cleaner and topping off your windshield washer fluid will also boost their performance.
Plus, seasonal maintenance tips can help you avoid costly replacements while ensuring clear visibility in all weather conditions.
Consider implementing the art of decluttering strategies to maintain a tranquil and efficient driving experience.
Regular Blade Inspections
Regular inspections of your wiper blades are crucial for maintaining clear visibility, especially during adverse weather. Aim to conduct these inspections every three months to catch any wear or damage before they impact your safety.
During your checks, verify the blades operate smoothly and listen for any unusual noises. Pay attention to areas of your windshield that remain uncleaned—this can indicate a blade's ineffectiveness. Additionally, confirming that your vehicle's interior air quality is ideal can enhance your overall driving experience, making it easier to focus on the road and enjoy a clear view improved air quality.
Look closely for grooves, tears, or missing pieces on the rubber blade, as these issues can greatly impair performance and signal a need for replacement. A simple cleaning with glass cleaner can remove dirt and grime, extending the lifespan of your wipers and improving their functionality.
Additionally, keep your windshield washer fluid topped off and your windshield clean. This not only enhances visibility but also prevents rapid wear on your wiper blades.
Effective Cleaning Methods
Maintaining clean wiper blades is just as important as inspecting them for wear. Regular cleaning can greatly enhance their performance and extend their lifespan.
Here are three simple methods to keep your wipers in prime shape:
- Use Glass Cleaner: Spray a quality glass cleaner on your wiper blades to remove dirt and grime. This will help them glide smoothly across your windshield.
- Gentle Wipe: Grab a soft cloth or sponge and gently wipe the rubber part of the blades. Avoid harsh materials that can damage the rubber, which is essential for effective wiping.
- Keep the Windshield Clean: Regularly clean your windshield to eliminate debris and contaminants. A clean surface allows your wipers to operate more effectively, reducing wear and tear.
Additionally, don't forget to top off your windshield washer fluid. This guarantees ideal visibility and less strain on your wipers during operation.
Seasonal Maintenance Tips
When it comes to seasonal maintenance, it's vital to give your wiper blades some extra attention. Inspect your wiper blades every three months to spot any wear or damage that could compromise your visibility during rain or snow. If you notice any cracks or tears, it's time to replace them. Proper maintenance can enhance your overall driving experience, just as guaranteeing a clean campsite can elevate your time in nature unique camping experiences.
Cleaning your wiper blades regularly with glass cleaner can make a significant difference. This simple step removes dirt and grime, prolonging their lifespan and improving performance.
Don't forget to top off your windshield washer fluid regularly. This keeps your visibility ideal and guarantees your wipers can effectively clear away debris.
Maintaining a clean windshield is just as important. Dirt accumulation can wear out your wiper blades faster and cause streaks, reducing their effectiveness.
In winter months, use an ice scraper instead of your wipers to remove ice. Using wipers for this purpose can lead to damage and decreased performance.
Common Wiper Blade Mistakes
Ignoring wiper blade maintenance can lead to dangerous visibility issues and compromised safety on the road. Many drivers overlook their wipers until they notice streaks or smudges, but a quick inspection every three months can prevent potential hazards.
Here are some common mistakes to avoid:
- Believing All Wipers Are Universal: It's a misconception that wiper blades fit every vehicle. Always choose blades that match your car's make and model to guarantee peak performance.
- Neglecting Windshield Cleanliness: Dirt and grime buildup can drastically reduce wiper effectiveness, leading to streaking. Regularly clean your windshield to enhance visibility and prolong the life of your wipers.
- Replacing Blades Infrequently: Some drivers think wipers last forever, but you should replace them about every six months. This helps maintain safety and guarantees clear visibility during inclement weather.
The Essential Item
A simple $2 silicone wiper blade cleaner can be a game changer for your vehicle's maintenance routine. This affordable tool effectively extends the lifespan of your wiper blades by removing dirt and grime that diminishes their performance. By using this cleaner regularly, you can prevent the accumulation of debris that leads to streaking and reduced visibility.
One of the standout features of the silicone cleaner is its ability to restore the rubber's flexibility. This guarantees better contact with your windshield, resulting in peak performance when you need it most. Instead of constantly replacing your wiper blades, incorporating this quick and easy maintenance solution can save you money in the long run.
Additionally, utilizing a silicone cleaner enhances the effectiveness of your windshield washer fluid. This means clearer visibility during adverse weather conditions, giving you peace of mind while driving.
For just $2, you're investing in a simple yet effective way to keep your wipers in top shape. Make this essential item part of your vehicle care routine, and you'll never look back at your old wiper blade maintenance habits!
DIY Wiper Replacement Process
Keeping your wipers in top shape is only part of the equation; knowing how to replace them is equally important. Follow these simple steps to guarantee a smooth DIY wiper replacement process.
- Lift the Wiper Arm: Start by lifting the wiper arm away from the windshield. This gives you better access to the wiper blade.
- Remove the Old Blade: Locate the release tab on the old blade. Press it to detach the blade easily from the wiper arm.
- Attach the New Blade: Align the new wiper blade with the wiper arm. Push firmly until you hear a click, confirming it's securely attached.
Once you've replaced the blades, turn them on to test their performance. Verify they operate smoothly without any noise or skipping on the windshield.
It's also essential to dispose of the old wiper blades properly.
Remember to periodically inspect your new blades every few months for wear and tear. This simple maintenance guarantees your wipers will be reliable whenever you need them, keeping your view clear on the road ahead.
Benefits of Regular Wiper Care
Taking care of your wipers isn't just about convenience; it's essential for your safety.
Regular maintenance boosts visibility during bad weather, helps you save money on costly repairs, and extends the lifespan of your wiper blades.
Enhanced Visibility Safety
When you neglect your wiper blades, you not only risk diminished visibility but also compromise your safety on the road.
Regular maintenance is essential for guaranteeing clear sightlines, especially during adverse weather conditions. Worn or damaged blades can leave streaks on your windshield, making it harder to see and increasing the risk of accidents.
To enhance your visibility and safety, consider these three vital maintenance tips:
- Inspect Regularly: Check your wiper blades every six months for signs of wear or damage. Replace them if you notice cracks, tears, or stiffness.
- Keep Clean: Regularly clean your wiper blades to remove dirt and debris. This simple step can greatly improve their performance and lifespan.
- Top Off Washer Fluid: Confirm your washer fluid reservoir is full. This helps maintain peak visibility by clearing away muck that blades alone might miss.
Cost-Effective Maintenance
Regular maintenance of your wiper blades not only enhances your driving experience but also saves you money in the long run. By changing your wiper blades every six months, you considerably improve visibility during rain or snow, reducing the risk of accidents and potential costs associated with mishaps.
Performing quarterly inspections helps you catch wear and damage early, preventing expensive windshield repairs that often stem from neglected blades.
Cleaning your wiper blades with glass cleaner is another simple step that can extend their lifespan. This keeps them operating smoothly without leaving streaks or uncleaned areas on your windshield.
Additionally, maintaining a clean windshield and keeping washer fluid topped off prevents rapid blade wear, ensuring peak performance when you need it most.
Instead of using your wipers to clear ice, use an ice scraper. This practice preserves the integrity and functionality of your wipers, contributing to more effective maintenance over time.
Extended Blade Lifespan
Maintaining your wiper blades not only boosts your driving safety but also greatly extends their lifespan. Regular care can help you avoid frequent replacements, saving you time and money.
Here are three key practices to keep your wipers in top shape:
- Inspect Every Three Months: Check for wear and damage regularly. Early detection can prevent safety hazards and guarantee clear visibility, especially during storms.
- Clean with Glass Cleaner: Wiper blades collect dirt and grime over time. Cleaning them helps maintain proper contact with the windshield, enhancing performance and extending their life.
- Use an Ice Scraper: When winter hits, opt for an ice scraper instead of using your wipers to clear ice. This simple switch prevents unnecessary wear and tear, ultimately prolonging your blades' life.
Don't forget to top off your windshield washer fluid consistently. Keeping your windshield clean reduces strain on wiper blades, minimizing rapid wear.
Also, consider replacing your wipers every six months to guarantee effective performance. By integrating these practices, you'll enjoy clearer visibility and a longer lifespan for your wiper blades!
Frequently Asked Questions
What Are the Different Types of Wiper Connectors?
You'll find several wiper connector types: hook, pin, bayonet, and flat. Each serves a specific purpose, ensuring your wiper blades attach securely for ideal performance. Choose the right one for your vehicle's needs!
Do Windshield Wipers Come With 2?
Think of your car as a knight; it needs two trusty swords—one for each side. Yes, most windshield wipers come with two blades, ensuring you've got the visibility needed to conquer any storm.
How to Change Windshield Wipers Step by Step?
To change your windshield wipers, lift the wiper arm, detach the old blade, align the new blade with the arm, secure it, and gently lower the arm. Test the wipers to verify they're working properly.
What Happens if You Don't Replace Windshield Wipers?
Did you know that 90% of accidents happen in wet conditions? If you don't replace your windshield wipers, you're risking poor visibility, streaks, and costly windshield damage, all of which can make driving dangerously treacherous.
Conclusion
By keeping your wipers in top shape, you're not just ensuring clear visibility; you're safeguarding every journey, like a knight in shining armor protecting your kingdom. With that $2 essential item, you can easily replace your wipers and enjoy the peace of mind that comes with driving in any weather. Don't let a simple oversight rain on your parade—embrace regular wiper care, and you'll never look back on those blurry days again!
Maintenance
Never Check These Fluids Or Your Engine Will Self-Destruct!
When you ignore essential engine fluids, your vehicle’s fate hangs in the balance—discover the crucial checks you can’t afford to miss!
Neglecting vital engine fluids is a fast track to self-destruction. You must regularly check engine oil, coolant, and transmission fluid to avoid catastrophic failures. Low or dirty oil can lead to overheating and severe engine wear, resulting in costly repairs. Failing to maintain coolant levels risks overheating, potentially leading to engine damage. Don't overlook the transmission fluid either, as neglect can cause rough shifts and major repairs. Keep a close eye on these fluids to guarantee your engine runs smoothly. There's a lot more to learn about keeping your engine in top shape, so keep going!
Key Takeaways
- Regularly check engine oil levels; neglect can lead to engine wear, overheating, and costly repairs.
- Monitor coolant levels to avoid overheating, which can cause severe engine damage and expensive repair bills.
- Inspect transmission fluid for cleanliness and proper levels; dirty or low fluid can result in shifting issues and increased repair costs.
- Look for signs of oil leaks, low coolant, or dirty transmission fluid to catch potential issues before they escalate.
- Adhere to a maintenance schedule for oil changes, coolant checks, and timing belt inspections to prevent catastrophic engine failure.
Essential Engine Fluids Overview
When it comes to maintaining your vehicle, understanding essential engine fluids is key. Engine oil is your engine's lifeblood, lubricating moving parts and preventing overheating. Regular checks of this fluid are vital for guaranteeing your engine runs smoothly and lasts longer. If you neglect it, you're risking serious damage.
Next up is coolant, which regulates your engine's temperature. It prevents overheating and protects against severe engine damage. You should monitor your coolant levels frequently, especially during extreme weather. Low coolant can lead to catastrophic issues that could leave you stranded.
Don't forget about transmission fluid, either. This fluid guarantees smooth gear shifts and protects the components of your transmission.
Routine inspections are necessary to avoid costly repairs and frustrating breakdowns. If your transmission fluid is low or dirty, you may experience shifting problems, which can lead to more significant issues down the road.
Consequences of Neglecting Oil
Neglecting your engine oil can accelerate wear on critical components, putting your vehicle at serious risk.
When lubrication fails, overheating becomes a real threat, leading to expensive repairs or even total engine failure.
Keeping an eye on your oil levels is essential to prevent these costly consequences.
Engine Wear Acceleration
Regularly checking your engine oil is essential for maintaining its health, as neglect can lead to severe wear and damage. When you skip oil changes, the oil breaks down over time, losing its ability to lubricate effectively, much like how high refresh rates enhance gaming experiences.
This can cause harmful metal-on-metal contact, accelerating engine wear. Insufficient oil levels also contribute to overheating, as oil is vital for dissipating heat in your engine.
Here are some key consequences of neglecting oil maintenance:
- Engine wear increases dramatically, shortening your engine's lifespan.
- Contaminated oil introduces particles that scratch engine surfaces, causing further damage.
- Sludge buildup obstructs oil passages, impairing circulation and leading to catastrophic failure.
- Costly repairs result from damage that can easily reach thousands of dollars.
Overheating Risks
Overheating poses a notable risk to your engine's health, especially if you let oil maintenance slide. Regular oil changes are vital; neglecting them can lead to increased friction and inadequate lubrication, causing your engine temperature to rise.
As engine oil degrades over time, failing to check its level and condition can result in overheating, putting your engine at serious risk. When oil levels are low or contaminated, you may experience oil starvation. This dangerous condition can lead directly to engine failure, resulting in costly repairs that you could've avoided.
Overheating can warp or seize engine components, often necessitating a complete engine replacement if you don't address the issue promptly. The risk of overheating skyrockets after 5,000 to 7,500 miles without an oil change, particularly in high-performance or older vehicles.
Lubrication Failure
Just one missed oil change can lead to serious lubrication failure in your engine. When you neglect regular oil changes, you're inviting trouble. Increased friction and overheating can wreak havoc on your engine's components, resulting in catastrophic damage. In the worst-case scenario, your engine might need a complete rebuild.
Here are some consequences of ignoring oil maintenance:
- Increased wear: Lack of lubrication leads to metal-on-metal contact, rapidly wearing down critical parts.
- Sludge formation: Without proper oil flow, sludge builds up, obstructing crucial pathways and exacerbating wear.
- Seized components: Insufficient lubrication can cause engine parts to seize, leading to a total breakdown.
- Performance drop: Engines without adequate lubrication suffer decreased performance and fuel efficiency.
Regular oil maintenance isn't just a recommendation; it's imperative. Ignoring this can void warranties and raise the chances of engine failure.
Don't let a simple task become a costly mistake. Keep up with your oil changes to guarantee your engine runs smoothly and efficiently. Your engine depends on it!
Importance of Coolant Levels
Maintaining proper coolant levels is essential to prevent your engine from overheating and avoid costly repairs.
When coolant is at the right level, it enhances system efficiency and keeps everything running smoothly.
Regular checks can save you from serious issues down the road.
Prevent Engine Overheating
While you mightn't think about it often, keeping an eye on your engine's coolant levels is essential to prevent overheating. Low coolant can lead to severe engine damage, such as warped cylinder heads and blown gaskets.
The coolant circulates through your engine, absorbing heat and helping to maintain ideal temperatures. If the levels drop, your engine struggles to dissipate heat effectively.
To avoid costly repairs, follow these guidelines:
- Check coolant levels at least once a month.
- Replace coolant when it shows signs of contamination.
- Monitor the temperature gauge for any unusual readings.
- Look out for warning signs like steam from the engine or the check engine light illuminating.
Ignoring your coolant can lead to repair bills exceeding $1,500 due to overheating.
By making coolant maintenance a habit, you protect your engine and keep it running smoothly. Remember, a little attention now can save you from a major headache later.
Enhance System Efficiency
Properly managing your coolant levels can greatly enhance your engine's overall efficiency. When your coolant levels are ideal, you're preventing the engine from overheating, which is essential for avoiding severe damage like warped cylinder heads or blown gaskets.
Coolant doesn't just regulate temperature; it also protects against corrosion and lubricates the moving parts within the cooling system.
To guarantee your engine runs smoothly, regularly check your coolant levels. If you notice signs like engine overheating, a sweet smell from leaking coolant, or puddles under your vehicle, it's time to act.
An ideal coolant mixture usually consists of 50% coolant and 50% distilled water, striking the perfect balance for effective heat transfer while preventing freezing or boiling over.
Maintaining proper coolant levels not only enhances efficiency but also keeps your engine performing at its best. Ignoring this essential fluid can lead to costly repairs down the line, so make it a habit to check.
Your engine depends on it, and you'll save yourself a fortune in the long run by preventing overheating and guaranteeing everything runs smoothly.
Avoid Costly Repairs
Ignoring your coolant levels can lead to expensive repairs and major headaches. Low coolant can cause your engine to overheat, risking severe damage or even total failure.
Regular maintenance checks are essential, especially before long trips, to avoid these costly consequences.
Here are some key points to keep in mind about coolant maintenance:
- Prevention is Key: Regularly check coolant levels to prevent overheating.
- Change Intervals: Change your coolant every 30,000 to 50,000 miles to maintain peak performance.
- Watch for Signs: Look out for frequent overheating, visible coolant leaks, or a low coolant warning light on your dashboard.
- Corrosion Protection: Proper coolant levels protect your engine from rust and sludge buildup.
Transmission Fluid and Performance
Your vehicle's transmission fluid plays an essential role in its overall performance, acting as a lubricant for the moving parts within the transmission. Without adequate transmission fluid, you risk increased friction, which can lead to wear and tear on crucial components. This degradation often occurs due to heat and contamination, making regular maintenance necessary.
To maintain peak performance, you should check your transmission fluid levels and quality every 30,000 to 60,000 miles, depending on your vehicle model. Low or dirty fluid can result in delayed or rough shifting and even slipping gears. Ignoring these issues may lead to costly transmission repairs, which can easily be avoided with timely maintenance.
Moreover, regularly inspecting your transmission fluid not only prevents performance-related problems but can also extend the life of your transmission. Keeping an eye on this important fluid guarantees smooth shifting and enhances your overall driving experience.
Signs of Fluid-Related Issues
Fluid-related issues can manifest in various ways, and spotting the signs early can save you from costly repairs.
By being vigilant about your vehicle's fluids, you can prevent severe damage to your engine and its components.
Here are key signs to watch for:
- Oil leaks: Look for any signs of oil pooling or dripping around the timing chain cover. This could indicate a failing seal that may lead to inadequate lubrication.
- Coolant levels: If your engine is overheating, check your coolant levels. Low coolant could signal a failing water pump, affecting not just temperature but also the timing belt performance.
- Transmission fluid: Regularly inspect your transmission fluid for color and consistency. Dirty or low fluid can cause shifting issues that stress your engine.
- Timing belt wear: While not a fluid, regular checks for cracks or fraying on your timing belt are essential. A snapped belt can lead to catastrophic engine damage.
Preventative Maintenance Tips
To keep your engine running smoothly, regular preventative maintenance is vital. Start by inspecting and replacing your timing belt every 100,000 miles. This simple step prevents cracking and potential engine failure, saving you from costly repairs down the line.
Don't overlook oil changes, either; they're essential for maintaining your timing chain's lubrication, allowing it to last as long as your engine. Additionally, just as it's important to monitor your vehicle's fluids, staying informed about cold medications overview can help you effectively manage your health during cold seasons.
Watch for signs of wear, like cracking in the timing belt or unusual noises from the timing chain. Catching these issues early can save you a fortune in repairs. Ignoring preventative maintenance can lead to severe engine damage, so make it a priority to extend your engine's life.
Keeping a maintenance log is another smart move. Track your fluid levels and replacement intervals to guarantee you never miss critical checks. This habit will help you avoid the dreaded engine self-destruction.
Frequently Asked Questions
How Do You Tell if Your Engine Is Destroyed?
If your engine's misfiring, making strange noises, leaking oil, or showing signs of a damaged timing belt, it's time to worry. Ignoring these symptoms could mean serious damage or even engine failure. Don't wait!
How Often Should I Check Engine Fluids?
Think of your engine as a well-tuned orchestra; each fluid plays an essential note. You should check engine oil monthly, coolant every few months, transmission fluid twice a year, and brake fluid every six months. Stay in harmony!
Will a Blown Engine Still Drive?
You can drive a vehicle with a blown engine for short distances, but it's risky. Severe damage can occur, so it's best to stop immediately and get professional help to avoid costly repairs.
Can You Save a Blown Engine?
Imagine a phoenix rising from ashes. Yes, you can save a blown engine if it's not severely damaged. Rebuilding or replacing parts might cost a few hundred to several thousand, but it's often worth it.
Conclusion
Your engine's fluids are the lifeblood of your vehicle, much like water is to a thriving plant. Neglecting them is like ignoring a wilting flower; it won't survive long without care. By regularly checking oil, coolant, and transmission fluid, you nurture your engine, ensuring it runs smoothly and efficiently. Remember, a well-tended engine blooms with power and longevity, while neglect can lead to a catastrophic collapse. Don't let your vehicle wilt—stay vigilant and maintain those essential fluids!
-
DIY Repairs1 month ago
Reset Your Nissan Titan Oil Light Quickly & Easily
-
DIY Repairs1 month ago
Reset Your Chevy Equinox Oil Light Quickly
-
Definitions and Roles1 month ago
What is a Automotive Repair – Expert Guide
-
Legal and Regulatory1 month ago
How to Get a Bureau of Automotive Repair License
-
Legal and Regulatory1 month ago
How to File a Complaint With the Bureau of Automotive Repair
-
Legal and Regulatory1 month ago
What Does the California Bureau of Automotive Repair Do
-
Mechanical Issues1 month ago
Leaking Oil? This Quick Fix Could Save You Thousands!
-
Structural Issues3 weeks ago
Rust Proof Your Car For $10 With This Little-Known Trick