Automotive Repair
The Secret Diagnostic Tool Mechanics Are Trying To Hide
Keen to uncover the hidden diagnostic tool mechanics don’t want you to know about? Discover its secrets and unlock your vehicle’s potential.
The secret diagnostic tool mechanics often try to hide is the CER Elite. Priced around £150, it connects via Wi-Fi and offers advanced features like extensive health reports and live data streaming. This user-friendly device simplifies diagnostics for engine, ABS, and airbag systems, making it perfect for both professionals and DIY enthusiasts. Unlike traditional tools, it doesn't require a costly subscription for updates and provides coding capabilities for new modules. By tapping into its features, you can gain insights that were once reserved for mechanics. There's plenty more you should discover about using it effectively.
Key Takeaways
- The CER Elite tool provides extensive diagnostics for Volkswagen Audi vehicles, often revealing issues mechanics may overlook or not disclose.
- Its user-friendly interface allows DIY enthusiasts to perform advanced functions, reducing reliance on professional mechanics.
- Regular updates ensure the tool remains effective, keeping users informed of the latest diagnostic capabilities.
- Cost-effective pricing eliminates the need for expensive subscriptions or multiple specialized tools, enhancing accessibility for all vehicle owners.
- The tool's coding features allow users to customize settings, giving them control over vehicle functionalities typically managed by mechanics.
Overview of CER Elite Tool
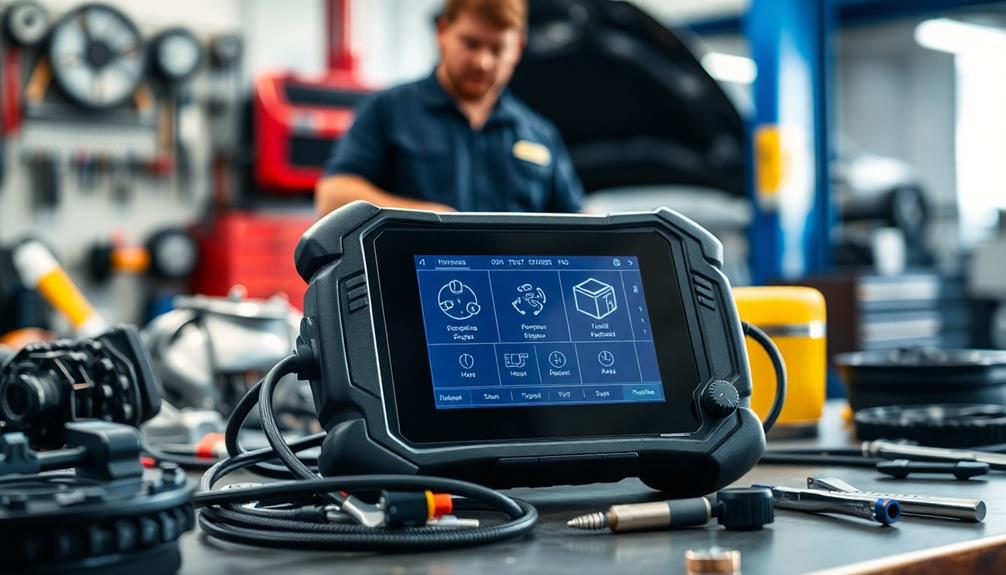
The CER Elite tool is a powerful diagnostic device tailored for Volkswagen Audi Group vehicles. When you're working on these cars, you'll appreciate how it connects via Wi-Fi, making it easy to use with either USB or car power. Priced around £150, it's a smart investment, especially since it offers additional features for about $40 each; keep an eye out for discounts during events like Amazon Black Friday.
This tool performs thorough Health Reports across all control modules, including engine, ABS, climate, and airbags. You'll benefit from its support for both generic OBD2 and manufacturer-specific diagnostics. The user-friendly touchscreen interface allows you to navigate effortlessly, so you can access advanced functions like actuator testing and live data streaming.
However, take care when using this tool for coding and adaptations. You'll want to save changes and fully understand your vehicle's specifics to avoid any potential issues. If you ever feel uncertain, just remember to come back and review the guidelines.
With the CER Elite, you've got a reliable companion for all your diagnostic needs!
Diagnostic Functions and Features
Diagnostic capabilities of the CER Elite tool make it an indispensable asset for any technician working on Volkswagen Audi Group vehicles.
You'll appreciate its extensive Health Reports that scan all control modules, including critical systems like engine, ABS, climate, and airbags. This little bit of thoroughness guarantees you catch any potential issues early.
The tool also offers advanced functions that elevate your diagnostics. You can perform actuator testing, stream live data, and adapt throttle valves and EGR systems to boost vehicle performance.
Whether you need generic OBD2 diagnostics or manufacturer-specific insights, the CER Elite provides a wide range of compatibility.
Plus, you can code new airbag control modules and make adaptations such as dash sweeps and LED coding, which enhances customization options.
With regular updates, you'll find that the tool maintains its cutting-edge capabilities, allowing you to stay in tune with new features and functions.
In the ever-evolving world of vehicle diagnostics, the CER Elite tool guarantees you're always a step ahead.
User-Friendly Interface Design
When you use the CER Elite, you'll appreciate the intuitive touchscreen navigation that makes accessing functions a breeze.
This tool offers quick access to various adaptation and coding features, ensuring you can tackle diagnostics efficiently.
With its user-friendly design, you won't need to be a pro to navigate advanced functions comfortably.
Additionally, as email security insights suggest, user-friendly interfaces can greatly enhance user engagement and reduce errors in operation, making it easier for technicians to focus on accurate diagnostics.
Intuitive Touchscreen Navigation
Steering through the CER Elite tool is a breeze thanks to its intuitive touchscreen interface, which allows you to access control modules and diagnostic functions quickly. The design focuses on simplicity, making it perfect for home mechanics and DIY enthusiasts who don't have professional training.
A clean and organized workspace, as suggested in health and wellness benefits, enhances your focus and efficiency, allowing you to utilize the tool to its full potential. You won't waste time trying to figure things out; the layout is straightforward and user-friendly.
With fast loading times, you'll experience minimal wait periods during diagnostics and adaptations. This means you can get right to work without delays. Performing adaptations like dash sweeps and LED coding is as easy as tapping a few menu options, greatly reducing the complexity often associated with vehicle diagnostics.
Additionally, the interface includes screen capture and recovery options, letting you save and review essential diagnostic information efficiently. This functionality guarantees you won't lose important data during your troubleshooting sessions.
Quick Access Functions
Steering through the CER Elite tool feels effortless thanks to its quick access functions, designed specifically for ease of use.
You'll appreciate the intuitive touchscreen interface that allows you to navigate seamlessly between control modules. With just a few taps, you can perform system selections to access a wide range of vehicle diagnostics, making it a breeze for DIY enthusiasts like you.
The tool supports various adaptations, including dash sweeps and LED coding, so you can easily tap into advanced functions without any hassle. You won't have to sift through complicated menus; everything you need is right at your fingertips.
Additionally, the screen capture and recovery options guarantee you can document your work effectively, preserving your progress or sharing findings with others.
Regular updates to the interface mean you'll always have access to the latest features and capabilities. This ongoing improvement not only enhances your user experience but also keeps you ahead in the ever-evolving world of vehicle diagnostics.
With quick access functions, the CER Elite tool transforms complex tasks into straightforward actions, making your mechanic journey smoother and more enjoyable.
Adaptation and Coding Tools
Adaptation and coding tools have never been more accessible thanks to the CER Elite's user-friendly interface design. You'll appreciate the intuitive touchscreen that makes maneuvering through various diagnostic functions a breeze. With quick loading times, you can jump right into your projects without delays.
Performing adaptations like dash sweeps and LED coding is straightforward, thanks to a simple system selection process. You don't need to be a tech whiz to take full advantage of its capabilities. The tool even supports coding for new airbag control modules, giving you thorough access to essential vehicle channel information—perfect for home mechanics looking to expand their skills.
Regular updates guarantee the interface remains relevant, adapting to the ever-evolving landscape of vehicle technologies. You can count on continuous improvements that enhance usability.
Plus, the inclusion of screen capture and recovery options empowers you to document any changes you make, allowing you to revert to previous settings if needed. This feature not only boosts your confidence during adaptations but also streamlines your workflow, making the CER Elite an invaluable asset in your diagnostic toolkit.
Safety Guidelines for Use
When using the CER Elite tool, safety should always be your top priority. Begin by verifying you understand the specific systems of the vehicle you're working on. A solid grasp of these systems is vital; improper modifications can lead to considerable malfunctions that could jeopardize safety.
Before you engage in coding or adaptations, save any changes you make. This step prevents potential vehicle issues that may arise during your work. It's also wise to avoid any actions that could render the vehicle undrivable.
Careful diagnostics are essential before making modifications to guarantee you're not leaving your vehicle in a compromised state. Always remember, you're responsible for the consequences of any changes performed with the tool. Informed decision-making is key during diagnostics.
Regularly update the CER Elite tool to enhance functionality and safety. Keeping the tool current guarantees you have access to the latest features and protocols, which can greatly improve your diagnostic processes.
Community Engagement Strategies
Community engagement is essential for fostering a vibrant DIY culture around the CER Elite tool. By encouraging you to leave comments and share your experiences on platforms like YouTube, TikTok, and Instagram, the tool creates a lively atmosphere where everyone feels involved.
When you like and follow the content, you support the growth of the channel, which ultimately brings more DIY enthusiasts into the fold. Engaging with this community can also help improve your financial literacy, as you learn about budgeting and investment strategies from fellow members who share their experiences with tools like the common financial terms.
The CER Elite tool actively seeks your feedback to shape future content, ensuring you feel a sense of belonging and influence. This engagement not only strengthens community ties but also enhances your overall learning experience.
Regular updates on new tools and features keep you informed and excited about the latest advancements in vehicle diagnostics.
Moreover, the platform promotes an interactive experience by showcasing user-generated content, making it easier for you to connect with others who share your interests.
Whether you're sharing a success story or troubleshooting a problem, your contributions help build a supportive community. Embrace these opportunities, and you'll find that your involvement enriches both your knowledge and the collective expertise of fellow DIYers.
Cost and Pricing Options
The cost of the CER Elite tool is approximately £150, though this can vary due to market fluctuations and promotional offers.
When you're considering this investment, it's crucial to think about the overall cost of ownership, especially if you plan to purchase additional features. Each of these features is priced at around $40, allowing you to customize your diagnostic capabilities according to your needs.
Here are some key points to keep in mind:
- Market Variability: Prices can change based on current market conditions.
- Promotional Discounts: Look out for sales during events like Amazon Black Friday for potential savings.
- Cost-Effectiveness: The tool can perform advanced functions without needing a professional garage setup.
- DIY Friendly: Perfect for enthusiasts wanting to tackle their vehicle diagnostics at home.
- Total Expense Consideration: Factor in additional features when evaluating your investment.
Comparison With Traditional Tools
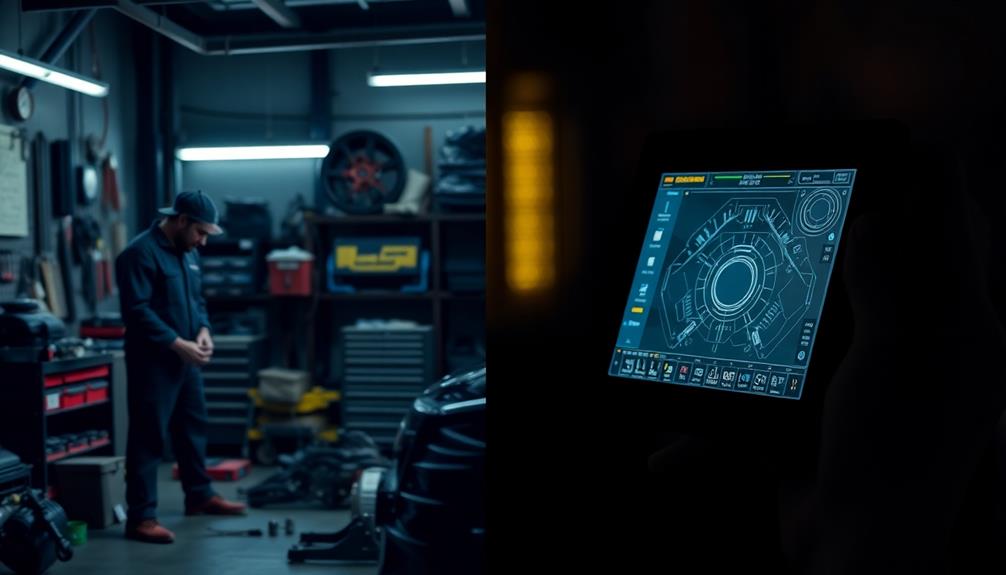
When you compare the CER Elite to traditional diagnostic tools, you'll notice significant differences in cost efficiency and functionality.
While many older tools come with high upfront costs and limited features, the CER Elite offers a more affordable solution with advanced capabilities.
This makes it easier for you to tackle a variety of diagnostic tasks without the complexity often associated with older models.
Cost Efficiency Comparison
Cost efficiency is a critical factor when choosing diagnostic tools, and the CER Elite stands out as an affordable alternative to traditional options. Priced around £150, it's a budget-friendly choice compared to conventional tools that can cost anywhere from £300 to over £1,000.
What makes the CER Elite especially appealing for your wallet? Consider these benefits:
- No Subscription Fees: Unlike many traditional tools, the CER Elite offers regular updates without costly software subscriptions.
- Affordable Add-Ons: Additional features are priced at about $40 each, considerably less than typical all-in-one packages.
- Compact Design: It connects via USB or car power, so you won't need extra batteries or chargers, saving you even more.
- Multiple Functions: Advanced capabilities like DPF regeneration and EGR adaptations are included, reducing the need for multiple specialized tools.
- Long-Term Savings: The overall cost efficiency of the CER Elite makes it a smart investment for DIY enthusiasts.
Functionality Versus Complexity
Steering through the world of diagnostic tools can feel overwhelming, but the CER Elite simplifies the experience considerably. Unlike traditional tools that often require extensive technical knowledge, the CER Elite features a user-friendly touchscreen interface, making it accessible for everyone, including DIY enthusiasts.
Here's a quick comparison between the CER Elite and traditional tools:
Feature | CER Elite |
---|---|
Interface | User-friendly touchscreen |
Real-time Data Streaming | Yes |
Actuator Testing | Yes |
Manufacturer-specific Support | Integrated in one unit |
Advanced Coding Capabilities | Yes, throttle valves & EGR systems |
Traditional tools typically strand you with separate devices for manufacturer-specific diagnostics, while the CER Elite combines both generic OBD2 and manufacturer functions. Its intuitive design allows for quick health reports across all control modules, saving you valuable time. Additionally, the advanced coding capabilities empower you to adapt systems that were previously reserved for professional-grade equipment. The CER Elite stands out by offering high functionality without the complexity often found in traditional diagnostic tools.
Frequently Asked Questions
Can OBD Unlock a Car?
You might wonder if OBD can release your car. While some OBD-II tools access specific functions, they aren't primarily designed for releasing vehicles. Plus, misuse could lead to legal issues or unintended problems.
What Does "I'm" Mean on a Code Reader?
When you see "I'm" on a code reader, it usually indicates the Input Monitor status. This message helps you assess whether a vehicle component is functioning correctly or needs further investigation for potential issues.
How Do I Turn off the Check Engine Light With a Code Reader?
To turn off the check engine light, connect your code reader to the OBD2 port, scan for trouble codes, and use the "Erase Codes" function. Remember to fix the underlying issue to prevent recurrence.
Does OBD 3 Exist?
OBD-3 isn't here yet; it's still a dream in the automotive domain. You'll find discussions buzzing about its potential, but for now, OBD-II reigns supreme, keeping your vehicle diagnostics grounded in reality.
Conclusion
In uncovering the secrets of the CER Elite Tool, you've likely realized it's not just another diagnostic gadget—it's a game changer. Mechanics may be hesitant to share it, fearing it'll disrupt the status quo. But embracing this tool could elevate your skills and efficiency. By challenging traditional methods, you're not just keeping up; you're stepping ahead. So, are you ready to reveal the future of diagnostics and leave outdated tools behind? The choice is yours.
Professional Repair
Shocking Questions Mechanics Hate To Answer—But Must!
Learn the surprising questions mechanics dread to answer, and uncover the truths about your vehicle’s repairs that might leave you questioning everything.
You might be surprised at the questions mechanics often dread but have to address. "Why are repairs so expensive?" is a tough one, especially when parts and labor costs keep rising. You might also ask, "Why did this issue happen?" since hidden problems can complicate repairs. Mechanics can't guarantee every job due to unpredictable vehicle issues, which can frustrate you. Plus, long wait times for parts often lead to dissatisfaction. Understanding these challenges can help you navigate the repair process better. Stick around, and you'll discover more insights that reveal the truth behind your car's maintenance needs.
Key Takeaways
- "Why is the repair cost so high?" can be frustrating as mechanics must explain rising parts and labor expenses.
- "Is this repair really necessary?" challenges mechanics to justify essential repairs against customer skepticism.
- "Can you guarantee this repair will fix the issue?" puts pressure on mechanics due to unpredictable vehicle problems and hidden issues.
- "Why is this taking so long?" can be tough to answer when supply chain issues delay parts availability.
- "What if I don't do this repair?" forces mechanics to convey potential risks and future costs of neglecting maintenance.
Why Are Repairs So Expensive?
When you take your car in for repairs, you might be shocked by the bill. It's becoming increasingly common for repair costs to skyrocket, often leaving you wondering why. One reason is the rising costs of parts and labor; every time you visit a mechanic, you may face higher expenses.
For instance, repairs on older vehicles like a 2008 Pathfinder can hit $6,400, or a 2002 Isuzu Axiom might run you $5,500—totally exceeding the vehicle's market value. In addition, modern vehicles like the 2024 GMC Sierra may require specialized GMC tuning to enhance performance, which can add to repair costs.
Modern cars are more complex than ever, filled with intricate electronics and sensors. This complexity requires specialized knowledge, which can drive up diagnostic fees and labor costs considerably.
Moreover, if you own a high-mileage vehicle, routine maintenance often uncovers hidden issues, leading to unexpected repairs that escalate quickly.
All these factors can strain your budget considerably. If you're driving an older model, ongoing maintenance costs can become a long-term financial challenge, making every repair visit a source of anxiety.
Understanding why repairs are so expensive can help you prepare for these costs before you pull into the shop.
What's Wrong With My Car?
Identifying what's wrong with your car can often feel like searching for a needle in a haystack. With today's complex technology, diagnosing issues can be a real challenge.
Mechanics frequently encounter high-mileage vehicles, where hidden problems complicate repairs and drive up costs. Many consumers aren't aware of their vehicle's maintenance needs, leading to unexpected engine failures.
Regular maintenance, similar to the upkeep of an air purifier, can considerably reduce the likelihood of major repairs.
Consider these common signs your car might need attention:
- Strange noises: Clicking or grinding can indicate serious issues.
- Warning lights: Dashboard alerts aren't just for decoration; they signal problems.
- Poor performance: Sluggish acceleration or stalling could mean your engine's in trouble.
- Fluid leaks: Puddles under your car often point to leaks that need urgent care.
Frustration can grow when you feel uninformed about recalls or necessary repairs, negatively impacting your customer experience.
Mechanics stress the importance of routine maintenance, yet many drivers overlook it, potentially resulting in severe issues and expensive repairs down the line.
How Often Should I Maintain It?
Maintaining your car is vital to keeping it running smoothly and preventing costly repairs. So, how often should I maintain it? Routine maintenance is key. Mechanics typically recommend oil changes every 5,000 to 7,500 miles. This not only guarantees engine longevity but also saves you time in the long run by preventing more severe issues.
Don't forget about tire rotations, which should be done every 6,000 to 8,000 miles. This promotes even wear and extends the life of your tires, allowing you to get the most out of your investment.
Air filters need replacing every 15,000 to 30,000 miles; clean filters improve engine efficiency and fuel economy. Checking your brake fluid regularly is essential as well. You should change it every 2 to 3 years for peak braking performance.
Finally, spark plugs generally need replacement every 30,000 to 100,000 miles, depending on your vehicle. By sticking to these maintenance schedules, you're not just preserving your car's health; you're also saving time and money in the future.
Why Did This Issue Happen?
Many drivers are surprised to find that issues with their vehicles often stem from a lack of routine maintenance. You might think a few skipped oil changes won't hurt, but neglecting regular checks can lead to serious problems. It's hard to say just how much a lack of upkeep can cost you down the road.
Here are some common reasons why issues crop up:
- High mileage wear and tear can lead to engine failures.
- Complex modern engines have electronic systems that can fail.
- Design flaws in engines, like GM's 4.3-liter Vortec, cause repeated issues.
- Misconceptions about repair costs create disbelief when bills arrive.
These factors compound over time, and if you don't address them early, you could face expensive repairs that exceed your car's value.
Mechanics often encounter frustrated owners who can't understand why their vehicles are failing. It's essential to recognize that many problems are preventable with proper maintenance. Ignoring the basics can turn minor issues into major headaches, leaving you to wonder, "Why did this issue happen?"
Regular checks not only keep your car running smoothly but also save you from unexpected financial strain.
Is My Car Worth Repairing?
When faced with a hefty repair bill, it's natural to wonder if your car is worth fixing. Start by comparing the repair costs to your vehicle's market value. Sometimes, costs can exceed the worth of the car, making you rethink your investment. For instance, repairs for a 2008 Pathfinder could hit $6,400, while a 2002 Isuzu Axiom might need $5,500 just for an engine replacement.
Repair Cost | Vehicle Value | Decision |
---|---|---|
$6,400 | $4,500 | Consider replacing |
$5,500 | $6,000 | Worth repairing |
$2,000 | $3,000 | Definitely repair |
Make sure to evaluate your vehicle's overall condition, especially if it has high mileage. Hidden issues can arise during repairs, which could lead to further costs. Emotional attachments can tempt you to invest in repairs, but be realistic about the long-term implications. Remember, well-maintained older cars might be more cost-effective to fix than newer models with complex designs. So, weigh your options carefully before making a decision.
Can You Guarantee This Repair?
When you ask, "Can you guarantee this repair?" you're tapping into a complex issue.
Mechanics often face repair limitations due to the unpredictable nature of vehicle problems and how they can be intertwined.
Understanding warranty coverage and trusting your mechanic's expertise is key to managing your expectations.
Repair Limitations Explained
In the world of auto repair, you might find that mechanics often can't guarantee specific repairs. This uncertainty stems from various factors that influence the repair process. While they aim to provide pretty good service, the unpredictable nature of vehicle wear and tear can complicate things.
Here are a few reasons why:
- Hidden Issues: High mileage vehicles may have underlying problems that aren't apparent until you dig deeper.
- Complex Technology: Modern cars feature intricate electronic systems, which can drive up repair costs and make diagnosis tricky.
- Parts Reliability: Mechanics often source parts from different vendors, and the quality can vary, affecting repair success.
- Market Value Decisions: Sometimes, extensive repairs might exceed the vehicle's market value, forcing tough choices about whether to fix or replace it.
Given these challenges, mechanics can't always provide absolute guarantees. They do their best to inform you about potential risks and outcomes, but it's vital to understand that the nature of auto repair can be unpredictable.
Your vehicle's health hinges on many factors, making guarantees a tricky business.
Warranty Coverage Insights
Many car owners assume that repairs will be guaranteed under warranty, but that's not always the case. Warranty coverage can greatly vary by manufacturer, and many modern vehicles come with limited warranties covering specific repairs for a set number of years or miles.
It's essential to understand that warranties typically exclude wear-and-tear items, like brake pads and tires, which can lead to confusion about what repairs might be covered.
Mechanics often feel frustrated when customers expect certain repairs to fall under warranty, especially when there's a lack of prior maintenance records or if modifications have been made to the vehicle. Some warranties do offer "powertrain" coverage, which protects essential components like the engine and transmission, but exclusions can apply based on the repair's nature.
To navigate warranty coverage effectively, you should familiarize yourself with the specific details of your warranty. Many repairs may require you to provide documentation showing that routine maintenance was performed according to the manufacturer's guidelines.
If not, you risk voiding your warranty, leaving you responsible for unexpected repair costs. Always ask questions to clarify what's covered before assuming any repair will be guaranteed.
Trusting Mechanic Expertise
Trusting a mechanic's expertise can feel intimidating, especially with the complexities of modern vehicles. When you ask, "Can you guarantee this repair?" remember that mechanics often face skepticism. The reality is that today's vehicles are intricate, making absolute guarantees nearly impossible.
Consider these factors that affect trusting mechanic expertise:
- High-tech sensors that control everything from navigation to safety systems
- Expensive parts that may not always be readily available
- Labor costs that reflect specialized knowledge and skill
- Routine maintenance that, if overlooked, compromises repair outcomes
It's important to understand that mechanics aim for transparency in their work. Many customers lack a basic understanding of how these systems operate, leading to unrealistic expectations.
Trust issues are compounded by negative stereotypes, making it essential for you to communicate openly with your mechanic.
Why Are Parts Taking So Long?
You might be wondering why your car parts are taking forever to arrive.
Supply chain issues and increased demand for repairs have created a perfect storm, leaving mechanics waiting longer than ever.
As the complexity of vehicles grows, sourcing specific parts quickly is becoming increasingly difficult.
Supply Chain Issues
Often, customers find themselves frustrated when their vehicles sit idle for weeks or even months due to supply chain issues.
These supply chain disruptions have been worsened by global events, causing significant delays in obtaining essential automotive parts. You might be wondering why this is happening, and here are some key factors at play:
- Semiconductor shortages affecting modern vehicle production
- Bottlenecks in sourcing materials, leading to increased costs
- The complexity of modern vehicles relying on specialized components, such as those requiring performance tuning
- Mechanics often waiting weeks or months for parts to arrive
Each of these factors contributes to the extended repair timelines you're experiencing.
Mechanics are often left in the lurch, unable to provide timely service because the parts simply aren't available. The reliance on advanced technology in vehicles makes it even more difficult to find replacements quickly.
When your car's in the shop, it's not just a minor inconvenience; it's a major disruption to your daily life. Understanding these supply chain disruptions can help you grasp why your mechanic may struggle to give you a precise timeline for your vehicle's repairs.
Increased Demand Factors
In today's automotive landscape, the demand for repair parts often outstrips supply, leading to frustrating delays. Increased demand factors play a significant role in this issue. Rising costs of parts and labor have made repairs more expensive, causing many drivers to delay maintenance. As a result, when repairs are finally needed, the rush for parts can overwhelm supply chains.
Additionally, modern vehicles' reliance on specialized electronics and advanced technology creates a scarcity of specific replacement parts. Mechanics often face prolonged downtime because diagnosing issues in these vehicles requires waiting for components that can take weeks or even months to source.
Supply chain disruptions, fueled by global events and shifting consumer demands, further exacerbate these delays. The automotive industry's trend toward just-in-time inventory management means parts are rarely stockpiled, which leads to longer lead times when unexpected repairs pop up.
In short, if you're wondering why your repair is taking so long, consider these increased demand factors. They're not just a mechanic's excuse; they reflect a complex industry grappling with unprecedented challenges.
What Should I Do Next?
Taking charge of your vehicle's maintenance can seem intimidating, but knowing what to do next is essential for both your safety and your wallet.
So, what should you do next? Start by familiarizing yourself with your car's manual. Mechanics often find that nearly 15% of owners never read theirs, which leads to costly misunderstandings about upkeep.
Here's a quick checklist to help you get started:
- Check for recalls: Stay updated to avoid frustration and potential safety hazards.
- Prioritize routine maintenance: Simple tasks can prevent severe and expensive repairs down the road.
- Learn basic engine mechanics: Empower yourself with knowledge to build trust with your mechanic.
- Address performance issues promptly: Don't ignore warning signs; high repair costs can exceed your vehicle's value.
Frequently Asked Questions
Why Do Some Cars Require More Maintenance Than Others?
Some cars require more maintenance due to complex engineering, higher performance demands, or specific parts. You'll find that luxury or sports models often need frequent checks, while simpler vehicles typically have lower maintenance needs.
Can You Explain the Labor Costs Involved in My Repair?
Sure, labor costs in your repair might seem like a mystery, but they actually reflect the mechanic's expertise, shop overhead, and time spent. So, you're fundamentally paying for peace of mind—what a deal, huh?
How Do You Determine the Right Parts for My Vehicle?
To determine the right parts for your vehicle, we assess its make, model, and year. We also consider the specific issue and consult manufacturer specifications, ensuring you get the best quality and compatibility for your repair.
What Can I Do to Prevent Future Issues?
Preventing future issues is like guarding a treasure; you've gotta maintain your vehicle regularly, check fluid levels, and replace worn parts. Trust me, staying proactive now can save you from costly repairs later!
Why Are Some Repairs Covered Under Warranty and Others Are Not?
Some repairs are covered under warranty because they're caused by manufacturer defects, while others arise from wear and tear or misuse. Always check your warranty details to understand what's included and what's not.
Conclusion
Maneuvering car repairs can feel like wandering through a maze, but you don't have to face it alone. By understanding these tough questions mechanics often dread, you'll empower yourself to make informed decisions. Remember, staying proactive with maintenance can save you time and money in the long run. So, don't hesitate to ask your mechanic for clarity. With the right knowledge, you can steer your car troubles toward smoother roads ahead.
Common Repairs
Headlight Dim? Here’s The Quick Fix Mechanics Keep Secret
Banish dim headlights for good by uncovering the secret mechanics don’t want you to know—discover the quick fix that could change everything!
If your headlights are dim, the quick fix mechanics often overlook is checking the ground connection. A faulty ground wire is responsible for 90% of dimming issues. Inspect your wiring harness for fraying or corrosion, and consider using a power probe to check voltage levels—healthy circuits should show above 9.8V. Rewiring the ground directly to the chassis can stabilize voltage flow. Regular inspections and securing connections also help maintain brightness. By understanding these common culprits, you can tackle dim headlights effectively. Stick around, and you'll uncover even more insider tips to keep your headlights shining bright!
Key Takeaways
- Check the ground wire connections, as 90% of dim headlight issues stem from faulty ground connections.
- Use a power probe to diagnose voltage levels; readings below 12V indicate problems in the circuit.
- Inspect the wiring harness for wear or fraying, which can hinder optimal headlight performance.
- Regularly clean and secure ground connections to prevent voltage drops that lead to dim headlights.
- Conduct periodic inspections of older vehicles to identify and address potential wiring problems early.
Common Causes of Dim Headlights
When dealing with dim headlights, understanding the common causes can save you time and frustration. One major culprit is a faulty ground wire, which accounts for 90% of dim headlight issues. If you notice that one side of your headlights is dimmer than the other, it's likely due to an inconsistent ground connection. The ground wire, typically black, is vital for proper voltage flow and light intensity.
Another common cause is a poor connection within the wiring harness. This harness connects multiple circuits, including high beam, low beam, and ground circuits. If there's wear and tear, it can lead to poor performance.
Aging vehicles are particularly susceptible to these wiring issues, so regular visual inspections of your headlight connections are important. Look for any signs of fraying or disconnection that could impact the brightness of your headlights.
Essential Diagnostic Tools
Identifying the right tools can make diagnosing dim headlights much easier. With the correct equipment, you can pinpoint issues quickly and effectively. Here are some essential tools you should have on hand:
- Power Probe: This tool is preferred over a multimeter for testing headlight circuits, as it provides real-time voltage readings that better indicate the circuit's health.
- Wiggle Method: A practical technique to spot intermittent connections. By physically moving the wiring harness while monitoring the headlights, you can identify trouble spots.
- Direct Ground Signal Tester: This helps you check the integrity of the ground wire in the headlight harness, vital for diagnosing ground issues.
- Voltage Tester: Use this to measure voltage levels; readings below 12V, like 9.8V or 3.7V, can signal underlying problems within the wiring or connections.
Understanding the Repair Process
Repairing dim headlights is often straightforward, especially when you tackle the common culprits. The majority of dim headlight issues are due to a faulty ground connection, accounting for about 90% of cases.
Start by diagnosing the ground problems using a power probe for voltage readings. Healthy circuits usually show voltages above 9.8V. If your readings are below this, you've likely found the source of the issue.
Next, you'll need to identify and rewire the faulty ground wire in the headlight harness to your vehicle's chassis. This step is essential, as a solid connection will guarantee proper voltage flow, restoring your headlights' brightness.
After you've made the necessary repairs, check the voltage readings again to confirm they're back to expected levels.
Don't forget to conduct a visual inspection of the entire headlight wiring and connections. Look for any signs of wear and tear that could affect performance.
Techniques for Wiring and Grounding
Proper wiring and grounding techniques are essential for ensuring your headlights perform at their best. When you focus on these aspects, you'll notice a significant improvement in lighting performance.
Here are some key techniques to take into account:
- Use a master ground: This central connection point stabilizes voltage distribution across your vehicle's electrical systems.
- Opt for nylon braided wire loom: This choice enhances durability and protects your wiring from wear and tear, keeping connections safe.
- Keep ground wires black: Standardizing your ground wire color makes it easier to identify and maintain them, ensuring the integrity of your connections.
- Inspect regularly: Regularly checking and maintaining your ground connections can prevent issues, especially in older vehicles prone to corrosion.
Importance of Ground Connections
When it comes to your headlights, the integrity of the ground wire is essential for ideal brightness.
A solid master ground connection guarantees your headlights get the voltage they need to shine effectively.
If you notice dimming, it's time to check those ground connections before assuming it's a bulb issue.
Ground Wire Integrity
A reliable ground connection is essential for your headlights to shine brightly and consistently. In fact, a bad ground accounts for 90% of dim headlight issues.
When the ground connection is faulty, you can experience significant voltage drops, leading to low readings like 9.8V or even 3.7V. This indicates poor circuit health and can cause inconsistencies in brightness between your high and low beams.
To guarantee your headlights perform at their best, consider these key points:
- Regularly inspect ground connections for wear and tear.
- Rewire the ground connection directly to the chassis for stability.
- Check for any interruptions in the circuit that might affect brightness.
- Understand that proper grounding enhances overall lighting efficiency.
Master Ground Functionality
Ground connections play a vital role in your vehicle's electrical system, acting as the backbone that supports all components, including your headlights. The master ground serves as the central connection point, ensuring every part receives a stable ground reference for ideal performance.
If this connection is compromised, you might face dim headlights, a common issue that stems from poor ground connections, accounting for about 90% of such problems. A faulty ground wire can cause significant voltage drops, with readings plummeting as low as 3.7V. This reduction directly impacts the brightness and overall performance of your headlights.
Regularly inspecting and maintaining your vehicle's ground connections, especially in older models, can help prevent intermittent issues and boost the reliability of your electrical system.
To enhance the effectiveness of these connections, consider using durable materials, like nylon braided wire looms. They outperform less effective alternatives, ensuring your ground connections last longer and function better.
Maintenance Tips for Older Vehicles
Maintaining older vehicles requires a proactive approach to guarantee safe and reliable operation. If you're driving a classic or an older model, focusing on the electrical system can help prevent issues like dim headlights.
Regular maintenance of the electrical components is as essential as understanding the principles behind systems like the refrigeration cycle that promote efficiency and performance. Here are some key maintenance tips to keep your vehicle running smoothly:
- Regularly inspect wiring harnesses for wear, corrosion, or fraying.
- Maintain clean and secure ground connections at the master ground point.
- Use a power probe to check for voltage levels near 12V in the headlight circuit.
- Schedule periodic checks of the electrical system, focusing on ground wires and connections.
Taking these steps can save you from headaches down the road. Remember to replace any worn or damaged wiring using nylon braided wire loom for added durability.
It's also vital to keep those ground connections free from rust, dirt, and loose fittings. By staying ahead of potential problems, you can enjoy a safer driving experience and enhance the longevity of your older vehicle.
Don't underestimate the importance of these simple maintenance tasks; they'll keep your headlights shining bright and your vehicle in top shape!
Enhancing Electrical System Performance
To enhance your vehicle's electrical system performance, start with a solid grounding connection, as poor grounds often lead to dim headlights.
Regularly check the integrity of your wiring harness and address any wear and tear to keep everything running smoothly.
Importance of Good Grounding
A solid grounding connection is essential for ensuring your vehicle's electrical system operates efficiently, especially when it comes to headlight brightness. Did you know that a faulty ground wire accounts for 90% of dim headlight issues? This highlights how crucial proper grounding is in your vehicle's lighting system.
With a good ground connection, you'll notice consistent brightness in your headlights, which is necessary for peak performance.
Here's why good grounding matters:
- Enhanced Brightness: Strong grounds keep your headlights shining brightly.
- Voltage Stability: A reliable ground prevents significant voltage drops, avoiding readings as low as 3.7V.
- Central Connection: Using a master ground boosts the reliability and efficiency of your electrical system.
- Durable Materials: Employing materials like nylon braided wire loom helps prevent future electrical issues.
Don't underestimate the importance of the integrity of your ground wire.
Any wear or damage can seriously compromise your vehicle's electrical performance. By ensuring solid grounding, you can enhance not only your headlights but also the overall functionality of your vehicle's electrical system.
Make grounding a priority for a safer driving experience!
Wiring Harness Integrity
How well do you understand the importance of your vehicle's wiring harness? This vital component connects various circuits, including high beams, low beams, and ground connections, directly affecting your headlights' brightness and functionality.
Issue | Impact on Headlights |
---|---|
Bad ground connection | 90% of dim headlight problems |
Wear and tear | Intermittent connections |
Poor protection | Reduced durability |
Regularly inspecting your wiring harness is essential. Look for signs of wear and tear—this can lead to intermittent connections that can be frustrating. A simple "wiggle method" can help test these connections for reliability.
Additionally, consider using a master ground as a central connection point. This guarantees that all components receive a stable power supply, enhancing your electrical system's performance.
When it comes to protecting your wiring harness, choose nylon braided wire loom over corrugated plastic. It offers greater durability and longevity against environmental factors, which is vital for maintaining peak headlight performance. Remember, a well-maintained wiring harness can greatly reduce issues and keep your headlights shining bright.
Regular Maintenance Practices
Your vehicle's electrical system thrives on regular maintenance practices that guarantee peak performance and longevity. By committing to these practices, you can prevent dim headlights and guarantee ideal functionality.
Here are some key strategies to enhance your electrical system's performance:
- Inspect and clean ground connections regularly, as bad ground issues account for 90% of dim headlight problems.
- Use nylon braided wire loom to protect wiring, enhancing durability and preventing wear over time.
- Conduct voltage checks in the headlight circuit; this helps identify voltage drops that could affect brightness.
- Implement the wiggle method during inspections to detect intermittent connections, which can lead to inconsistent lighting performance.
Additionally, for older vehicles, schedule routine maintenance checks. This proactive approach allows you to address potential wiring issues before they escalate, guaranteeing your electrical system remains reliable.
When you make these maintenance practices a priority, you'll not only enhance your vehicle's lighting but also increase its overall electrical efficiency.
Seeking Further Assistance and Feedback
While dealing with dim headlights can be frustrating, seeking further assistance and feedback from knowledgeable sources can provide valuable insights. If you have specific questions about your headlights, don't hesitate to reach out for personalized troubleshooting. Engaging with mechanics or automotive forums can help you uncover common solutions that mightn't be widely known.
Regular maintenance on older vehicles is essential to prevent issues like wiring degradation, which can lead to dimming headlights. So, consider discussing your vehicle's upkeep with professionals who can offer tailored advice.
Additionally, subscribing to reliable automotive channels can keep you updated on maintenance tips and fixes for common vehicle issues, ensuring you stay informed.
Don't forget to provide feedback on repair videos you watch. Your input can help creators improve their content, making it more useful for others facing similar problems.
Frequently Asked Questions
How Do You Fix a Dimmed Headlight?
To fix dimmed headlights, check the ground wire for faults. Use a power probe for accurate voltage readings, and try the wiggle method to identify loose connections. Rewire the ground to restore brightness effectively.
Why Do My Headlights Seem so Dim?
You're driving down a dark road, but your headlights barely illuminate the path. Dim headlights often stem from a bad ground connection or wiring issues. Regular checks can help you avoid this frustrating situation.
Can You Drive With a Dim Headlight?
You shouldn't drive with a dim headlight. It reduces your visibility and makes it harder for others to see you, increasing the risk of accidents. Fixing it promptly guarantees safety and compliance with traffic regulations.
Why Does My Headlight Work on Bright but Not Dim?
If your headlight works on bright but not dim, it's likely due to a faulty ground connection or an issue in the low beam circuit. Check for loose wires or poor connections to resolve the problem.
Conclusion
Now that you know the common causes and fixes for dim headlights, don't let poor visibility dim your drive. With the right tools and a bit of know-how, you can light up the road ahead. Remember, maintaining good ground connections is like laying a solid foundation for your electrical system. So, keep your headlights shining bright, and don't hesitate to seek help if needed. Your safety's worth the effort—after all, a clear path is a happy journey!
Common Repairs
AC Repair So Easy Mechanics Don’t Want You To Know About It!
Prepare to uncover simple AC repair techniques that mechanics won’t share, and learn how you can save money and boost your skills today!
AC repair isn't as complicated as many mechanics want you to believe. With just a few basic tools—like a multimeter and socket set—you can tackle common issues like weak airflow or warm air from the vents. Simple tasks, such as replacing a capacitor or cleaning filters, can easily save you money. It's essential to check for refrigerant levels and inspect your outdoor unit before calling in professionals. By understanding and applying these DIY techniques, you can effectively maintain your system. Keep going, and you'll discover even more tips to enhance your skills and confidence in AC repairs.
Key Takeaways
- Regularly changing and cleaning air filters can significantly enhance airflow and efficiency, reducing the need for professional help.
- Simple DIY repairs, like replacing capacitors, can be completed in about two hours and save on service costs.
- Checking and recharging refrigerant levels using DIY kits can prevent costly breakdowns and improve system performance.
- Power supply checks and outdoor unit inspections are straightforward tasks that can identify common issues before they escalate.
- Utilizing online marketplaces for cost-effective replacement parts allows you to perform repairs without high mechanic fees.
Common AC Issues Explained
Understanding common AC issues can save you time and money on repairs. One of the most frequent problems you might encounter is weak airflow. This often points to clogged filters or a failing blower motor, both of which can be solved with routine maintenance.
If you're feeling warm air blowing from the vents, it typically means you're dealing with low refrigerant levels or a compressor malfunction. A refrigerant check and potential compressor repair can get your AC running efficiently again.
You should also be aware of unusual smells coming from your system. These odors often indicate mold or bacteria growth in the ducts, which can be tackled by cleaning the system or using specific cleaning solutions.
Listen for strange noises like grinding or squealing, too. These sounds can signal mechanical issues within the AC components, such as the compressor or fan, which may need inspection or replacement.
Lastly, if you notice leaking fluids beneath your vehicle, it might indicate refrigerant leaks or other system failures. Timely diagnostics are essential to prevent further damage and expensive AC repair costs down the line.
Stay proactive, and your AC will serve you well!
DIY Repair Techniques
When it comes to DIY repair techniques for your car's AC system, having the right tools and knowledge can make all the difference. Start by investing in basic tools like a multimeter, insulated screwdrivers, and a socket set, which you can usually get for under $100.
Regularly cleaning and replacing air filters is essential; it greatly improves airflow and system efficiency, helping you avoid costly repairs later on.
You can also check and refill refrigerant levels at home using DIY kits, which saves you money while ensuring your AC compressor functions properly. If you're noticing weak airflow or unusual noises, inspect components like the blower motor and condenser fan yourself. These issues often have straightforward fixes.
Many common repairs, such as replacing capacitors or contactors, can be accomplished in about two hours. By tackling these tasks, you not only extend the lifespan of your AC unit but also gain valuable experience.
Essential Tools for Repairs
When tackling AC repairs, having the right tools is vital for both effectiveness and safety.
You'll need basic hand tools like pliers and wrenches, along with essential safety equipment to protect yourself while working.
Let's explore the must-have tools that can make your repair process smoother and more efficient.
Basic Tool Requirements
Having the right tools on hand is essential for successful AC repairs. With the appropriate basic tools, you can tackle most common issues with ease.
Here's a list of must-haves for your repair toolbox:
- Multimeter: This tool is vital for electrical testing, allowing you to check voltage and continuity.
- Socket Set: A versatile socket set helps you remove and install various parts efficiently, ensuring you've got the right sizes for bolts and nuts.
- Refrigerant Manifold Gauge Set: This set is key for diagnosing refrigerant levels and checking system pressures, helping you identify potential problems quickly.
- Torque Wrench: Use this tool to tighten bolts to the manufacturer's specifications, preventing damage or leaks from improper installation.
Essential Safety Equipment
Before tackling any AC repairs, prioritizing your safety is essential. Start by wearing safety goggles to protect your eyes from refrigerants and debris. This simple step guarantees you can see clearly and work safely throughout the repair process.
Next, insulated gloves are a must. They shield your hands from electrical shocks and sharp components, keeping you safe while you work.
A multimeter is another essential tool; it helps you test electrical circuits and diagnose issues accurately. This way, you can pinpoint faults without guesswork.
Before you access any electrical components, always use a voltage tester. This tool guarantees the power is off, greatly reducing your risk of injury during repairs.
Cost-Effective Replacement Parts
Finding cost-effective replacement parts for your car's air conditioning system can greatly reduce repair expenses and keep your vehicle cool during hot months.
By exploring various options, including understanding the implications of economic transactions, you can save money while ensuring your AC system runs smoothly.
Here are some tips to help you find the best deals:
- OEM Compressors: Look for OEM compressors priced between $150 and $200, which are often more affordable than dealership options.
- Salvage Yards: Consider sourcing used compressors from salvage yards, where prices can be remarkably lower, perfect for DIY enthusiasts.
- Regular Maintenance: Replace contactors and start/run capacitors every five years to prevent costly failures in your AC system.
- Online Marketplaces: Utilize online platforms and appliance stores to find competitive pricing on replacement parts, ensuring cost-effective repairs.
Testing and Troubleshooting Steps
Once you've secured cost-effective replacement parts for your AC system, it's time to confirm everything's working properly. Begin by checking the power supply to verify the circuit breaker isn't tripped and that the thermostat is set to cooling mode with a temperature lower than the current room temperature. Then, inspect the outdoor condensing unit for any signs of compressor and fan activity.
Here's a simple troubleshooting checklist to guide your testing:
Step | Action |
---|---|
1. Power Supply | Check circuit breaker and thermostat settings |
2. Outdoor Unit | Inspect for compressor and fan movement |
3. Thermal Limit Switch | Test continuity to verify it's functioning |
4. Compressor Voltage | Use a multimeter to measure voltage |
5. Refrigerant Levels | Verify and recharge if low |
These steps are critical in diagnosing issues within your air conditioning system. If you find discrepancies in voltage or lack of refrigerant, you may need to take further action or replace faulty components. By methodically testing and troubleshooting, you can confirm your system operates efficiently.
When to Seek Professional Help
If you notice your AC frequently cycling on and off or hear unusual noises, it's time to call in a professional.
Signs like weak airflow or warm air from the vents can point to serious issues that need expert evaluation.
Don't hesitate to reach out for help, especially if DIY fixes haven't worked after a few tries.
Signs of Serious Issues
Sometimes, your air conditioning unit will show signs that something's seriously wrong, and ignoring these clues can lead to bigger problems down the road.
It's essential to recognize these signs to avoid costly repairs. Here are four key indicators that you should seek professional help for your A/C system:
- Frequent Breakdowns: If your A/C unit keeps breaking down despite recent repairs, it's likely time for a professional evaluation rather than more band-aid fixes.
- Inefficient Cooling: When you notice that your unit isn't cooling as efficiently as it used to or the temperatures are inconsistent, this points to deeper issues that need expert diagnosis.
- Unusual Noises: Strange sounds or vibrations during operation often indicate mechanical failures. Addressing these issues with a qualified technician can prevent further damage.
- Rising Energy Bills: If your energy bills have skyrocketed without any changes in usage, this could signal underlying problems with your A/C unit's efficiency, warranting a professional assessment.
Don't wait until it's too late—recognizing these signs early can save you headaches and money in the long run.
Complex System Diagnostics
When your air conditioning system exhibits persistent issues, it's crucial to recognize when to call in the experts. Complex system diagnostics often require specialized tools and knowledge, especially for problems like compressor cycling or electrical failures that basic troubleshooting might miss.
If your AC continues to blow warm air after replacing components like the Climate Control Module or checking refrigerant levels, it's time to consult a professional. A certified technician can accurately assess the high and low side pressures of your AC system, helping to diagnose potential refrigerant leaks or compressor issues that DIY methods might overlook.
Here's a quick guide to help you decide when to seek professional help:
Signs You Need Help | Actions to Take |
---|---|
Persistent warm air | Call a certified technician |
Unusual noises from the unit | Get a thorough evaluation |
Frequent cycling or system failure | Consult an AC specialist |
Frequently Asked Questions
Why Does AC Repair Cost so Much?
AC repair costs so much mainly due to high labor fees, expensive parts, and additional charges for refrigerant services. Frequent breakdowns can lead to costly diagnostics and unnecessary replacements, driving your expenses even higher.
What Is the First Thing to Check When the AC Stops Working?
When your AC stops working, start by checking the thermostat settings. Make sure it's on "cool" and the temperature is lower than the room's. This simple step often resolves the issue quickly.
How Long Does It Take to Learn How Do You Fix AC?
Learning to fix AC takes dedication, patience, and practice. You'll grasp the basics in 3-6 months, gain hands-on experience over 1-2 years, and develop proficiency through regular DIY projects or working alongside experienced technicians.
What Is the Most Common Problem That Can Occur in a Car's AC System?
The most common problem you'll encounter in a car's AC system is low refrigerant levels, often due to leaks. This leads to insufficient cooling, emphasizing the need for regular maintenance and inspection to prevent issues.
Conclusion
Now that you know the ropes, tackling common AC issues can be a breeze. By using the DIY techniques and essential tools we've discussed, you can save both time and money. Just remember, if you hit a brick wall and the problem seems beyond your reach, don't hesitate to call in the pros. With a little effort and know-how, you can keep your cool without breaking the bank!
-
Legal and Regulatory2 months ago
How to File a Complaint With the Bureau of Automotive Repair
-
Legal and Regulatory2 months ago
What Does the California Bureau of Automotive Repair Do
-
Legal and Regulatory2 months ago
How to Get a Bureau of Automotive Repair License
-
DIY Repairs2 months ago
Reset Your Nissan Titan Oil Light Quickly & Easily
-
Legal and Regulatory2 months ago
What Does the Bureau of Automotive Repair Do
-
DIY Repairs2 months ago
Reset Your Chevy Equinox Oil Light Quickly
-
Definitions and Roles2 months ago
What is a Automotive Repair – Expert Guide
-
DIY Repairs2 months ago
Fix Your Car’s Squeaky Brakes With This Simple Household Item!