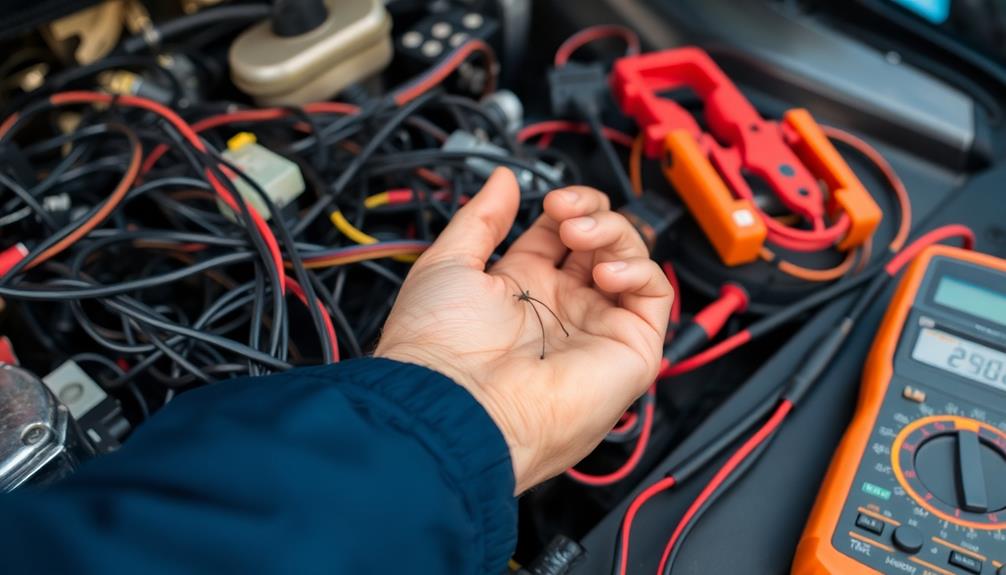
One simple wire can indeed kill your engine forever if it's damaged or improperly insulated. Start by visually inspecting your wiring for frays or exposed areas, especially near metal parts. Check critical ground connections and battery links to verify they're secure and corrosion-free. Use a multimeter to conduct a continuity test, which helps pinpoint shorts. Remember to look for signs of wear in connectors, as constant vibration can lead to shorts. By staying proactive with your electrical diagnosis, you can prevent costly repairs. Stick around, and you'll uncover more tips to protect your engine from these silent threats.
Key Takeaways
- Inspect wiring for damaged insulation, as frayed wires can cause shorts that may lead to engine failure.
- Check ground connections regularly; faulty grounds can disrupt electrical flow and harm engine performance.
- Use a multimeter to conduct continuity tests, identifying potential shorts before they cause significant damage.
- Look for signs of corrosion on connectors and battery terminals, which can impede electrical flow and lead to shorts.
- Regularly inspect wiring harnesses for wear and tear, particularly in areas exposed to vibration and movement.

USANOOKS Microfiber Cleaning Cloth Grey - 12 Pcs (12.5"x12.5") - High Performance - 1200 Washes, Ultra Absorbent Microfiber Towel Weave Grime & Liquid for Streak-Free Mirror Shine - Car Washing Cloth
- High Absorbency Grip Root Weave: Locks in 8-10x weight in liquids
- Lint-Free and Scratch-Resistant: Ensures streak-free mirror shine
- Durable for 1200+ Washes: Long-lasting reusable cleaning cloths
As an affiliate, we earn on qualifying purchases.
Importance of Electrical Diagnosis

When it comes to maintaining your engine's performance, the importance of electrical diagnosis can't be overstated. Ignoring electrical issues can lead to significant problems, including blown fuses and even engine failure. By diagnosing electrical faults early, you can prevent these costly outcomes.
Using tools like a multimeter and test light, you can effectively test circuits for continuity and potential shorts in the wiring.
A thorough visual inspection of your vehicle's wiring and connectors is essential. You might spot frayed insulation or areas where wires come into contact with the chassis—common causes of electrical faults. Understanding the flow of electrical current is also crucial. It helps you recognize how improper grounding can affect sensor readings and other critical systems.
Regular diagnostic testing is your best defense against major electrical failures. By detecting faulty connections or shorts before they escalate, you can save yourself from significant repair bills and the hassle of a breakdown.
Don't underestimate the power of electrical diagnosis; it's your first step in safeguarding your engine and ensuring its longevity. So, take the time to investigate any electrical issues you encounter, and keep your engine running smoothly.
Common Causes of Shorts
When you're troubleshooting electrical issues, damaged wiring insulation, improper ground connections, and connector wear and tear are common culprits that can lead to shorts.
These problems can create direct paths to ground or disrupt signals, causing significant performance issues.
It's crucial to inspect these areas carefully to prevent costly repairs and guarantee your engine runs smoothly. This includes checking for any leaks that may allow fluids that harm your engine to seep into critical components. Ensuring that these fluids are properly contained can help extend the life of your engine and prevent unnecessary wear. Regular maintenance of these systems is key to optimal performance and avoiding unexpected breakdowns.
Damaged Wiring Insulation
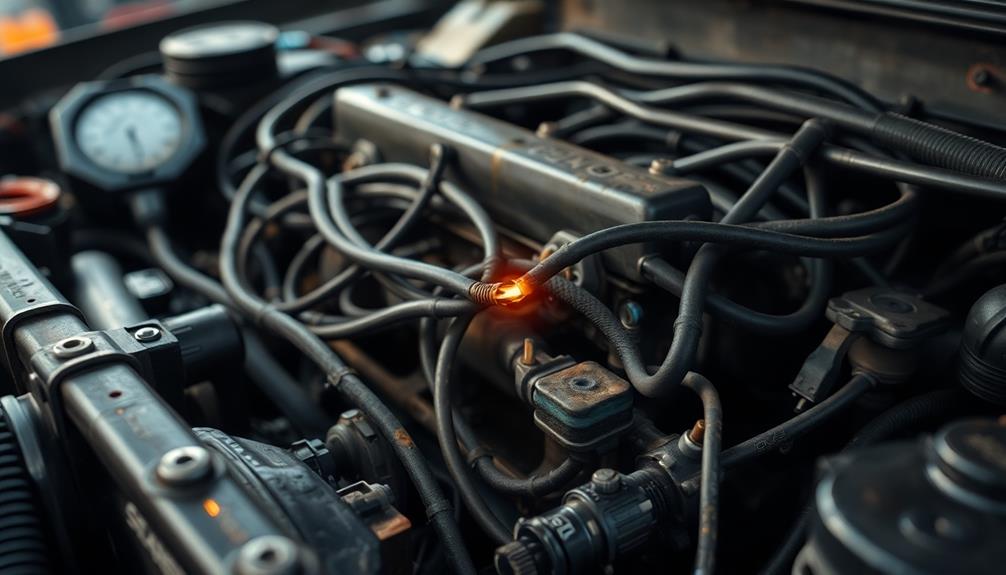
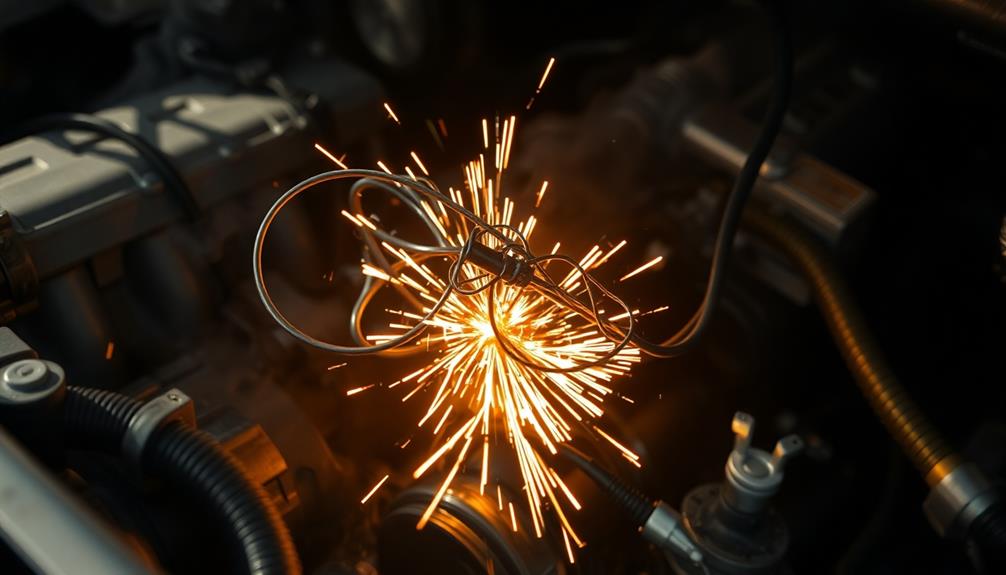
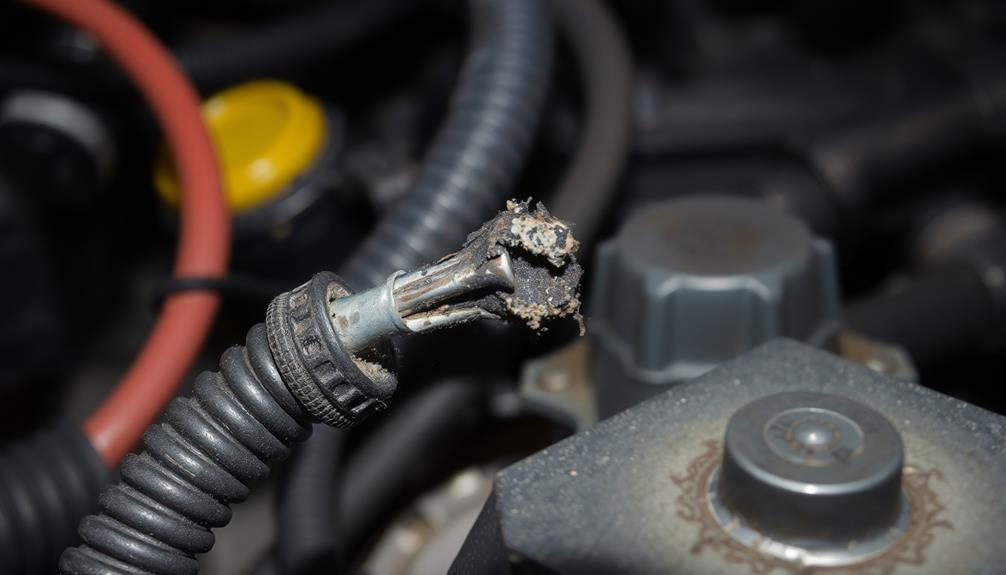
Damaged wiring insulation is a silent yet significant threat to your engine's electrical system. When insulation wears down, it exposes the conductive wire, greatly increasing the risk of shorts to ground. This is a leading cause of blown fuses in vehicles, which can lead to costly repairs or even engine failure.
Common causes of damaged wiring insulation include excessive heat, abrasion from contact with metal surfaces, and environmental factors like moisture or chemicals that degrade the material over time.
During visual inspections, pay close attention to areas where wires might rub against metal parts or experience flexing; these spots are particularly vulnerable to insulation wear.
To identify damaged wiring insulation effectively, use a continuity test with a multimeter. This tool can detect low resistance or a direct connection to ground, indicating a potential short.
Regular checks and maintenance of your wiring insulation can help prevent shorts that compromise your electrical systems and lead to engine issues. By staying proactive, you can save yourself from the frustration and expense of dealing with shorts caused by damaged wiring insulation.
Improper Ground Connections
Improper ground connections can be a hidden menace in your vehicle's electrical system, often leading to shorts that disrupt performance. These faulty connections create a positive short to ground, which can blow fuses and even damage essential electrical components. Worn wires might come into contact with grounded parts or the chassis, resulting in immediate shorts.
That's why regular visual inspections are imperative; they can help you identify problematic wiring before it escalates.
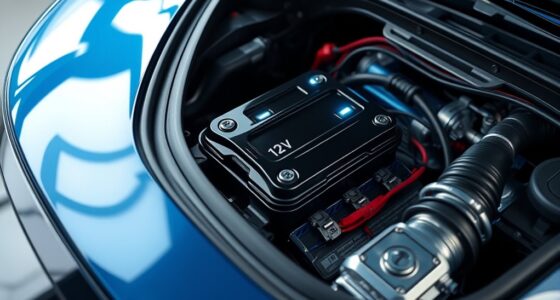
One of the most critical ground connections is the battery's link to the chassis. This connection completes multiple circuits, so any disruption can cause significant performance issues or even engine failure. Additionally, insufficient insulation on positive cables heightens the risk of shorts, underlining the need for maintaining proper wire integrity and connections.
To prevent problems related to improper ground connections, make it a habit to regularly disconnect and inspect your connectors. Look for signs of wear or damage, as catching these issues early can save you from costly repairs and keep your vehicle running smoothly.
Connector Wear and Tear
A vehicle's electrical system can suffer considerably from connector wear and tear, often leading to shorts that compromise performance. This wear usually happens due to constant vibration and movement, which can fray wires within the wiring harness. When these frayed wires touch the chassis, they can short out and blow fuses, disrupting your vehicle's electrical functionality.
Regular maintenance, similar to filter replacement guidelines, can help identify and mitigate issues early on.
One key area to inspect is where wires exit connectors. Repeated bending and flexing can cause the insulation to wear away, exposing conductive materials and increasing the risk of shorts. Corrosion is another culprit that can impede electrical flow, so regular inspections are essential.
Environmental factors like heat and moisture can further accelerate the deterioration of connectors, making them prime suspects in electrical failures.
To proactively identify potential shorts, use a multimeter to check continuity and resistance in connectors. This simple step can save you from significant damage to your engine or electrical system down the line.
Visual Inspection Techniques
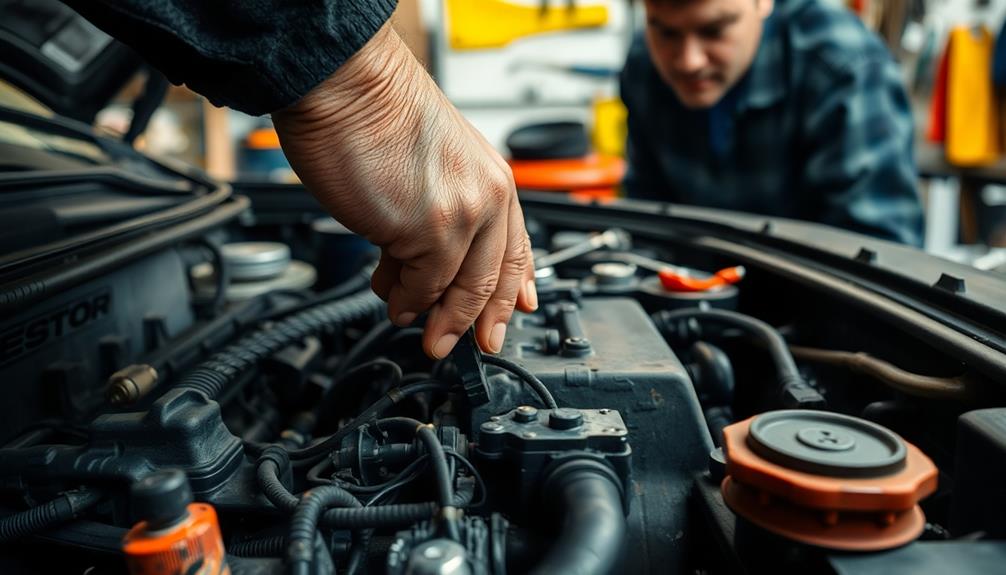
When you're troubleshooting electrical issues in your engine, performing a thorough visual inspection of the wiring is essential. Start by examining wires near connectors, especially in areas where they might rub against the chassis or other components. Look for signs of fraying or corrosion, particularly around the car's battery and ground connections. A compromised ground can impact multiple circuits and cause performance issues.
Here's a quick checklist to guide your inspection:
| Inspection Focus | Signs to Look For | Action to Take |
|---|---|---|
| Wires near connectors | Rubbing or wear | Inspect and replace if necessary |
| Battery ground wiring | Corrosion or loose connections | Clean and secure connections |
| Wiring harnesses | Exposed or damaged insulation | Replace or repair damaged sections |
| Repeated blown fuses | Bad wire condition | Disconnect and visually assess wires |
Regularly inspect the wiring harnesses, paying close attention to areas prone to movement or heat. Identifying these potential issues early can prevent shorts and protect your engine's functionality. Stay vigilant, and you'll keep your engine running smoothly.
Diagnostic Testing Methods
When you're troubleshooting electrical issues, continuity testing is a key method for identifying shorts in your vehicle's wiring.
You can use a multimeter or a test light, but keep in mind that each tool has its limitations—especially when it comes to detecting high-resistance shorts.
Continuity Testing Techniques
Continuity testing techniques are essential for diagnosing electrical issues in your engine. By using a multimeter set to continuity mode, you can check for an uninterrupted path in a wire. A reading of 1 or O indicates an open loop, while any resistance may suggest a potential short. Always power off the circuit before testing to avoid false readings or damage to the multimeter.
You can also use a test light for continuity testing. Connect it to the battery positive and probe the wire in question; if the light illuminates, it indicates a connection to ground. However, be mindful of limitations like high resistance in shorts, which can yield false negatives, or ghost voltage from adjacent circuits.
Here's a quick reference table:
| Method | Usage |
|---|---|
| Multimeter | Set to continuity mode |
| Test Light | Connect to battery positive |
| Circuit Power Off | Prevents false readings |
| Fuse Removal | Systematically isolate circuits |
Identifying shorts through systematic fuse removal helps pinpoint the cause of continuity issues, ultimately aiding in diagnosing engine performance problems.
Test Light Limitations
Many technicians rely on test lights for quick diagnostics, but they come with notable limitations. A test light requires a specific amount of current to illuminate, which means it might miss high-resistance shorts that can still disrupt the circuit.
If you're using a test light and encounter ghost voltage from nearby energized wires, you could be misled into thinking there's continuity when, in fact, there isn't.
Moreover, while a test light can show whether a circuit is complete, it doesn't provide quantitative resistance measurements. That lack of precision makes it inferior to a multimeter, which can reveal the exact resistance levels in the circuit.
This limitation can lead to false negatives in diagnosing shorts, as a test light may not illuminate even when a short is present due to high resistance.
For accurate diagnosis, especially in complex circuits, it's best to use a multimeter alongside your test light. This combination allows for a more thorough evaluation of potential shorts and can help you avoid misdiagnoses that could lead to costly repairs or engine issues.
Understanding Short Types
Understanding the different types of shorts in your vehicle's electrical system is fundamental for effective troubleshooting. Shorts can wreak havoc on your engine, and recognizing their types helps you pinpoint issues faster.
A common type is the positive short to ground, which occurs when a damaged positive wire makes contact with a ground. This can lead to excessive current flow, blowing fuses in your fuse box and potentially harming your engine.
While positive shorts are less frequent, they can happen in high-current circuits. If the current exceeds the fuse rating, you'll face blown fuses. Insulation on positive cables plays a vital role in preventing shorts, as manufacturers guarantee they're adequately insulated to avoid wear and contact with grounded parts.
Another concern is positive shorts affecting signal wires, like those linked to O2 sensors. Although this type of short usually doesn't damage the ECU, it can disrupt readings, leading to performance issues.
Preventing Engine Damage
To keep your engine running smoothly, taking proactive steps to prevent damage is essential. A positive short to ground can wreak havoc on your car, leading to blown fuses and overheating wires, which could ultimately cause severe engine damage.
Here are some key actions you should take:
- Regularly inspect wiring for wear or fraying.
- Use a multimeter for continuity testing to find shorts.
- Maintain proper insulation on positive cables and car battery connections.
- Monitor signal wires, like O2 sensors, for interference from shorts.
By keeping an eye on these aspects, you can prevent shorts that jeopardize your engine's functionality.
Remember that issues like inadequate insulation can lead to shorts, potentially damaging your engine components or electrical systems.
Don't overlook the importance of ensuring your car battery connections are secure and well-insulated.
Frequently Asked Questions
What Is the Best Way to Find a Short Wire?
To find a short wire, use a multimeter to check for resistance, inspect connectors for damage, and employ a test light for continuity. Pull fuses one by one to isolate the problematic circuit.
How Do You Trace a Dead Wire?
To trace a dead wire, start with a visual inspection for damage. Then, use a multimeter to check continuity, and if needed, pull fuses to isolate the circuit causing the issue. Confirm proper grounding throughout.
How to Trace an Electrical Short in a Car?
Tracing an electrical short in your car's wiring is like searching for a needle in a haystack. Start by using a multimeter to check continuity, and inspect wires for damage, isolating circuits by pulling fuses.
How to Find a Bad Wire in a Wiring Harness?
To find a bad wire in a wiring harness, inspect for damage visually, then use a multimeter to check continuity. Probe with a test light to identify shorts and systematically disconnect connectors to isolate issues.
Conclusion
In the tangled web of your engine's wiring, one simple wire can spell disaster. By mastering the art of electrical diagnosis, you can spot potential shorts before they wreak havoc. Picture yourself, tools in hand, confidently exploring your engine's depths—like a detective solving a mystery. With keen eyes and a bit of know-how, you'll not only prevent costly repairs but also guarantee your engine purrs like a well-tuned orchestra for years to come.