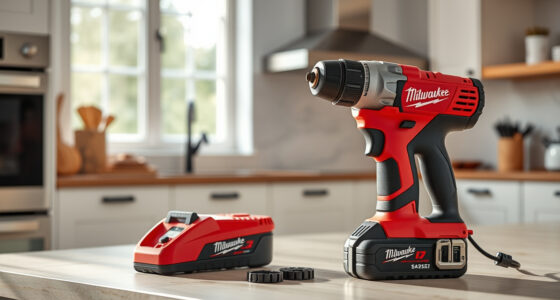

Set up an automotive garage so you can find tools quickly, store heavy equipment safely, and keep floors and work surfaces clear. This guide is for home mechanics organizing a small or medium garage with hand tools, power tools, fluids, and vehicle equipment. The work is beginner-friendly and usually takes 3-6 hours, plus any time needed to install wall-mounted storage.

Get business pricing on garage and car supplies
- Business-only prices and quantity discounts
- Tax-exempt purchasing
- Multiple users, one account, clear invoices

Power Tool Organizer Wall Mount, 4 Tier Heavy Duty Tool Storage Rack
- ✔ Brand: Not specified
- ✔ Material: Alloy steel
- ✔ Shelves: 4 hanging shelves

Ernst Manufacturing 10-Compartment Drawer Organizer – Heavy-Duty Stackable Tray, Low-Profile Toolbox Storage, Red
- ✔ Brand: Ernst Manufacturing
- ✔ Model: 5010-Red
- ✔ Material: High-impact ABS plastic

6-Piece 12" Magnetic Tool Holder Storage Organizer – Wall-Mount Rack for Garage, Workbench, and Slatwall
- ✔ Material: Alloy steel
- ✔ Quantity: 6 magnetic strips
- ✔ Dimensions: 13.78 x 3.54 x 1.97 inches
Difficulty: Beginner | Time: 3-6 hours, depending on garage size
What You’ll Need
Tools & Materials:
- Tape measure
- Pencil and painter’s tape or removable labels
- Toolbox, rolling tool chest, or drawer cabinet
- Wall-mounted pegboard, slatwall, or rail system with compatible hooks
- Heavy-duty shelving for bulky equipment and supplies
- Small parts organizers or divided bins
- Cleaning cloths and waste containers
Knowledge:
- Basic ability to sort tools by type and frequency of use
- Ability to identify wall studs or masonry anchors before mounting storage
Check the weight ratings and installation instructions for every cabinet, shelf, hook, and wall system. Keep flammable liquids, batteries, and chemicals in suitable containers and follow their labels and local fire-safety guidance. If mounting into an unfamiliar wall or installing very heavy storage, get help from a qualified installer.
Power Tool Organizer Wall Mount, 4 Tier Heavy Duty Tool Storage Rack
When a garage has accumulated drills, hand tools, hooks, and other equipment across multiple surfaces, this four-tier rack offers the broadest organizing approach in this lineup. Its four hanging shelves and modular pegboards divide storage by tool type, which can make it easier to return gear to a consistent place. The stated 400-pound capacity also sets it apart from the magnetic strips, whose per-strip limit is much lower and whose usefulness depends on tools being magnetic.That capacity and flexibility come with a more demanding setup. The rack needs a secure wall installation, and the product description specifically calls out wall studs; buyers should plan the layout and mounting before loading it. It also occupies a fixed wall area, whereas the Ernst tray slips into an existing toolbox and the magnetic set can suit narrower spaces. We would choose this rack when garage clutter includes bulky or varied tools and there is a suitable wall. It is less compelling for renters, small collections, or anyone looking only to sort fasteners.
Pros:
- Four shelves and modular pegboards create distinct zones for different tools.
- Stated 400-pound shelf capacity suits heavier storage needs when properly installed.
- Adjustable hooks allow the layout to change as the tool collection changes.
- Wall mounting keeps equipment off benches and floors.
Cons:
- Requires secure installation into wall studs, which can be challenging for beginners.
- Indoor-use design is not intended for outdoor exposure.
Best for: Garage owners who need substantial, adjustable wall storage for power tools and assorted hand tools.
Not ideal for: Renters or beginners who cannot confidently mount a heavy organizer to suitable wall studs, and buyers who only need a small-parts tray.
Bottom line: For garages that need to organize a varied, substantial tool collection on the wall, this rack provides the most complete storage system in the group.
“For garages that need to organize a varied, substantial tool collection on the wall, this rack provides the most complete storage system in the group.”
Ernst Manufacturing 10-Compartment Drawer Organizer – Heavy-Duty Stackable Tray, Low-Profile Toolbox Storage, Red
For the small items that vanish into the bottom of a toolbox, the Ernst tray takes a more contained approach than either wall-mounted pick. Its ten flexible compartments can separate fasteners, bits, and other small gear, while the low-profile shape is intended for shallow drawers. Rolled bottom edges are designed to make small pieces easier to retrieve, addressing a familiar frustration with deep, flat bins.The tray’s role is deliberately narrower than the four-tier rack: it will not organize bulky power tools or free up a crowded workbench. It also depends on a compatible drawer, so deeper compartments may be a poor fit. Stackability can help make use of vertical space inside a toolbox, but it does not change the footprint of the drawer itself. Compared with the magnetic set, the Ernst organizer keeps loose and nonmetallic items contained rather than displayed for immediate access. We would pick it for tidy, portable small-parts storage and skip it if the real problem is larger equipment or wall clutter.
Pros:
- Ten compartments provide flexible separation for small tools and parts.
- Low-profile form is designed for shallow toolbox drawers.
- Stackable trays can help organize multiple layers of small items.
- High-impact ABS is described as fuel- and solvent-resistant.
Cons:
- May not fit deeper toolbox compartments as intended.
- Does not include tools or fasteners.
Best for: Automotive DIYers who want to separate fasteners, bits, and small tools inside a shallow toolbox drawer.
Not ideal for: Buyers organizing bulky tools, deep drawers, or a garage wall; it is a storage tray and does not include tools or fasteners.
Bottom line: This is the most targeted pick for small automotive parts when a shallow toolbox drawer is the storage space that needs attention.
“This is the most targeted pick for small automotive parts when a shallow toolbox drawer is the storage space that needs attention.”
6-Piece 12" Magnetic Tool Holder Storage Organizer – Wall-Mount Rack for Garage, Workbench, and Slatwall
When frequently used pliers, wrenches, screwdrivers, and keys keep disappearing into drawers, six magnetic strips make a simple visible storage zone. The set’s wall-mounted magnetic layout can keep compatible metal tools within reach of a bench, and the listed 10-pound capacity per strip gives buyers a stated limit to consider when arranging their tools. Compared with the four-tier rack, these holders take a more direct, less shelf-based approach to hand tools; compared with the Ernst tray, they favor visibility over containment.The main limitation is what the magnets can hold. Nonmetallic tools and items that do not attach securely are poor matches, and heavier tools should be evaluated against the per-strip capacity rather than assumed safe. Installation also means choosing a suitable surface and taking care with painted walls, since mounting may leave marks. The alloy-steel construction and included screws support a straightforward wall setup, but buyers wanting broad storage for power tools or loose hardware will get more utility from the four-tier rack or drawer tray. We see this as a focused access solution, not a complete garage system.
Pros:
- Six strips create multiple visible holding areas for metal tools.
- Stated magnetic capacity is up to 10 pounds per strip.
- Alloy-steel construction is suited to garage and workshop use.
- Mounting screws are included for wall installation.
Cons:
- Magnets may not securely hold heavier or nonmetallic items.
- Wall installation can mark painted surfaces if not handled carefully.
Best for: Drivers and DIYers who want compatible metal hand tools visible and close to a workbench.
Not ideal for: Anyone storing nonmetallic or heavier tools, or seeking shelves and compartments for a mixed collection.
Bottom line: Choose these strips for quick access to compatible metal hand tools when a full shelf-and-pegboard rack would be more storage than you need.
“Choose these strips for quick access to compatible metal hand tools when a full shelf-and-pegboard rack would be more storage than you need.”
As an Amazon Associate we earn from qualifying purchases.
Before You Start
Plan the layout around the vehicle and the work you do. Leave room to open doors, move around the car, and use a jack or lift according to its instructions. Do not store heavy equipment overhead or place shelves where they could fall onto a vehicle or work area. Set aside a clear path to the exit, electrical panel, and fire extinguisher.
Before buying storage, measure the usable wall and floor space, including door swings and vehicle clearance. Make a quick inventory of your tools and supplies so you can choose storage with the right capacity.
Step-by-Step Instructions
Step 1: Clear and measure the work area
Move the vehicle out, then clear the floor and work surfaces. Measure each usable wall, note doors, windows, outlets, and obstructions, and mark the vehicle’s parking footprint with removable tape. Keep the marked area clear enough for the doors to open and for you to walk around the vehicle.
Tip:Do not plan storage in front of an electrical panel, exit, or fire extinguisher.
Check: You have written measurements and a clear outline of the space the vehicle and walkways need.
Step 2: Sort tools and supplies
Group items by task: hand tools, power tools, fasteners, vehicle-specific tools, cleaning supplies, and fluids. Remove broken or duplicate items you do not need, and set aside anything that needs repair. Put small fasteners and fittings into labeled containers instead of leaving them loose.
Tip:Keep chemicals in their original containers so labels and hazard information remain available.
Check: Each item belongs to a clear group, and loose small parts are contained.
Step 3: Choose storage for each group
Assign frequently used hand tools to a toolbox, tool chest, or visible wall system near the main work area. Use a rolling chest for tools you move between jobs. Reserve sturdy shelves for bulky items such as a shop vacuum, fluid containers, and spare parts. Use small divided organizers for sockets, fasteners, fuses, and electrical connectors.
Tip:Check load ratings before placing heavy tools or supplies in drawers or on shelves. A full drawer can weigh more than it looks.
Check: Every group has a storage location with enough space and a suitable weight rating.
Step 4: Install wall storage securely
Follow the storage manufacturer’s instructions to install pegboard, slatwall, rails, or shelves. Locate wall studs or use anchors rated for the wall type and expected load. Keep heavier items low, distribute weight across the mounting points, and avoid placing hooks where tools could fall onto a car or walkway.
Tip:Do not rely on a single drywall screw for heavy equipment. If you cannot confirm the wall structure or anchor rating, use freestanding storage or ask a qualified installer.
Check: The mounted system does not shift when lightly loaded, and heavier items have stable support.
Step 5: Arrange tools by how you use them
Put everyday tools at arm’s reach from the main workbench or service area. Group related tools together, such as ratchets beside sockets and measuring tools beside layout tools. Place rarely used specialty tools in labeled drawers or bins. Leave a clear section of wall or bench for temporary job staging.
Tip:Arrange wall tools so each one has a visible outline or labeled position. Missing tools are easier to spot when every item has a home.
Check: You can retrieve common tools without moving unrelated equipment, and the work surface remains usable.
Step 6: Store heavy and hazardous items safely
Set heavy equipment on low shelves or the floor in stable positions. Secure cylinders or other items that can tip, and store batteries and chemicals according to their labels. Keep fuel, solvents, oily rags, and other flammable materials away from heat, sparks, and ignition sources. Store jacks, jack stands, and lifting accessories where they are easy to inspect before use.
Tip:Never use a storage shelf as a substitute for vehicle support equipment. Follow the vehicle and lifting-equipment instructions whenever you work under a car.
Check: Heavy items cannot fall from overhead storage, hazardous products are labeled and contained, and lifting equipment is accessible for inspection.
Step 7: Label locations and test the layout
Label drawers, bins, and shelves with plain names such as “metric sockets,” “electrical,” or “brake tools.” Put each tool away, then simulate a typical job by finding a few commonly used items and returning them. Move any storage that blocks access, crowds the vehicle, or makes frequently used tools awkward to reach.
Tip:Use labels that describe contents rather than temporary projects so the system still makes sense after a job is finished.
Check: You can locate and return common tools without searching through mixed containers or blocking a walkway.
Step 8: Set a simple reset routine
After each job, return tools to labeled locations, wipe down the bench, and dispose of waste using the appropriate local rules. Once a month, check that wall hooks, shelf fasteners, and drawer slides remain secure. Reassign storage when a new tool no longer fits its group.
Tip:Keep a small empty tray for tools in use during a repair, then empty it when the job is complete.
Check: The garage can return to its organized state in a few minutes after ordinary work.
Common Mistakes to Avoid
- Buying storage before measuring the garage and vehicle clearance. — Measure walls, door swings, walkways, and the parked vehicle footprint before choosing cabinets or shelving.
- Putting heavy tools on high shelves or weak wall mounts. — Check load ratings, mount into suitable structure, and keep the heaviest items low.
- Mixing small parts and leaving containers unlabeled. — Use divided organizers and label them by part type or job category.
- Placing frequently used tools in hard-to-reach storage. — Keep everyday tools near the work area and reserve distant or high storage for occasional items.
Troubleshooting
Problem: Wall hooks or shelves loosen after installation.
Solution: Remove the load, check the mounting instructions and wall type, and replace unsuitable fasteners with correctly rated anchors or stud-mounted hardware. Do not reload the system until it is stable.
Problem: The tool chest drawers are difficult to open or feel unstable.
Solution: Redistribute heavy tools into lower drawers, remove excess weight, and check the chest’s load rating and caster locks. Place the chest on a level floor.
Problem: The planned storage blocks vehicle doors or the walking path.
Solution: Recheck the taped vehicle footprint, move storage to another wall, or use a narrower cabinet. Keep access routes and the exit clear.
Problem: Tools keep ending up on the bench or floor.
Solution: Add a labeled home for the items you use most, and keep a temporary job tray for tools currently in use. Return the tray contents after each job.
What Success Looks Like
The finished garage has clear vehicle access and walkways, stable storage suited to each item’s weight, labeled homes for tools and small parts, and no hazardous materials or heavy tools stored carelessly. You can find and return common tools without moving unrelated items, and the workbench remains clear enough for the next job.
Next Steps
Use the reset routine after each repair and inspect wall mounts, shelves, and rolling cabinets monthly. When you add equipment, decide where it belongs before bringing it into the garage. If the tool collection grows beyond the available rated storage, revise the layout instead of stacking items in walkways or overhead.
Frequently Asked Questions
Should I use a pegboard or a tool chest?
Use a pegboard or compatible wall system for frequently used tools you want to see at a glance. Use a tool chest for heavier tools, portable storage, and items that need protection from dust. Many garages benefit from both.
How high should I mount garage shelves?
Mount shelves at a height that keeps their contents accessible and clear of vehicle doors and walkways. Store heavy items low. Follow the manufacturer’s mounting guidance and the wall’s load limits rather than choosing a height based only on available space.
Where should I store automotive fluids and chemicals?
Keep products in their original, closed containers and follow the label for temperature, ventilation, and separation requirements. Keep flammable products away from heat and ignition sources, and use local guidance for disposal of unwanted fluids.
How do I organize sockets and small fasteners?
Use divided organizers or labeled socket rails. Group sockets by drive size and measurement system, and keep fasteners separated by type and size. Labels help prevent mixing similar-looking parts.
How often should I check garage storage?
Return tools after each job. Check mounted storage, shelf hardware, caster locks, and containers about once a month, and inspect them sooner if a shelf shifts or a cabinet becomes difficult to move.