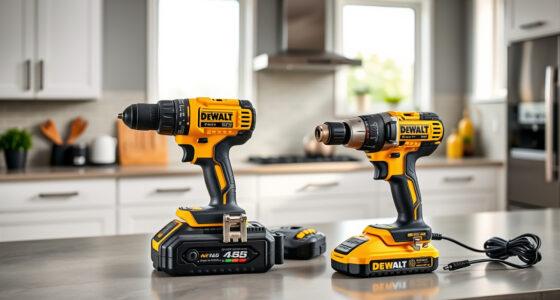
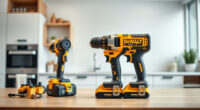
Getting started with your new Milwaukee power tools can seem daunting, but with the right approach, you can set them up quickly and safely. Whether you’re a professional or a DIY enthusiast, proper setup ensures optimal performance, longevity, and safety. This guide walks you through the essential steps to assemble, charge, and troubleshoot your Milwaukee M18 tools, focusing on safety and efficiency.

Get business pricing on garage and car supplies
- Business-only prices and quantity discounts
- Tax-exempt purchasing
- Multiple users, one account, clear invoices
We’ll cover setting up the tools, installing batteries, connecting accessories, and common troubleshooting tips to help you get the most out of your investment.
Key Takeaways
| Power System Compatibility | Ensure batteries are compatible with Milwaukee M18 tools for best performance. |
| Proper Battery Installation | Insert batteries correctly to avoid damage and ensure secure connection. |
| Safety First | Always wear safety gear and follow manufacturer guidelines during setup. |
| Connecting Accessories | Use appropriate accessories and verify they are properly attached. |
| Troubleshooting Basics | Identify common issues like battery charging or tool malfunctions and resolve them safely. |
Unboxing and Initial Inspection
- Carefully unpack all components from the Milwaukee M18 18V Cordless Power Tool Combo Kit. Confirm you have all 8 tools, 3 batteries (including the high-capacity 5.0 Ah and 6.0 Ah batteries), charger, and two heavy-duty contractor bags.
- Inspect each tool and accessory for any visible damage or defects. Do not use damaged items; contact Milwaukee support if needed.
- Familiarize yourself with each tool’s specific features and safety instructions found in the user manual.
Charging and Preparing Batteries
- Connect the included rapid charger to a suitable power outlet. Ensure the area is dry and free of clutter.
- Insert each battery into the charger, ensuring it clicks into place. The LED indicator will show charging status—red for charging, green for full.
- Allow batteries to fully charge before first use, especially the high-capacity 5.0 Ah and 6.0 Ah batteries, to maximize runtime.
- Once charged, remove batteries and store them in a cool, dry place if not immediately used.
Installing Batteries and Connecting Tools
- Align the battery contacts with the slot in the tool, then slide the battery in until it clicks securely. Always verify the battery is fully seated before use.
- Turn on each tool to verify proper operation. If a tool doesn’t power on, re-seat the battery or check the battery charge level.
- Attach any accessories, such as drill bits or blades, following the manufacturer’s instructions and ensuring they are tightly secured.
Safety Tips and Best Practices
- Wear appropriate PPE (personal protective equipment) like safety glasses, gloves, and hearing protection during setup and use.
- Always work in a clean, well-lit area to avoid accidents.
- Double-check that batteries are correctly installed and that tools are in good condition before operation.
- Avoid overcharging batteries or exposing them to extreme temperatures to prolong their lifespan.
Troubleshooting Common Issues
- If a tool doesn’t turn on, verify the battery is charged and correctly installed. Try a different battery if available.
- For weak performance, check if the battery needs recharging or replacing. Use Milwaukee’s high-capacity batteries for extended runtime.
- If the charger indicates an error, ensure the battery contacts are clean and free of debris.
- Consult the user manual for specific error codes or issues related to your model.
Storing and Maintaining Your Tools
Store your Milwaukee tools and batteries in a dry, cool place, ideally in the provided tool bags or a toolbox. Regularly inspect and clean the tools and battery contacts to ensure optimal performance. Follow manufacturer recommendations for maintenance to extend the lifespan of your equipment.
The Products in This Guide
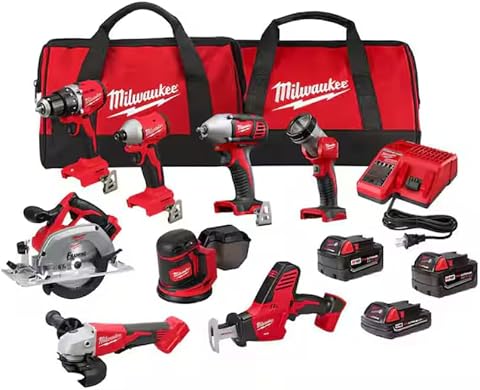
Milwaukee M18 18V Cordless Power Tool Combo Kit
- ✔ Voltage: 18V
- ✔ Number of Batteries: 3
- ✔ Tool Count: 8
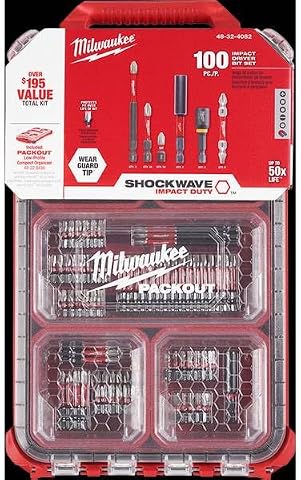
Milwaukee Shockwave 100pcs Impact Driver Bit Set Packout
- ✔ Impact Rated: Yes
- ✔ Case Type: Packout
- ✔ Number of Pieces: 100
Milwaukee M18 18V Cordless Power Tool Combo Kit
<p>The Milwaukee M18 18V Cordless Power Tool Combo Kit offers a comprehensive set of tools suitable for a wide range of tasks, from drilling to demolition. Its robust build, versatile batteries, and included storage solutions make it a reliable choice for any jobsite or workshop.</p>
Pros:
- Includes 8 powerful tools for various applications
- Three batteries for extended runtime
- Heavy-duty contractor bags for organization
- Fast charger minimizes downtime
Cons:
- Initial investment is higher
- Tools may be heavy for prolonged use
Best for: Construction, remodeling, maintenance projects requiring versatile power tools
Not ideal for: Light-duty or occasional hobbyist use; prefer smaller, less expensive options
Bottom line: A versatile, high-performance kit ideal for demanding construction and remodeling tasks.
Milwaukee Shockwave 100pcs Impact Driver Bit Set Packout
<p>This impact driver bit set offers 100 pieces packed in a durable Packout case, perfect for attaching to Milwaukee power tools for various tasks. It enhances the usability and efficiency of your setup.</p>
Pros:
- Extensive variety of bits
- Packout case for portability
- Durable construction
- Compatible with Milwaukee impact drivers
Cons:
- More bits than some users need
- Case may be bulky for small storage
Best for: Professional contractors and serious DIYers needing reliable impact bits
Not ideal for: Casual hobbyists with minimal bit needs
Bottom line: A comprehensive impact bit set that complements Milwaukee’s power tools for maximum versatility.
Frequently Asked Questions
How do I safely charge my Milwaukee batteries?
Always use the included rapid charger and connect it to a dry, grounded outlet. Do not leave batteries charging unattended for long periods and avoid exposing them to extreme temperatures.
What should I do if my tool isn’t turning on?
Check that the battery is properly installed and fully charged. If the problem persists, try a different battery or inspect the tool for any visible damage or obstructions.
Can I use different batteries across Milwaukee tools?
Yes, all batteries in the M18 platform are compatible with any M18 tools, provided they are the correct voltage and type. Use high-capacity batteries for longer runtime.
How do I prevent batteries from overheating?
Avoid prolonged heavy use and do not operate the tool continuously for extended periods. Store batteries in a cool, dry place and let them cool down between heavy tasks.
What maintenance is recommended for my Milwaukee tools?
Regularly clean the tools and battery contacts, inspect for damage, and store in a dry environment. Follow specific maintenance instructions in the user manual for each tool.
Power Up Your Projects with Confidence
Setting up your Milwaukee power tools correctly not only ensures safety but also maximizes performance and durability. By following these steps—unboxing, charging, installing batteries, and adhering to safety tips—you’ll be ready to tackle your projects efficiently. Remember, well-maintained tools and proper setup are key to successful and safe work in any construction or renovation environment.
Affiliate disclosure: As an Amazon Associate we earn from qualifying purchases. Prices and availability are accurate as of the time of publishing.
Fall Picks
fall essentials
As an affiliate, we earn on qualifying purchases.