Replacing your thermostat yourself can boost your home’s comfort and cut energy costs by giving you better control over your heating and cooling. Before starting, turn off the power to avoid shocks or damage. Carefully disconnect the old thermostat, label or photograph the wires, then install the new device following the manufacturer’s instructions. Once everything is connected, restore power and test your new thermostat. Keep going to find out how each step can be done safely and effectively.
Key Takeaways
- Turn off power to your HVAC system to ensure safety before starting.
- Remove the old thermostat, label wires, and take a photo for accurate reconnection.
- Mount the new thermostat securely in the same location, ensuring it’s level.
- Connect the wires to the correct terminals according to the manufacturer’s instructions.
- Restore power, test the system, and verify proper heating or cooling operation.
Replacing your thermostat yourself can be a straightforward way to improve your home’s heating and cooling efficiency. When you handle this task on your own, you gain control over your energy use, which can lead to lower utility bills and a more comfortable environment. The key is to approach the project with careful attention to safety precautions and a clear understanding of the process. Before you begin, turn off the power to your HVAC system to prevent electrical shocks or damage. This step is vital for your safety and helps you work confidently without the risk of short circuits or injury.
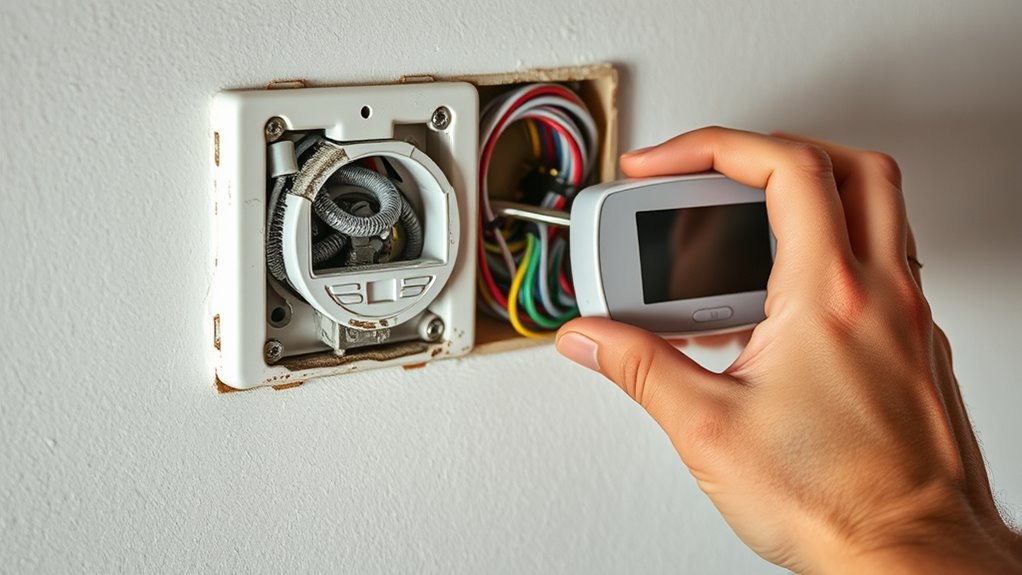
Once the power is off, remove the old thermostat by carefully disconnecting the wires. It’s important to take note of how the wires are connected, either by labeling them or taking a photo. This guarantees you can correctly connect the new thermostat later. When handling wiring, avoid touching any exposed metal parts and use insulated tools if necessary. Always double-check that the power remains off before proceeding. This attention to safety precautions helps prevent accidents and keeps your project on track. Additionally, understanding the efficiency ratings of your new thermostat can help optimize your system’s performance and energy savings.
After disconnecting the old thermostat, mount the new one in the same location, making sure it is level and securely attached to the wall. Follow the manufacturer’s instructions for wiring, matching the wires to the corresponding terminals on the new thermostat. Proper wiring is essential for maximum energy efficiency; incorrect connections can cause your system to malfunction or waste energy. Once everything is connected, restore power to your HVAC system and test the new thermostat to confirm it functions properly. Set the temperature and verify that your heating or cooling system responds accordingly.

New! Honeywell Home Programmable Thermostat, Single-Stage, 1 Heat/1 Cool Compatibility, 5-2 Day Schedule, X2P, White, RTH20B
CUSTOMIZE: Choose to receive change air filter reminders and select display settings to optimize this thermostat for home.The…
As an affiliate, we earn on qualifying purchases.
As an affiliate, we earn on qualifying purchases.
Frequently Asked Questions
Can I Replace My Thermostat Without Turning off the Power?
No, you shouldn’t replace your thermostat without turning off the power. For safety precautions, always switch off the circuit breaker before starting. Refer to wiring diagrams to understand the connections, and make sure you disconnect the wires carefully. Leaving power on risks electric shock or damaging your system. Taking these steps helps protect you and ensures a smooth installation. Always prioritize safety when handling electrical components.
What Tools Are Essential for DIY Thermostat Replacement?
You’ll need a few essential tools for DIY thermostat replacement. Start with wiring diagrams to guide your connections accurately, ensuring safety and proper setup. A voltage tester is vital to confirm power is off before handling wires, preventing shocks. Additionally, keep a screwdriver set for removing and installing the thermostat, and possibly pliers for handling wires. These tools make the process safer and more straightforward, helping you complete the replacement confidently.
How Do I Know if My New Thermostat Is Compatible?
You can determine if your new thermostat is compatible by checking its wireless compatibility with your system, ensuring it connects seamlessly. Also, verify the voltage requirements match your existing wiring—most homes use 24V, but some systems need 110V or others. Read the manufacturer’s specifications carefully and compare them with your current setup. If everything aligns, your new thermostat should work perfectly with your heating or cooling system.
How Long Does a Typical Thermostat Replacement Take?
Replacing a thermostat is like turning a new page in your home’s story. Typically, the installation timeline takes about 30 minutes to a few hours, depending on your skills and setup. You can streamline the process by following troubleshooting tips, like double-checking connections and reading the manual carefully. With patience and attention to detail, you’ll have your new thermostat up and running smoothly in no time.
What Are Signs the Thermostat Needs Replacement Immediately?
You should replace your thermostat immediately if you notice signs of thermostat failure, like inconsistent heating or cooling, or if it’s unresponsive. Sudden temperature drops can also indicate a malfunction. If your system struggles to maintain the desired temperature or if the thermostat display shows errors, it’s time to act. Ignoring these signs can lead to higher energy bills and discomfort, so don’t delay in getting it checked or replaced.

270 PCS Tear Resistant Cable Labels, 9 Colors Waterproof Cable Tags Wire Labels for Management, Cord Label Can Write On, Self Adhesive Wire Label Printable for Laser Printer and Handwriting
Size and Quantity: Contains 9 colors, including red, orange, yellow, blue, light blue, purple, light green, green, and…
As an affiliate, we earn on qualifying purchases.
As an affiliate, we earn on qualifying purchases.
Conclusion
Just like the steady hand of a conductor guiding an orchestra, your quick action keeps your home warm or cool. With a little effort, you’ve taken control of your comfort, ensuring the harmony of your living space. Remember, you hold the power to maintain your sanctuary—no need to wait for help. By replacing your thermostat yourself, you’ve become the master of your environment, turning a simple task into a triumph of DIY craftsmanship.
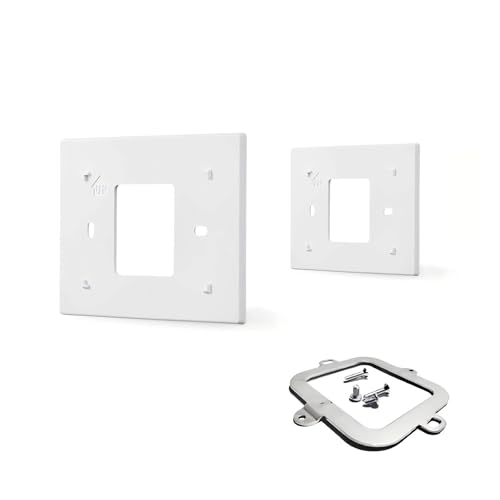
THP2400A1027W Thermostat Wall Plate Back Plate White Cover Assembly (1)
THP2400A1027W Thermostat Wall Plate Compatibility:RTH9585WF1004、TH9320WF5003、RTH9580WF、RTH6570E、RTH9585WF,RTH9600WF
As an affiliate, we earn on qualifying purchases.
As an affiliate, we earn on qualifying purchases.

Google Nest Thermostat Trim Kit – Made for the Nest Thermostat – Programmable Wifi Thermostat Accessory – Snow
The Nest Thermostat Trim Kit is designed to cover imperfections on your wall from removing your old thermostat.What's…
As an affiliate, we earn on qualifying purchases.
As an affiliate, we earn on qualifying purchases.