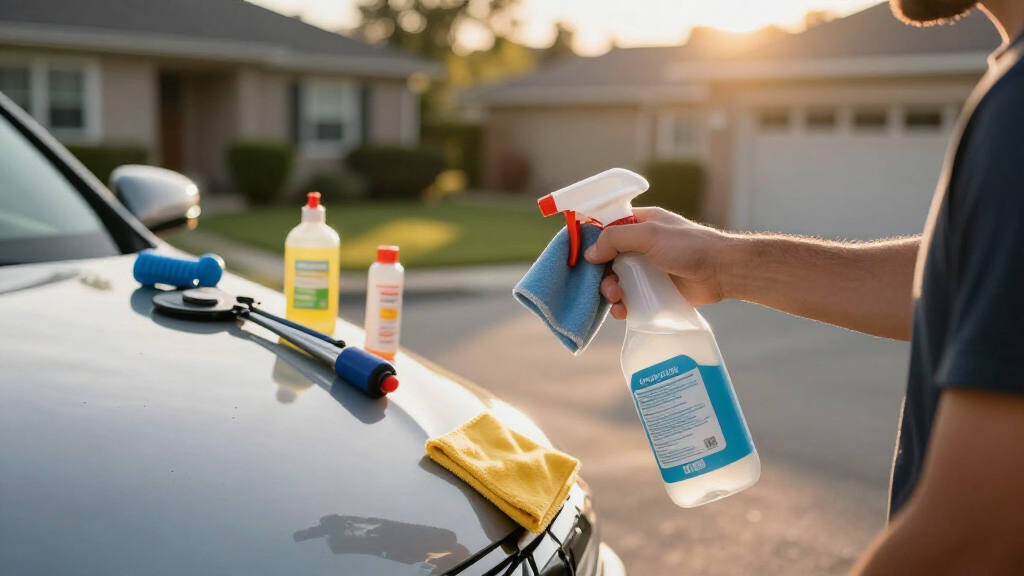
This guide provides step-by-step instructions on how to use a car detailing kit to thoroughly clean and enhance your vehicle. It is designed for beginners who want a comprehensive understanding of the process, tools, and techniques to achieve professional-looking results. Whether you’re preparing your car for sale, maintaining its appearance, or just want a satisfying cleaning session, this guide will walk you through the necessary steps to use a detailing kit effectively and safely.

Get business pricing on garage and car supplies
- Business-only prices and quantity discounts
- Tax-exempt purchasing
- Multiple users, one account, clear invoices

17pcs Pink Car Cleaning Kit with Handheld Vacuum & Detailing Tools
- ✔ Number of Pieces: 17
- ✔ Vacuum Power: 7500Pa
- ✔ Vacuum Length: 15 feet

35-Piece Car Detailing Kit with Tools and Accessories
- ✔ Number of Pieces: 35
- ✔ Weight: 5.02 pounds
- ✔ Package Dimensions: 14.37 x 7.76 x 7.76 inches

17pcs Car Detailing Kit Interior Cleaner with Handheld Vacuum and Accessories
- ✔ Number of Pieces: 17
- ✔ Includes: Portable vacuum, gels, brushes, microfiber towels, windshield cleaner, spray bottle, storage bag
- ✔ Suction Power: 8000pa
Difficulty: Beginner | Time: 2-3 hours
What You’ll Need
Tools & Materials:
- Car detailing kit (containing cleaning solutions, microfiber cloths, brushes, applicators, wax or polish)
Knowledge:
- Basic understanding of car surfaces (paint, glass, plastics) and safety precautions
Make sure your car is parked in a shaded, well-ventilated area. Read all instructions on your detailing products before use. Wear gloves if recommended by the product manufacturer.
17pcs Pink Car Cleaning Kit with Handheld Vacuum & Detailing Tools
<p>This kit stands out for its <strong>powerful handheld vacuum</strong> with 7500Pa suction and versatile tools, making it ideal for quick and thorough interior cleaning. Compared with larger kits, its <strong>compact size and included storage bag</strong> make it perfect for car owners who want convenience on the go. However, the <strong>limited cord length</strong> and some durability concerns noted by users suggest it’s better suited for light to moderate cleaning rather than heavy-duty exterior work.</p>
Pros:
- Powerful suction for interior dirt removal
- Complete set of interior and exterior cleaning accessories
- Portable with a dedicated storage bag
Cons:
- Tools may require careful handling to prevent damage
- Vacuum cord length limits mobility in larger vehicles
- Durability concerns reported by some users
Best for: Car owners who prioritize interior cleaning and portability
Not ideal for: Those needing heavy exterior or polishing tools, or larger vehicle coverage
Bottom line: A compact, powerful option ideal for interior cleaning and quick touch-ups, but less suited for heavy-duty exterior work.
“A compact, powerful option ideal for interior cleaning and quick touch-ups, but less suited for heavy-duty exterior work.”
35-Piece Car Detailing Kit with Tools and Accessories
<p>This extensive 35-piece set is perfect for those who want a <strong>professional-grade, all-in-one solution</strong>. It includes a wide array of brushes, pads, microfiber towels, and specialized tools, including a <strong>windshield cleaning system</strong> and <strong>drill attachments</strong> for power-assisted polishing. Compared to smaller kits, it offers <strong>more variety and depth</strong>, but the <strong>heavier weight and need for a compatible drill</strong> can be drawbacks for casual users.</p>
Pros:
- Wide variety of tools for complete car care
- Includes a windshield cleaning system for all-weather visibility
- Double the wax pads of standard kits for better polishing
Cons:
- Drill not included, requiring compatible equipment
- Some tools are highly specialized and may be unnecessary for basic cleaning
- The kit’s weight can make transport and storage cumbersome
Best for: DIY enthusiasts and detailers seeking a versatile, comprehensive kit
Not ideal for: Casual users or those without a drill, due to weight and tool complexity
Bottom line: Offers unmatched variety and professional features, making it best for detailed DIYers willing to handle a heavier, more complex kit.
“Offers unmatched variety and professional features, making it best for detailed DIYers willing to handle a heavier, more complex kit.”
17pcs Car Detailing Kit Interior Cleaner with Handheld Vacuum and Accessories
<p>This kit makes interior maintenance straightforward with its <strong>powerful 8000pa vacuum</strong> and all-in-one set of brushes, microfiber towels, and cleaning gels. Compared to larger exterior-focused kits, it offers a <strong>focused approach to interior upkeep</strong> and includes <strong>reusable microfiber pads</strong> for eco-friendly cleaning. However, it may not provide enough tools for exterior detailing or heavy-duty scrubbing.</p>
Pros:
- High suction power for dirt removal
- Includes reusable microfiber pads for eco-conscious cleaning
- Convenient extension handle with rotatable head
Cons:
- Limited to interior-focused cleaning tasks
- No heavy-duty exterior tools included
- Requires manual effort for deeper cleaning tasks
Best for: Car owners who want an effective interior cleaning solution and regular maintenance
Not ideal for: Those seeking a full exterior detailing or heavy-duty cleaning kit
Bottom line: A focused, effective interior cleaning kit best suited for regular maintenance rather than heavy-duty detailing.
“A focused, effective interior cleaning kit best suited for regular maintenance rather than heavy-duty detailing.”
As an Amazon Associate we earn from qualifying purchases.
Before You Start
Ensure your vehicle is cool and out of direct sunlight to prevent streaking or quick drying of products. Gather all tools and materials beforehand. Remove trash, personal items, and loose debris from inside the car. Protect sensitive areas like electronic controls and vents from excess moisture.
Step-by-Step Instructions
Step 1: Prepare your vehicle and workspace
Park your car in a shaded area and open all doors and windows. Remove trash, personal belongings, and loose debris from inside the vehicle. Rinse the exterior with water to remove loose dirt and prevent scratching during cleaning.
Tip: Use a hose with a gentle spray setting to avoid damaging paint. Avoid cleaning in direct sunlight, which can cause products to dry too quickly and leave streaks.
Check: The vehicle is free of loose dirt and the surface is wet but not muddy, ready for detailed cleaning.
Step 2: Wash the exterior
Mix car wash solution according to the product instructions. Use a microfiber wash mitt or sponge to wash the car from top to bottom, rinsing frequently to remove dirt. Cover all surfaces, including the wheels and tires.
Tip: Use a two-bucket method: one for soapy water and one for rinsing your mitt, to minimize dirt transfer and scratching.
Check: The car’s surface is clean and free of dirt, with no visible mud or grime. The water sheets off smoothly.
Step 3: Dry the exterior
Use a clean, dry microfiber towel or chamois to gently dry the vehicle. Pat or wipe the surface to prevent water spots. Focus on seams, door jambs, and crevices.
Tip: Dry the car in sections to avoid water evaporation spots. Use a blower for hard-to-reach areas if available.
Check: The surface is evenly dry, with no streaks or water spots remaining.
Step 4: Clean the wheels and tires
Apply a wheel and tire cleaner to the wheels and tires. Use a dedicated wheel brush and tire scrubber to agitate and loosen brake dust and grime. Rinse thoroughly with water.
Tip: Avoid using harsh brushes that can scratch the wheel surface. Use separate brushes for tires and wheels to prevent cross-contamination.
Check: Wheels and tires appear clean, shiny, and free of brake dust or grime.
Step 5: Clay bar treatment (optional but recommended)
If the paint feels rough or has embedded contaminants, use a clay bar lubricated with a detailing spray. Gently glide the clay over the surface in straight lines until it feels smooth.
Tip: Do not press hard; let the clay do the work. Keep the surface well-lubricated to prevent marring.
Check: The paint feels smooth to the touch and looks glossy, with no embedded contaminants.
Step 6: Apply paint cleaner or polish (if needed)
Apply a small amount of polish or paint cleaner to an applicator pad. Work in small sections using circular motions. Remove excess with a clean microfiber cloth.
Tip: Test on a small area first to check compatibility. Use light pressure to avoid damaging the paint.
Check: Paint surface appears uniform, smooth, and glossy without dull spots.
Step 7: Apply wax or sealant
Spread a thin, even layer of wax or sealant over the painted surfaces using a foam applicator or microfiber cloth. Allow it to haze or cure as per product instructions.
Tip: Work in small sections to prevent drying before buffing. Use circular or back-and-forth motions for even coverage.
Check: The wax or sealant forms a thin haze, and the surface looks shiny and smooth.
Step 8: Buff the wax or sealant
Use a clean, dry microfiber towel to buff the wax or sealant in circular motions until the surface shines brightly and no residue remains.
Tip: Use a different clean towel for buffing to avoid reintroducing dirt. Check for streaks or dull spots and buff again if needed.
Check: The paint has a deep, glossy finish with no visible residue or streaks.
Step 9: Clean and condition interior surfaces
Vacuum seats, carpets, and floor mats thoroughly. Use interior cleaner and a microfiber cloth to wipe dashboards, door panels, and other plastic or vinyl surfaces. Apply a conditioner if recommended.
Tip: Use specialized brushes for vents and crevices. Do not oversaturate electronic components.
Check: Interior surfaces are clean, dry, and free of dust or stains. Surfaces feel conditioned but not greasy.
Step 10: Clean windows and mirrors
Spray glass cleaner onto a microfiber cloth or directly onto the glass. Wipe in a circular motion to remove smudges and fingerprints. Use a second dry cloth to buff to streak-free clarity.
Tip: Avoid cleaning in direct sunlight to prevent streaks. Use a microfiber cloth designed for glass for best results.
Check: All glass surfaces are clear, streak-free, and free of smudges or spots.
Common Mistakes to Avoid
- Using abrasive brushes or harsh chemicals on paint or interior surfaces. — Use soft microfiber tools and products formulated for automotive use. Test products on small areas first.
- Cleaning in direct sunlight, causing streaks and quick drying of products. — Perform detailing in shaded areas or during cooler parts of the day.
- Not rinsing thoroughly, leading to residue buildup or streaks. — Rinse all surfaces well and remove excess water with a clean towel.
- Applying too much product, wasting material and creating buildup. — Use small amounts and spread evenly. Follow product instructions for application quantities.
Troubleshooting
Problem: Streaks or residue after waxing.
Solution: Buff the surface with a clean, dry microfiber towel using light pressure until streaks disappear.
Problem: Water spots after drying.
Solution: Dry the car promptly after washing and consider using a quick detailer or spray wax to remove spots.
Problem: Paint looks dull after polishing.
Solution: Ensure the polish was applied correctly and buffed thoroughly. Reapply with a clean cloth and more pressure if needed.
Problem: Glass still cloudy or streaky.
Solution: Use a dedicated glass cleaner and a lint-free microfiber cloth. Wipe in straight lines rather than circles.
What Success Looks Like
The vehicle’s exterior has a high-gloss finish with no visible dirt, streaks, or residue. The paint feels smooth and looks reflective. Interior surfaces are clean, conditioned, and free of dust. Windows are clear and streak-free. Overall, the car appears well-maintained and professionally cleaned.
Next Steps
Store leftover products properly for future use. Schedule regular maintenance washes and detailing sessions to keep the vehicle in top condition. Consider applying a ceramic coating or additional protective treatments if desired. If issues persist, consult a professional detailer for advanced services.
Frequently Asked Questions
Can I use household cleaning products for car detailing?
Most household cleaners are not suitable for cars, as they can damage paint or interior surfaces. Use products specifically formulated for automotive use.
How often should I detail my car?
For regular maintenance, wash and clean interior surfaces every 1-2 months. Full detailing, including waxing and polishing, can be done every 3-6 months depending on usage and environmental conditions.
Is clay bar treatment necessary every time I wash my car?
No, clay bar treatment is only needed if the paint feels rough or has embedded contaminants. Overusing it can wear down the clear coat.
Can I use a car detailing kit on all types of vehicle surfaces?
Most kits are safe for painted surfaces, plastics, and glass. Check product labels for compatibility with your specific vehicle materials.
Fall Picks
fall essentials
As an affiliate, we earn on qualifying purchases.