
Replacing brake lines is essential for maintaining your vehicle’s safety and braking efficiency. You’ll need to identify signs like leaks, corrosion, or a soft pedal, then carefully drain old brake fluid, disconnect the damaged lines, and install new ones. Remember, bleeding the system properly removes air and guarantees firm brake response. Using the right brake fluid type is imperative to prevent damage. Stay with us to uncover detailed steps and tips to make the process smooth and safe.
Key Takeaways
- Identify signs of brake line damage such as leaks, corrosion, or a soft pedal.
- Safely lift and support the vehicle before removing damaged brake lines.
- Bleed the brake system thoroughly after replacement to remove air and ensure proper pressure.
- Use the correct brake fluid type as specified in the vehicle’s owner manual.
- Regularly inspect and maintain brake lines to prevent future failures and ensure safety.

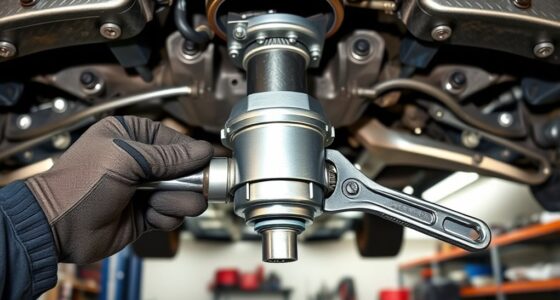
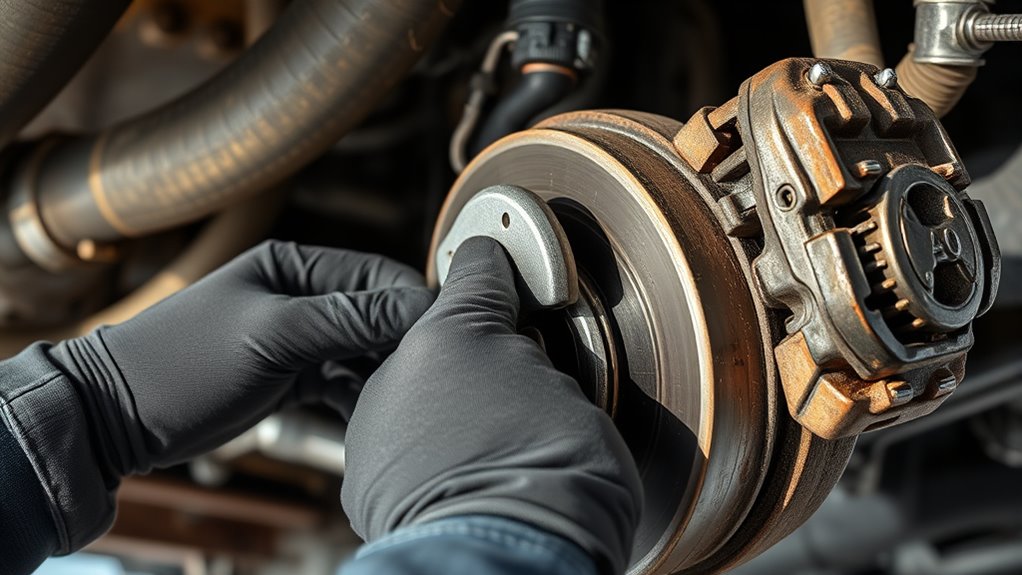
If you notice a soft brake pedal or fluid leaks under your vehicle, it’s time to contemplate replacing your brake lines. These signs indicate that your brake system isn’t functioning properly, which could be due to corroded, cracked, or damaged lines. Replacing brake lines is vital to maintaining safe braking performance and preventing more serious issues down the line. Before diving into the replacement process, it’s important to understand the role of bleeding procedures and brake fluid types, both essential to guaranteeing your brake system works effectively after the repair.
When replacing brake lines, you’ll need to perform bleeding procedures to remove air from the brake system. Air can enter the lines during the replacement process, which compromises braking efficiency. Bleeding involves systematically opening and closing valves at each brake caliper or wheel cylinder, then pressing the brake pedal to push fluid out and air bubbles along with it. Proper bleeding ensures you have a firm brake pedal and maximum pressure response. It’s vital to follow the specific bleeding sequence recommended for your vehicle to prevent air pockets from lingering. Using the right tools, such as a clear hose and a brake bleeding kit, can make this process smoother and more effective. Additionally, understanding brake fluid types is crucial, as different vehicles require specific fluids to optimize performance and prevent damage.
Choosing the correct brake fluid types is another necessary step. Different vehicles require specific brake fluids, typically either DOT 3, DOT 4, or DOT 5.1, each with varying boiling points and chemical properties. Using the wrong type can lead to decreased braking performance or damage to rubber seals and components. Before starting, check your owner’s manual or existing fluid to confirm the correct brake fluid type. During the replacement, you’ll drain the old fluid from the master cylinder and replace it with fresh, high-quality brake fluid compatible with your vehicle. Remember, brake fluid is hygroscopic, meaning it absorbs moisture over time, which can lead to corrosion and brake failure. That’s why using the right brake fluid and replacing it at regular intervals is key to maintaining a safe braking system.
Frequently Asked Questions
How Long Does a Brake Line Replacement Typically Take?
Replacing your brake line usually takes about 2 to 4 hours, depending on your vehicle and the complexity of the job. You’ll need to drain the brake fluid before removal, and then you’ll replace the old line with a new one. Afterward, bleed the brake system to remove air, ensuring brake fluid flows properly. Remember, if your brake pad is worn, consider replacing it too for ideal braking performance.
What Are the Signs That Indicate Brake Line Failure?
You’ll notice brake line failure if you see brake fluid leaks under your vehicle or a spongy brake pedal that feels soft when you press it. These signs indicate that your brake lines might be damaged or leaking, reducing braking efficiency. Don’t ignore these symptoms; they can compromise your safety. Have a mechanic inspect your brake system promptly to prevent further damage and guarantee your vehicle stops safely.
Can I Replace Brake Lines Myself or Should I Hire a Professional?
You can replace brake lines yourself if you have DIY tips and understand safety precautions. Start by gathering the right tools, like wrenches and new brake lines, and work in a safe, well-ventilated area. Follow step-by-step instructions carefully, and always wear safety gear. However, if you’re unsure or uncomfortable, it’s best to hire a professional to ensure the job’s done right and your safety isn’t jeopardized.
How Much Does Brake Line Replacement Usually Cost?
Replacing brake lines typically costs between $150 and $300, depending on your vehicle and labor rates. You should get a detailed cost estimate from your mechanic for repair expenses specific to your car. Keep in mind, DIY repairs might save money but can be risky if you’re not experienced. Hiring a professional guarantees proper installation, safety, and peace of mind, especially given the importance of brake system integrity.
Are There Different Types of Brake Lines Available?
Are you aware that there are different types of brake lines available? You can choose from flexible rubber brake lines, which are affordable and easy to install, or durable steel braided lines for better performance. The brake material and line routing vary to suit your vehicle’s needs. Consider your driving style and climate, as these factors influence the best choice for your brake lines, ensuring safety and reliability.
Conclusion
Replacing your brake lines is a vital step in ensuring your vehicle’s safety. By following the proper procedures, you prevent dangerous leaks and maintain peak braking performance. Think of your brake system as the heart of your car—neglect it, and everything else suffers. Don’t wait until a small issue turns into a disaster. Regular maintenance keeps your ride safe and reliable, and with care, your brakes will perform like a finely tuned machine for miles to come!